Social proof is really important when it comes to growing your WordPress website. It helps build trust and authority amongst your potential customers and clients, which results in increased conversion rates. And one of the best ways to create social proof is to add testimonials to your WordPress website.
Now, there are tons of ways to add client/customer testimonials. However, these are generally static and require the visitors to manually browse through them. This is where the Testimonial Rotator WordPress plugin comes into the picture.
For the purpose of this read, we have put together an in-depth guide going over how to add rotating testimonials to WordPress sites using the plugin. But first, let’s learn a bit more on what you can do with the plugin.
What Is Testimonial Rotator WordPress Plugin?
Testimonial Rotator WordPress plugin helps you manage all the testimonials you receive from clients and customers.

It can help you create a testimonial rotator custom post type where you can add testimonials and display them on your posts or pages using shortcode and widget. The plugin will rotate through all the testimonials automatically so that your clients get to see what other clients have to say about your products and/or services.
Features of Testimonial Rotator
Now that you have a basic idea of what the plugin can do, let’s quickly go over the different key features and functionalities it brings to the table.
- Create and add unlimited testimonials to the rotator.
- Access to multiple transition effects.
- Set variable transition speed.
- Randomize testimonials or show them in a preconfigured order.
- Tons of pre-designed rotator themes and template styles.
- Option to make custom testimonial templates.
- Allow users to manually browse through testimonials using Prev/Next Buttons.
- Enable pagination in list format.
- Support Star Ratings in testimonials.
- Add author information field for the clients/customers writing the testimonial.
- hReview support.
- Supports custom CSS styling.
- Display the add rotator section based on User Roles.
- Shortcode and widget support.
- Developer-friendly with tons of hooks and filters.
How to Add Testimonials to WordPress Site with Testimonial Rotator
Now that you have an idea of what you can do with the Testimonial Rotator plugin, here is a quick comprehensive guide on how to add testimonials to WordPress sites using the plugin.
So without further ado, let’s get started.
Step 1: Installing Testimonial Rotator
To install the plugin, head over to your WordPress backend dashboard. Next, from the left hand sidebar, navigate to Plugins > Add New. Inside the search field, type in “Testimonial Rotator.”
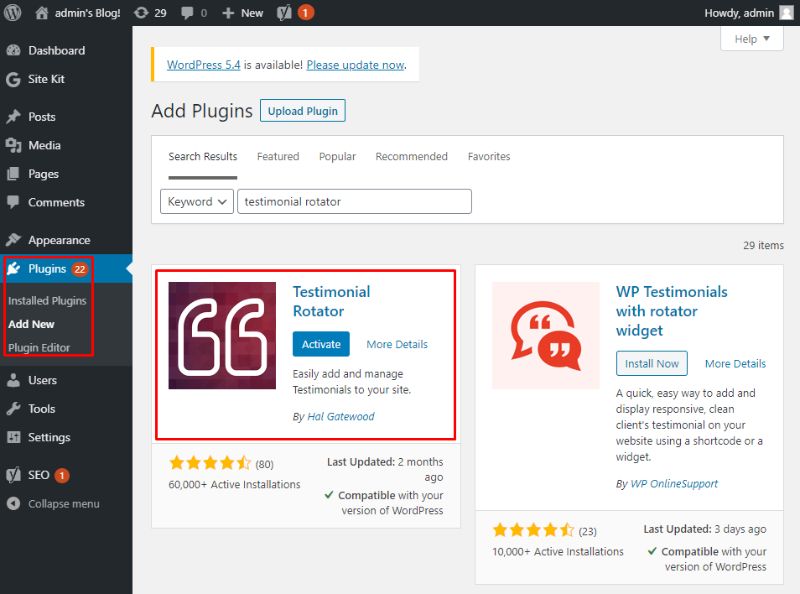
Now, you will need to hit Install Now followed by Activate as shown in the provided image.
Step 2: The Interface of Testimonial Rotator
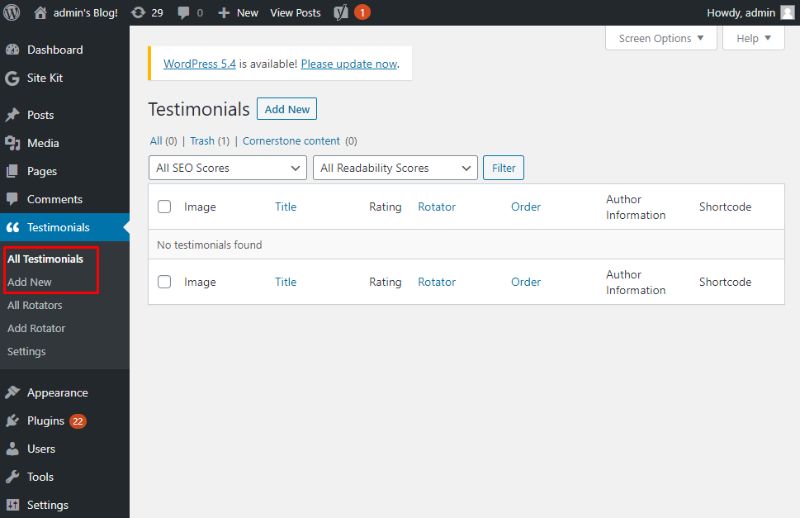
With the plugin installed, you should notice a new option – Testimonials on the left hand sidebar of your WordPress dashboard.
Click on it, and it will open the All Testimonials section.
As you can see, the plugin offers a couple of dedicated sections to help you create and manage your testimonials.
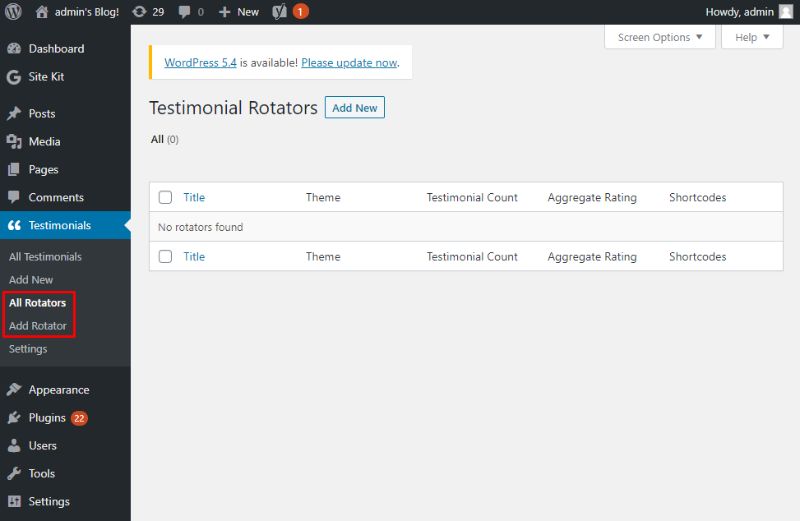
Whereas, you get a separate pair of sections to create and manage your rotators.
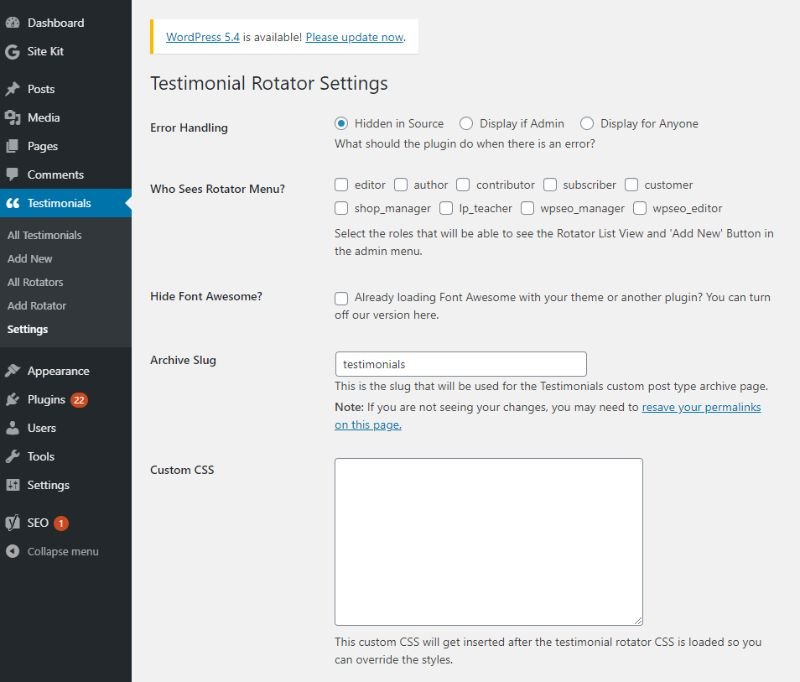
There is also a Settings area from where you can configure how the plugin will function.
Step 3: Create a Rotator
To get started, let’s quickly create a rotator for our testimonials.
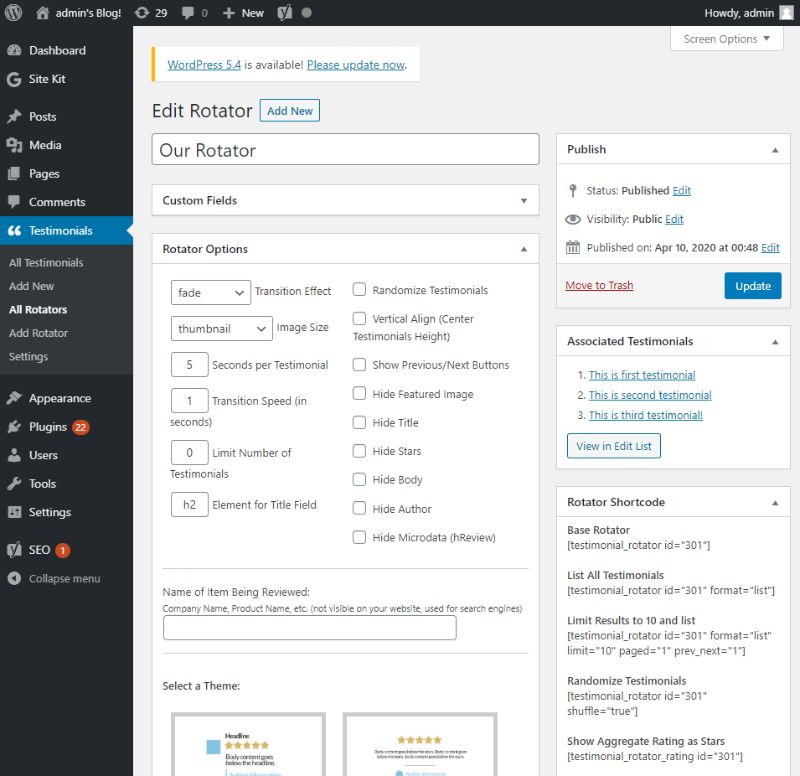
As you can see, the first section allows you to add new custom fields. This can be used to add extra metadata to the post.
Scrolling down you get access to the Rotator Options. Here you get access to all the different settings to configure how the rotator will function.
For starters, you can set a transition effect, image size, transition speed, and so on. There is even an option to randomize the testimonials, enable/disable next/prev buttons, and so on.
Following this, you get a text field where you can specify the product or service for which the testimonials are showing.
And finally, you get to choose a theme/template for the rotator. There are seven different options, and you should find something that compliments your site’s overall design and aesthetics.
Once done, just hit the Publish button and your rotator has been created.
Step 4: Creating a Testimonial
Now that you have created your rotator, let’s go and create some testimonials to place on the rotator.
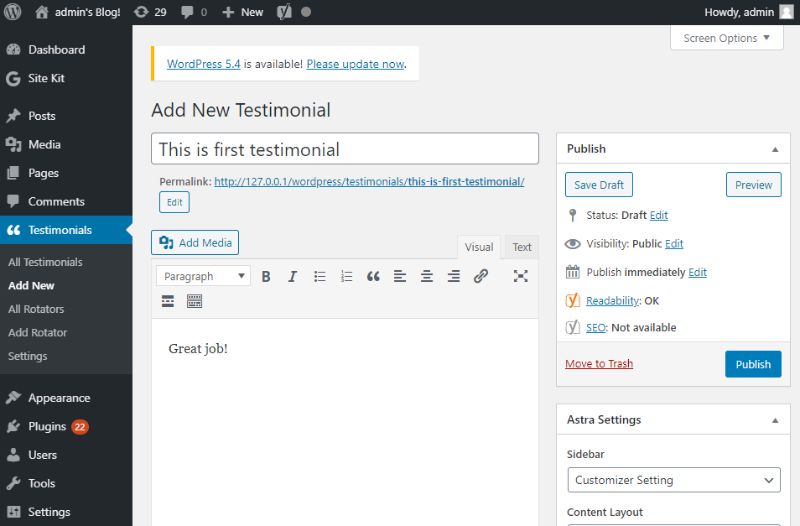
As you can see, the interface is similar to the tinyMCE editor. However, scrolling down, you will find additional testimonial options.
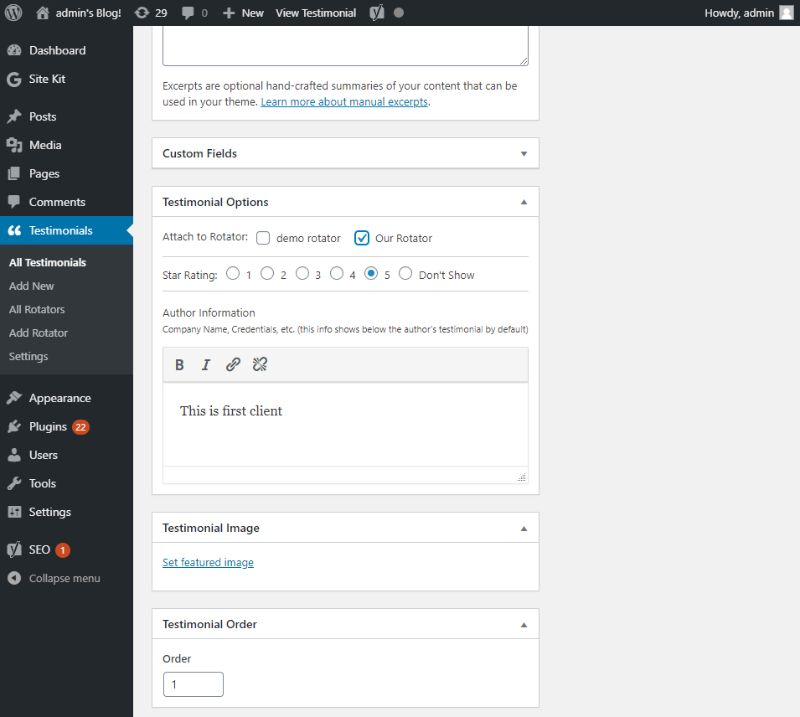
For starters, you get to choose which rotator you want to attach the testimonial to.
Next, you can add a star rating followed by author information, as well as a featured image to show with the testimonial. You can even configure a testimonial order.
Once done, hit Publish and the testimonial will be saved.
We will repeat this process to get a total of three testimonials for the sake of this tutorial and attach them to the same rotator – Our Rotator which we just created.
Step 5: Embed Testimonial Rotator to WordPress Page
Now that we have successfully created a testimonial rotator, let’s embed to one of our WordPress pages.
First, let’s head back to Testimonials > All Rotators from the left hand sidebar. As you can see, we intend on copying the Rotator shortcode for Our Rotator.
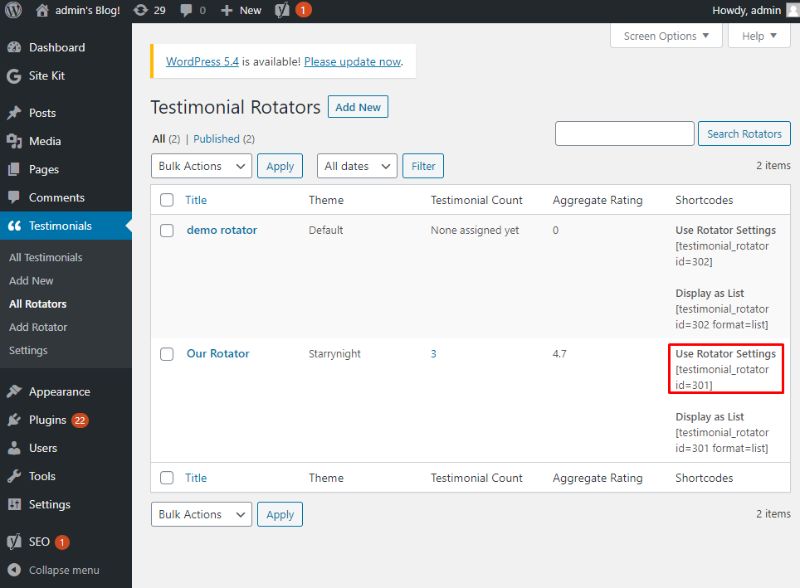
With the shortcode copied, let’s navigate to Pages > Add New. All you need to do is simply paste the Our Rotator shortcode where you want to showcase the testimonial rotator.
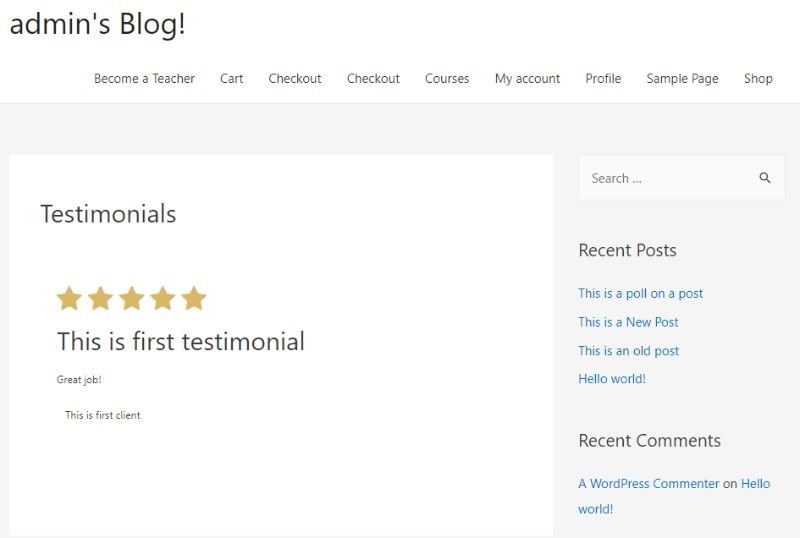
Once done, hit Publish, and the testimonial rotator is now live on your WordPress website. Here is a look of how it looks from the front end.
Note: The process is the same if you want to add testimonials to WordPress site posts.
Wrapping Up
So this was our full in-depth guide on how to use a Testimonial Rotator to add testimonials to WordPress site. As you can see, the plugin is super easy to use and comes with plenty of useful options to help you present your social proof in style.
You may also want to see our step by step guide on how to create polls and surveys in WordPress.
0 Comments