One of the most important parts of growing your business directly translates to growing your email list, and this is most easily possible by setting up an email newsletter. All you have to do is create an email newsletter form where your customers can enter their email addresses in order to receive updates about your products, services, or business.
This will help you stay in touch with your visitors which will help to boost your customer retention rate, and thus result in business growth.
Now, if you are a WordPress user wondering how you can create an email newsletter, then no need to look any further. We have put together an in-depth guide to help you set up an email newsletter powered by MailChimp using the MC4WP WordPress plugin.
MC4WP WordPress Plugin: Features and Functionalities
MC4WP is a free-to-use WordPress plugin that allows you to create beautiful opt-in forms that connect your WordPress website with your Mailchimp account. Visitors who wish to subscribe to your newsletter can simply enter their email addresses and names in the form. Then, it will be directly added to your MailChimp subscribers list.
Here is a quick look at the key features and functionalities of the MC4WP WordPress plugin to help you understand what you can do with it:
- Helps you to connect your WordPress website with MailChimp.
- Comes with loads of good-looking customizable signup forms optimized for mobile devices.
- Offers integration with popular WordPress plugins, including many form builder plugins like Ninja Forms 3, Contact Form 7, and so on.
- Option to expand the functionality by installing premium add-ons.
How to Create an Email Newsletter in WordPress
Now that you have a basic understanding of what the MC4WP plugin has to offer, here is a step by step guide to help you create an email newsletter using it in WordPress.
Step 1: Installing the Plugin
The first thing you need to do is install the plugin. All you have to do is log in to your WordPress backend dashboard, and navigate to Plugins > Add New from the left-hand side panel.
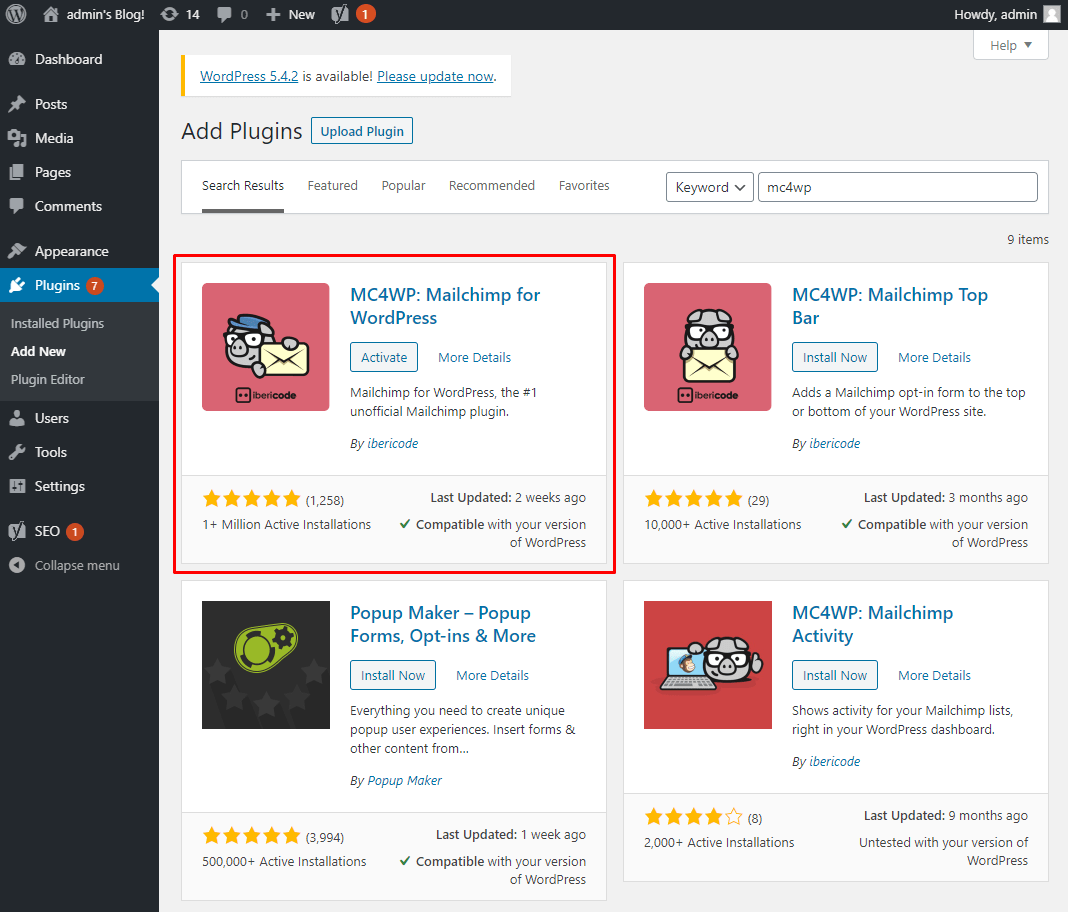
From here, type in MC4WP in the search field. Now, as shown in the image below, click on Install Now, followed by Activate on the highlighted plugin, and it will be now running on your WordPress website.
Step 2: Set Up the Plugin
With the plugin activated, you will see a new option – MC4WP on your WordPress dashboard side panel. Click on it to access all the plugin features and settings.
But first, you will need to enter the API key to connect with MailChimp.
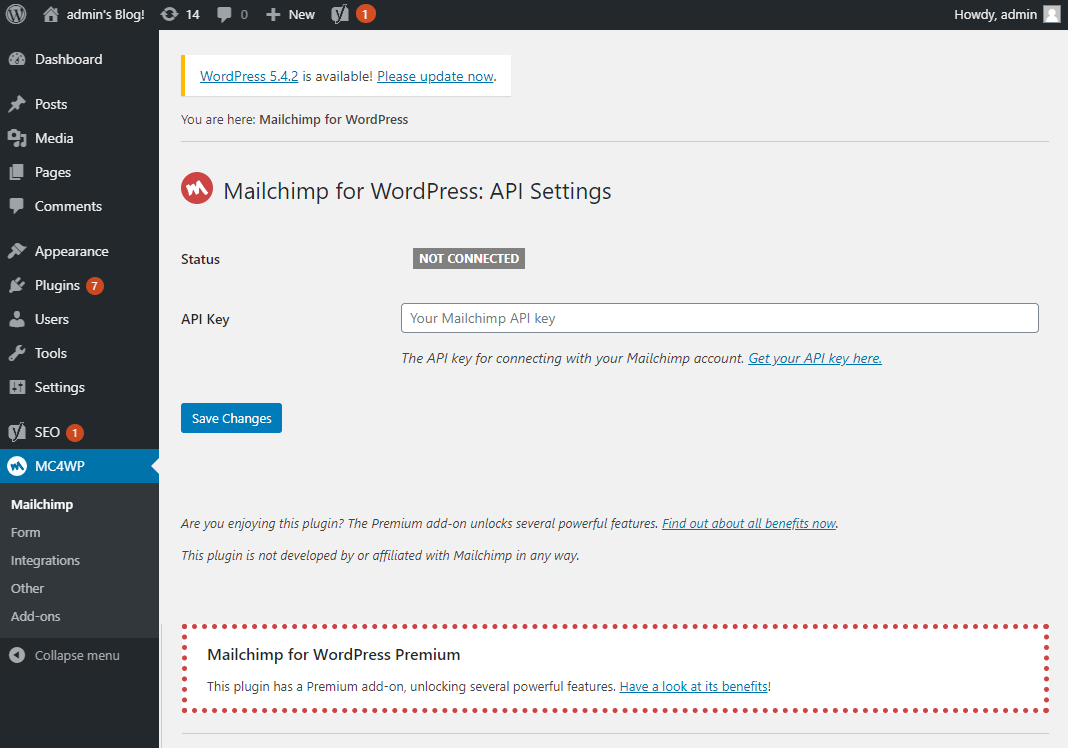
If you are not sure where to get your MailChimp API key, just click on the “Get your API key here” link which will take you to your MailChimp account (In case you don’t have a MailChimp account, you will need to create one).
Once you have your API Key, just copy & paste it in the provided field and you will be connected to your Mailchimp account. You can create an email newsletter using the plugin.
Step 3: Create an Email Newsletter
Once you have entered your API key and connected to your MailChimp account, head on over to MC4WP > Form from the dashboard side panel. From here you will get the option to add a new form.
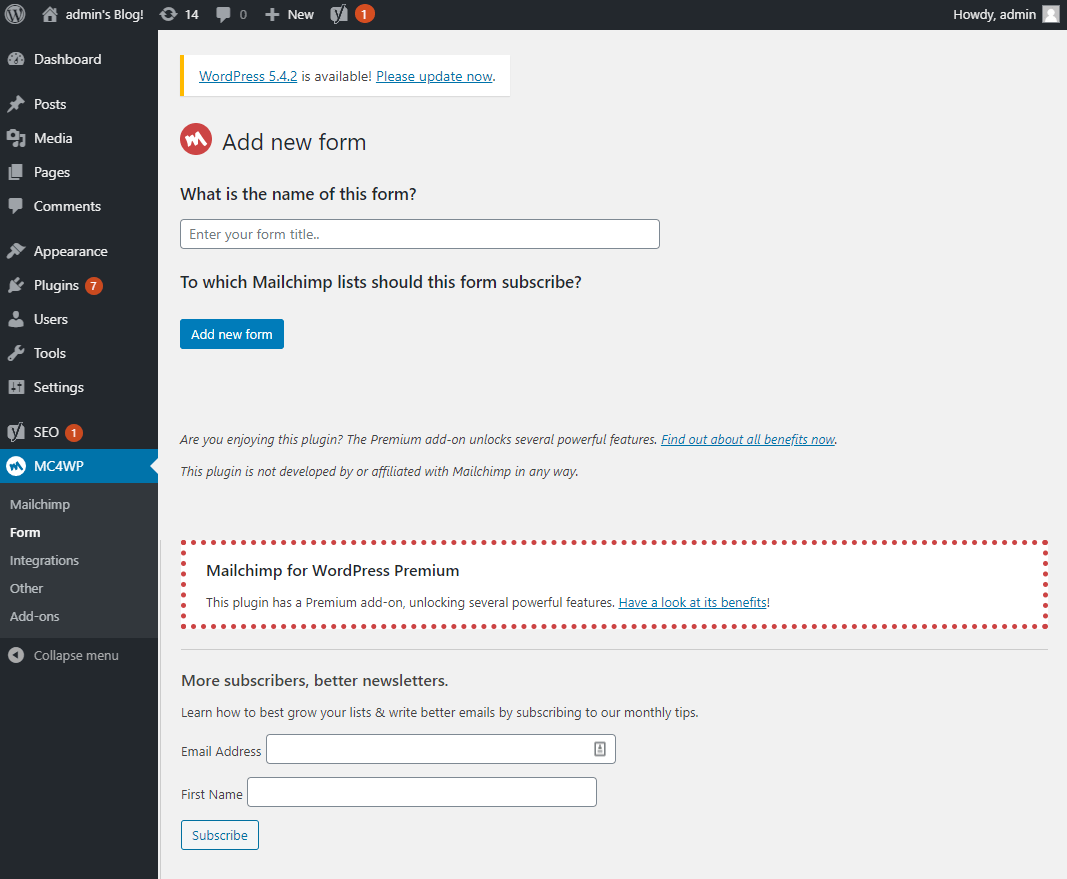
As you can see, you will have the option to enter the name for the new form and also select which MailChimp list you want this form to connect with. Once done, click on the Add New Form button, and you will be taken to the following screen.
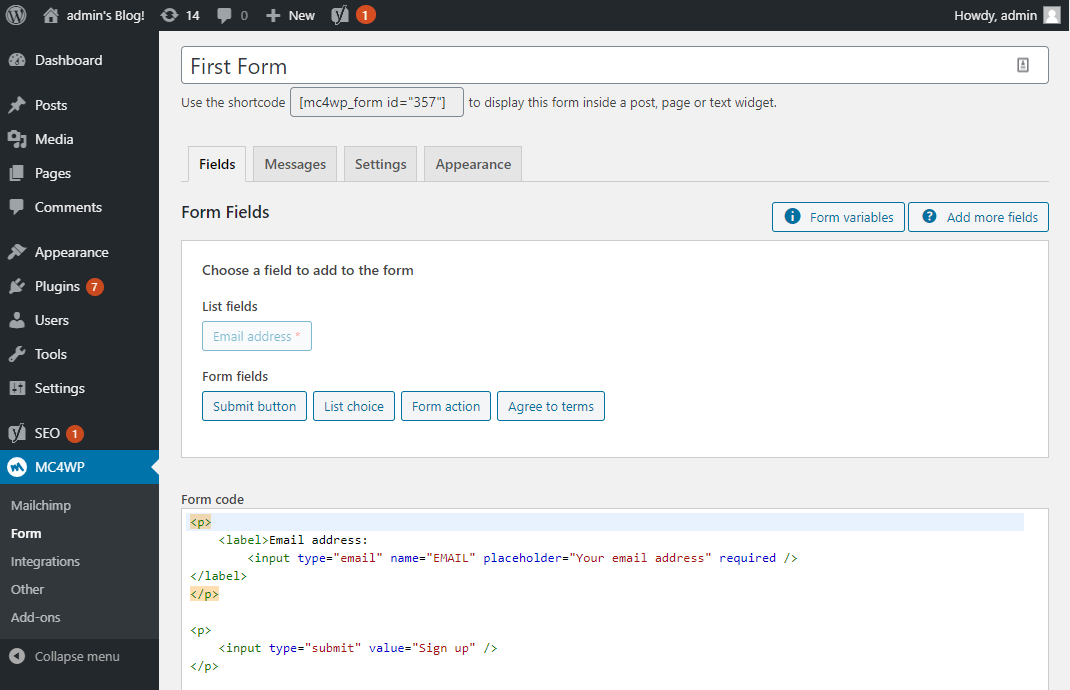
Here, you have the Form name at the top, followed by the corresponding form shortcode which you will need to use to add the form to your posts and pages.
Following this, you have several options to create and customize the form. The options are separated under four tabs – Fields, Messages, Settings, and Appearances. Let’s go through them one at a time.
At first, we are greeted with the options available under the Fields tab.
Here you can choose which fields you wish to add to the form. This is followed by a code editor which you can use to paste the custom HTML code to create the form. Scrolling further down reveals the preview section which gives you a visual preview of the form that you just created.
Up next, we have the Messages tab.
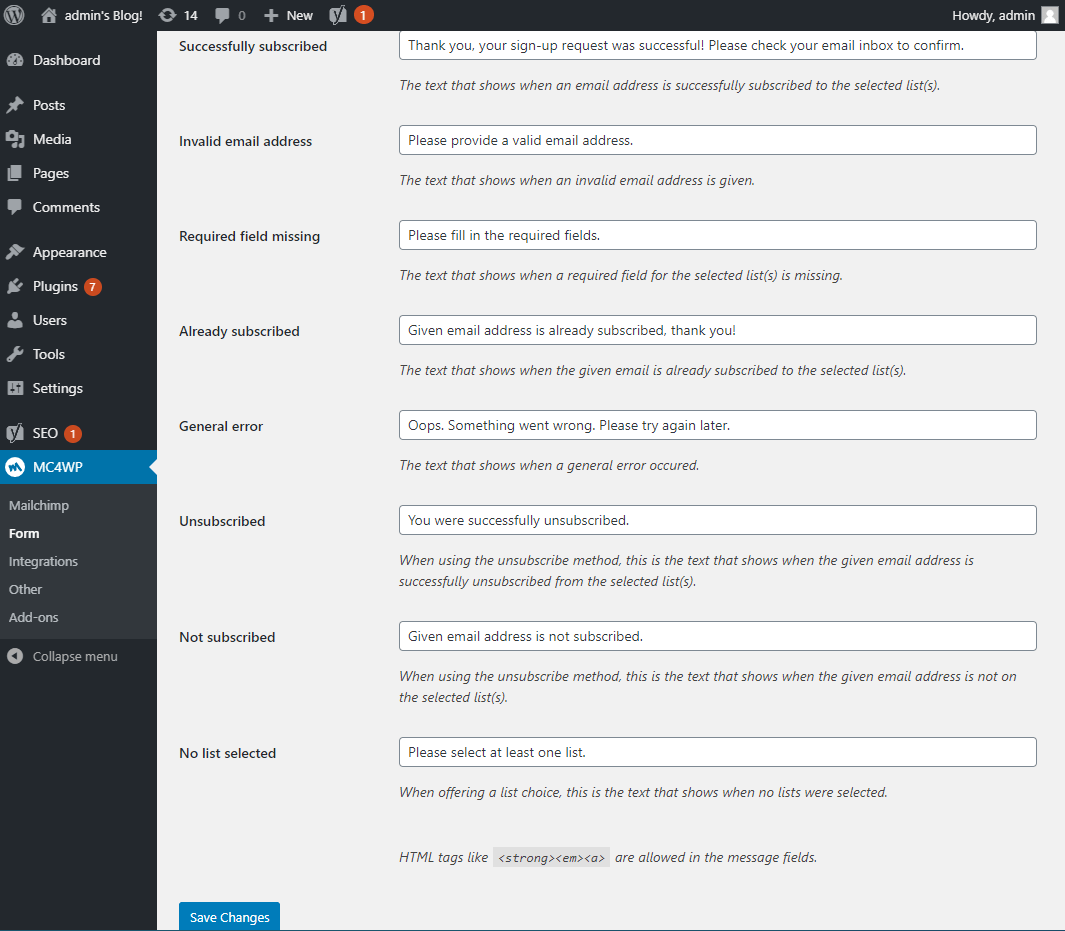
Here you get to set-up/customize the different messages that will appear depending on whether the visitor has successfully subscribed to your email newsletter or not.
For example, you can configure a custom message that will display when they are successfully subscribed, if they input an invalid email address, if they skip a required field, and so on.
Following this, we have the Settings tab.
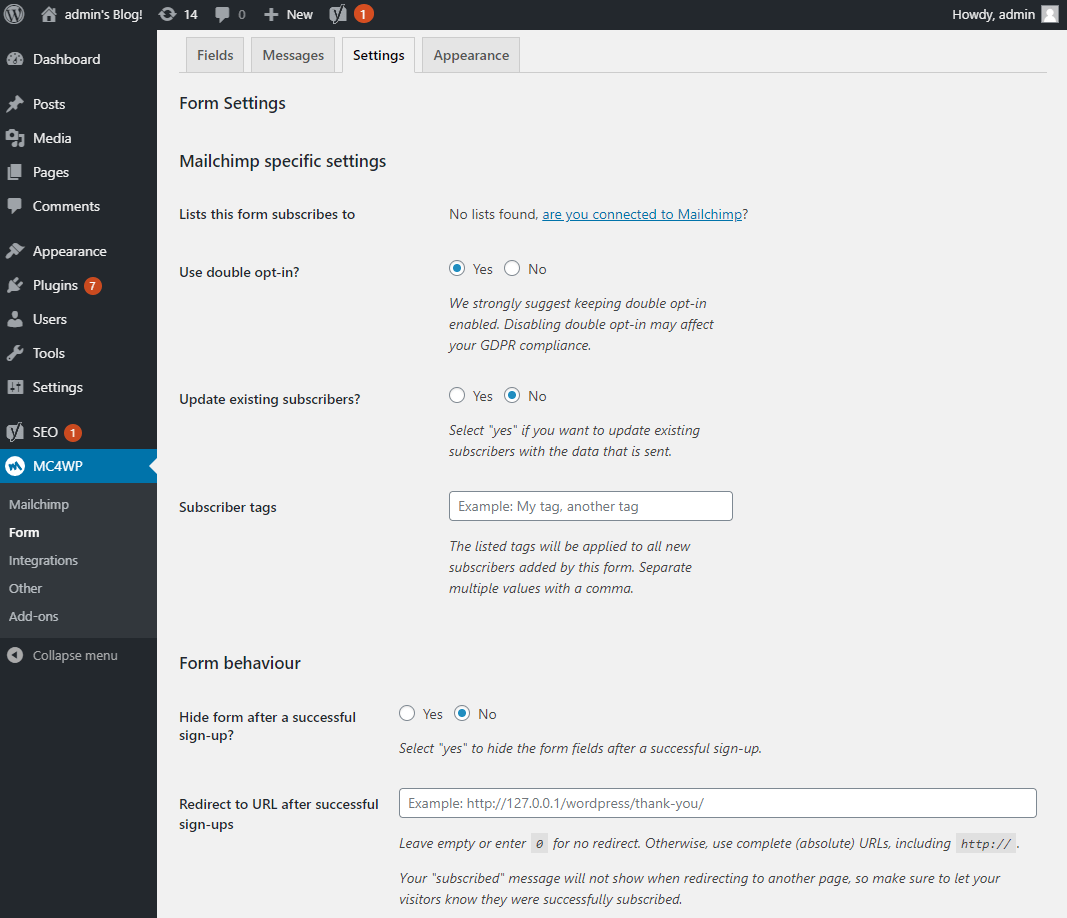
This is where most of the general settings concerning the plugin are located.
From here, you can specify or change the Mailchimp list to which subscribers of this form will get registered. Other than this, you get to enable/disable double opt-in, update existing subscribers, and so on.
And then finally, we have the Appearance tab.
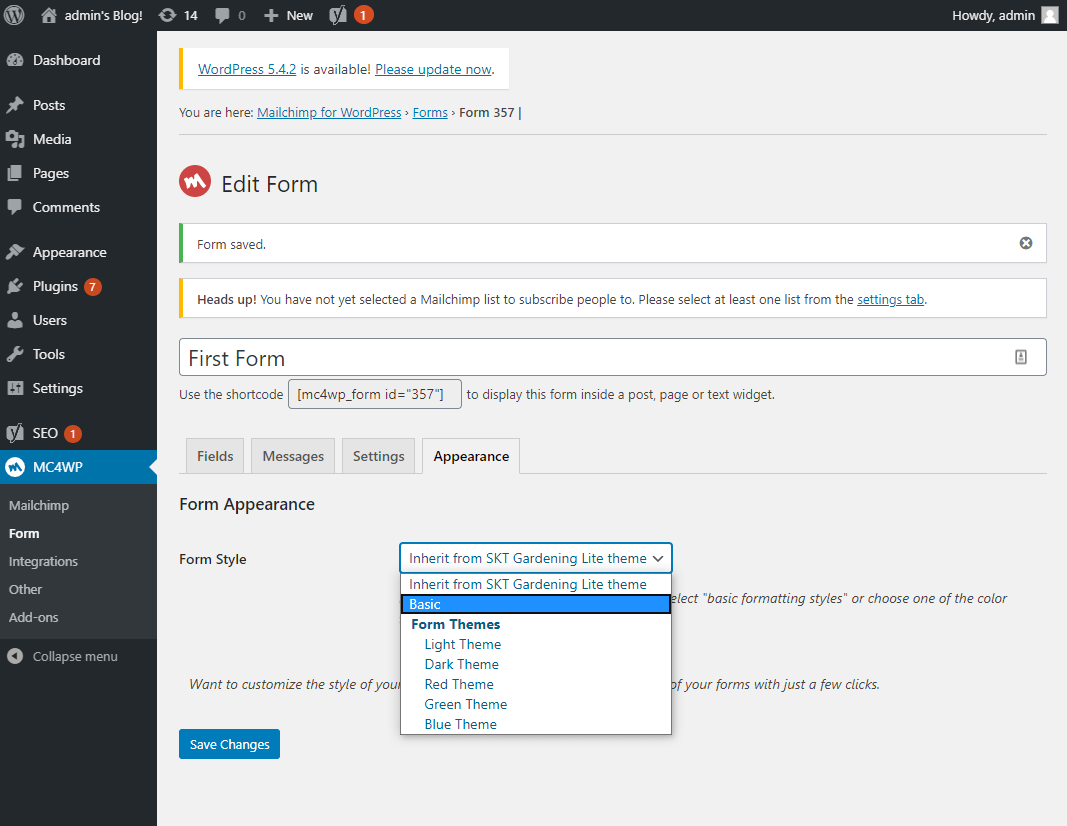
From here you can select one of the Form Styles available from the drop-down menu. As you can see, you can either use the basic template or go with one of the many coloured themes.
Alternatively, you can set the form to inherit the design settings of the active WordPress theme. This is recommended as it allows for a consistent design throughout your website.
Now, once you are done customizing the form, just hit on Save Changes and that’s it. You have successfully created your email newsletter form. You can now add it to any of your posts and pages using the provided shortcode.
Conclusion
So this is how you can use the MC4WP WordPress plugin to create an email newsletter form for your website. As you can see, the plugin is super easy to use and offers direct integration with Mailchimp email marketing services.
What’s more, is that you get access to plenty of customization options to set up a unique form specific to your business.
You may also want to see our in-depth guide on how to choose a domain name.
0 Comments