You must already know that WordPress comes with an in-built system to manage user roles. You can define the usage restrictions and permissions for specific users on your WordPress website. By default, you will get access to five user roles: Administrator, Editor, Author, Contributor, and Subscriber – each coming with its own set of pre-defined restrictions.
Now, if you want more flexibility to manage user roles freely, then we suggest using a plugin like User Role Editor.
What is User Role Editor?
User Role Editor is a WordPress plugin that allows you to create new user roles and assign them custom capabilities. The plugin will give you access to a list of different capabilities that you can assign to selected user roles.
This way, you can create as many new user roles as you like, and you have complete control over the permission and site access they can enjoy.
The plugin also comes with the option to allow multiple roles to a single user along with the option to add or remove capabilities on the fly. Furthermore, each user role along with their unique capabilities stays intact even if the plugin is uninstalled.
How to Manage User Roles in WordPress Using User Role Editor?
Now that you have a brief idea of what is User Role Editor and how it can help you manage user roles. Let’s quickly go over a step-by-step guide on how to use the plugin.
Note: For the purpose of this tutorial, we will be using the free version of the plugin.
Step 1: Installing The Plugin
Installing the User Role Editor is as straightforward as installing any other WordPress plugin.
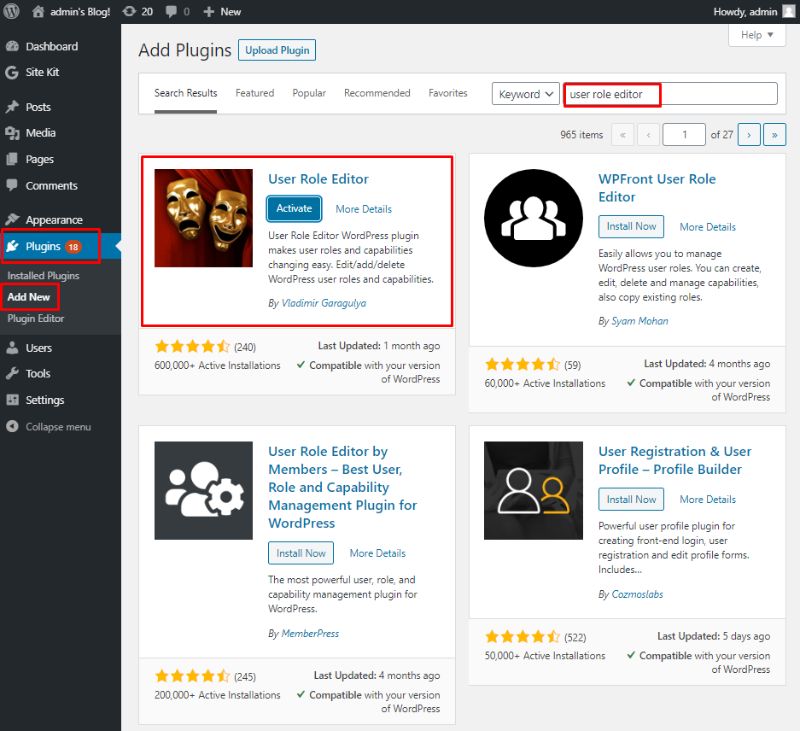
First, you will need to login to your WordPress backend dashboard, and then from the left-hand sidebar, navigate to Plugins > Add New.
Now, in the search field, type in User Role Editor. Next, click on Install Now followed by Activate as shown in the image below.
Step 2: The User Role Editor Interface
With the plugin installed and activated on your WordPress website, you will find a new option by navigating to Users > User Role Editor from the left-hand sidebar of the dashboard.
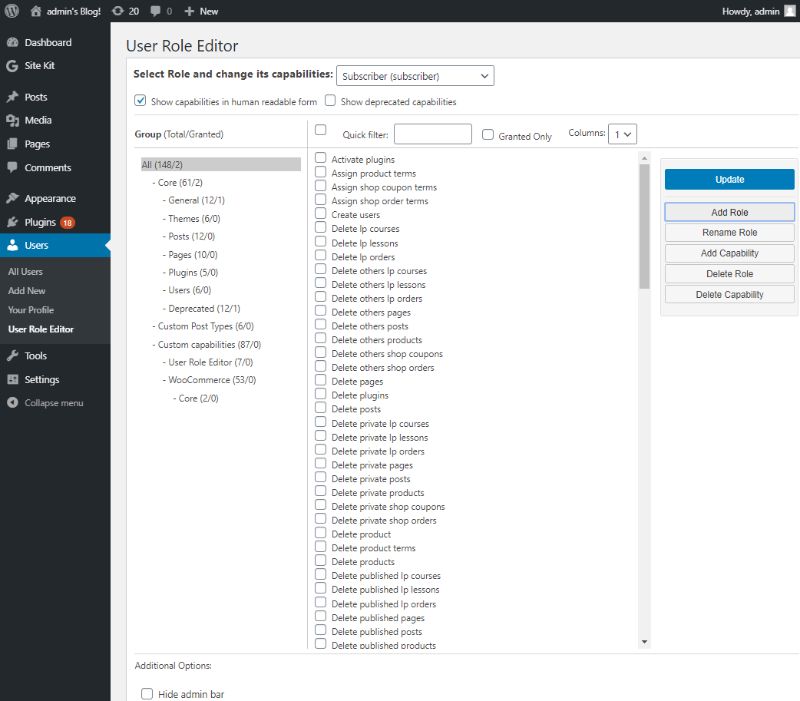
The above image shows an overview of the User Role Editor interface. As you can see, there is a drop-down menu button at the top which allows you to select a user role that you wish to edit.
Once you have selected a user role, you can select what capabilities (or permissions) you wish to allow for that specific user role. To the left-hand side, there is a column containing all user capabilities divided into groups.
Selecting a group will open up all respective capabilities on the column to its right-hand side. There you can tick the checkboxes to allow whichever capabilities you want to allow for the selected user role.
After selecting all desired capabilities for the user role, click on the Update button and you are all done.
Step 3: Add/Rename A User Role
Now, if you want to create/add a new user role, simply click on the Add Role button to the right-hand side of the interface. A new pop-up window will appear as shown in the image below.
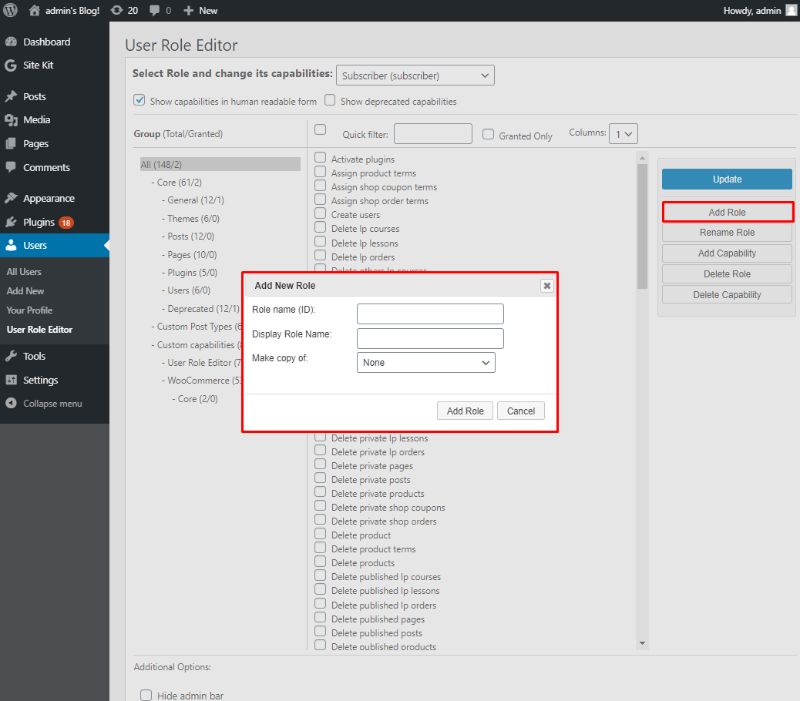
Here you can provide a Role Name or User ID followed by the Display Role Name. Also, if you don’t want to spend time adding custom capabilities to the new user role, you can use the Make Copy Of option.
It will let you select one of the pre-existing user roles from the drop-down menu to copy all its capabilities to the new user role.
The plugin also gives you the option to rename a user role, even the pre-existing ones.
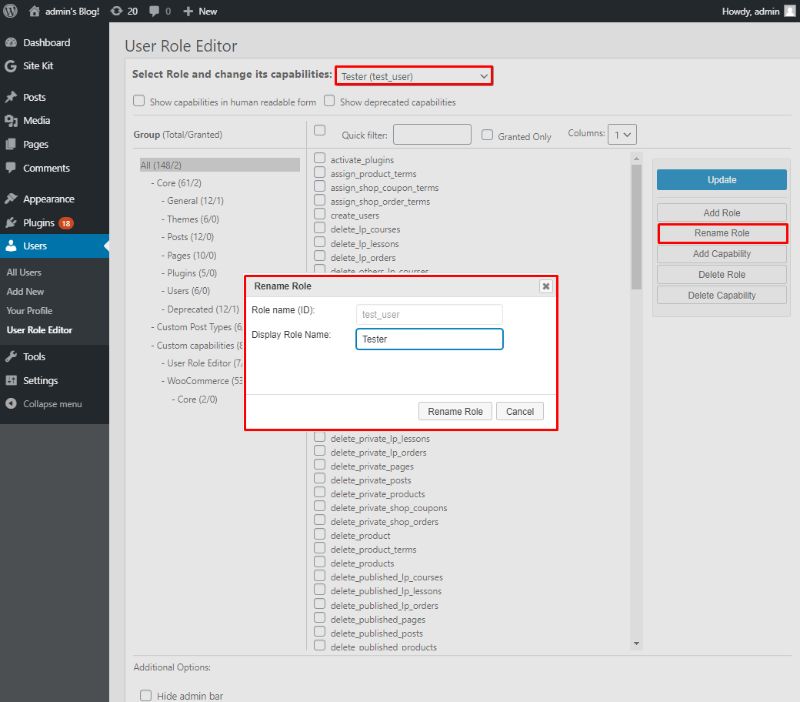
To do this, you will need to select the user role you want to rename and hit the Rename Role button. Now, simply type in a new Display Role Name and hit the Rename Role button, and you are done.
Step 4: Adding New Capabilities
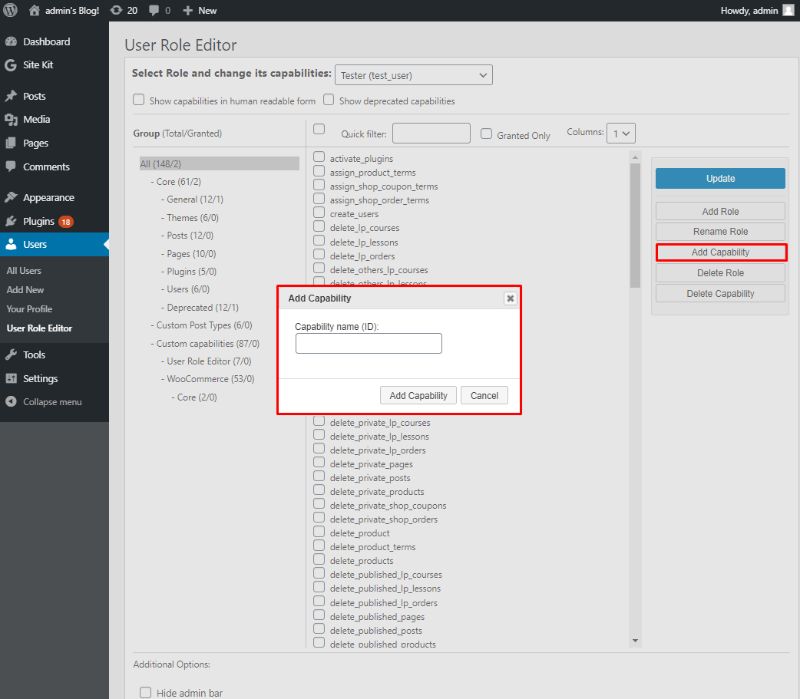
The plugin also allows you to create new capabilities.
First, click on the Add Capability button to open a new window. As shown in the image below, you will need to provide a Capability Name (ID) for the new capability you wish to add. Once done, hit the Add Capability button.
Step 5: Deleting User Roles And Capabilities
The plugin also allows you to delete user roles and capabilities. In order to delete a user role, click on the Delete Role button.
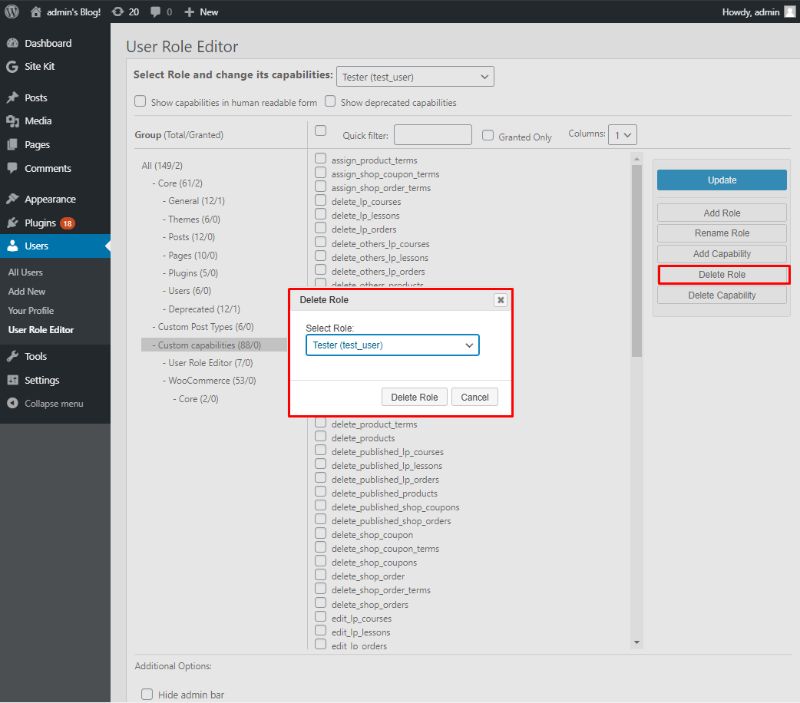
The option will open up a new window where you can select any of the existing user roles and click on the Delete Role button to remove it from your WordPress website.
Next, there is the Delete Capabilities option.

It also opens up a new pop-up window with a list of all your unusable capabilities (or capabilities that don’t offer any functionality). You can bulk select these capabilities and delete them all at once, or delete them selectively, whichever you like.
Once done, click on the Delete Capabilities button and they will be removed from the user roles they were assigned to.
Wrapping Up
So this was our full in-depth guide on how to manage user roles using the User Role Editor plugin. As you can see, the free version of the plugin alone comes with a boatload of options that gives you granular control over creating and managing user roles and what capabilities and permission each user role enjoys.
As your website begins to grow, you start gathering more and more users. A plugin like User Role Editor will then give you a great deal of control over your userbase.
In fact, it can also help you create a better user experience by providing your users with custom capabilities and permissions fine-tuned to your needs.
I hope this article helped you learn how to manage WordPress users and its capabilities. You may also want to see our step by step guide on how to auto-publish WordPress posts to social media.
0 Comments