Moving a WordPress site to a new host or new server is a real complex task, even if you are an experienced webmaster. Because you have to face the risk of data loss and downtime once failed. In this tutorial, I will show you how to migrate a WordPress site to a new host with no downtime.
How to migrate a WordPress site via WPvivid backup plugin
In previous articles, we have learned to backup a WordPress site and restore a WordPress site from backups by using WPvivid backup plugin. In this guide, let’s take a look at the process of migrate WordPress site to a new host.
WPvivid automatic site transfer
First thing you need to do is install and activate WPvivid backup plugin in the both sending site and receiving site. For more details, please see our guide on how to install WordPress site.
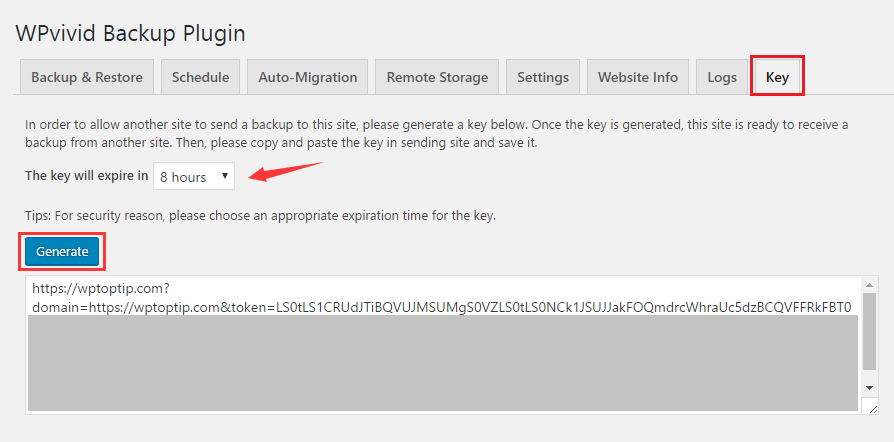
Next, you need to generate a key on Key tab page of WPvivid backup plugin on receiving site by clicking on Generate button. In addtion, you also can set up the expiration time for the key.
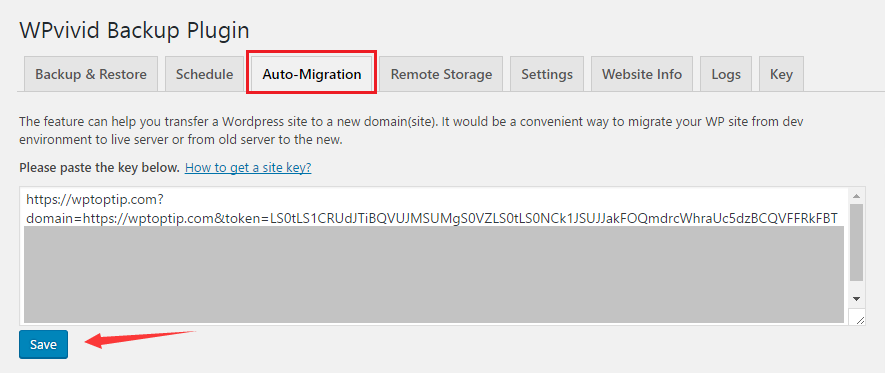
Once generating the key, go to Auto-migration tab page of WPvivid backup plugin in sending page and copy to paste it in key section and click on Save button.
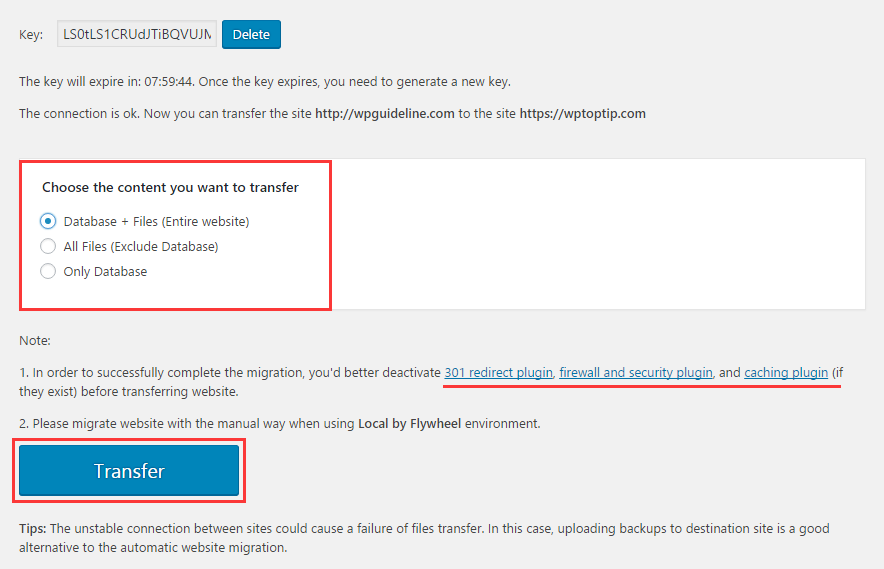
The next step is choose the content for transfer. There are three options available. You can transfer entire website, all files or database only. Then click on Transfer button.
Note that in order to successfully migrate website, please deactivate 301 redirect plugins, security plugins and caching plugins before starting site transfer if they are running on sending site.
You are able to see the progress of site transfer.
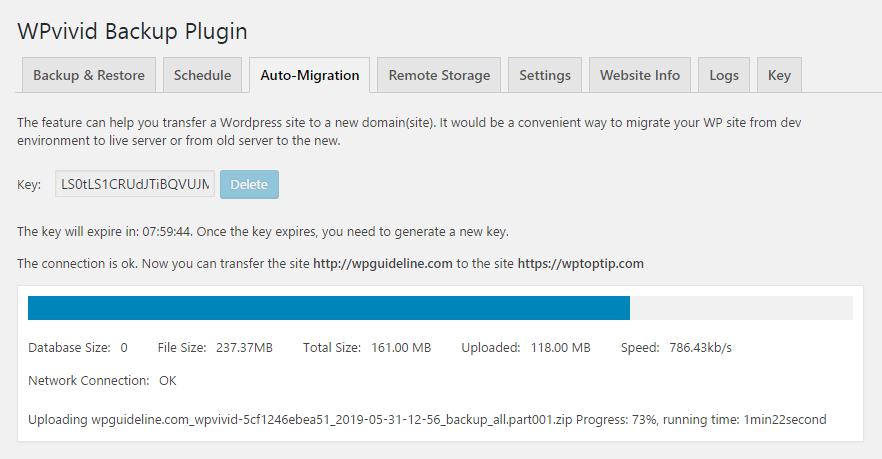
Once site transfer completes, a notification shows on the top of Auto-Migration tab page and tells you that site tranfer succeeded.

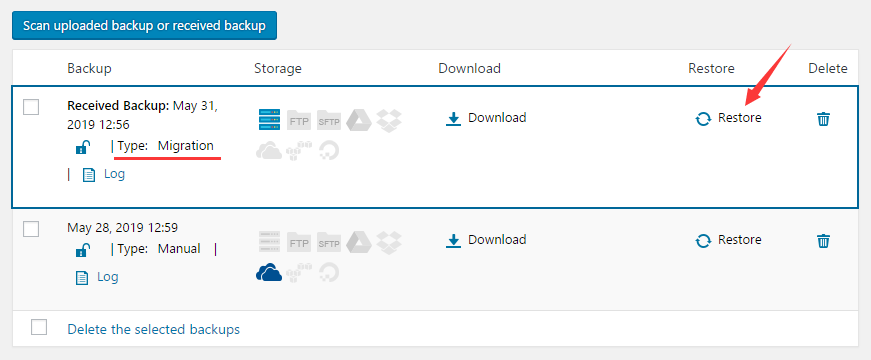
You head over to receiving site and WPvivid backup > Backup&Restore > Backups and will see the transferred backup listed in Backups.
WPvivid manual site migration
Besides auto-transfer, WPvivid backup plugin also offers a manual way for site migration. This is a good alternative to auto-transfer while there is an unstable connection between the sending site and receiving site.
At first, you create a backup for your sending site and download it to your computer. For more details, please see our guide on how to backup your WordPress site.
Next, go to Back&Restore tab page of WPvivid backup plugin in receiving site and click on Upload tab. Clicking on Select Files button to choose the backup or drag and drop the backup in uploads section. Then upload the backup by using Upload button.

Alternatively, you can also upload the backup by FTP client. For more details, please visit our setp by step guide on how to upload the files to server with WinSCP.
You need to upload the backup to the local storage directory created by WPvivid backup plugin. By default, it is /var/www/html/your-domain/public_html/wp-content/local_storage directory.
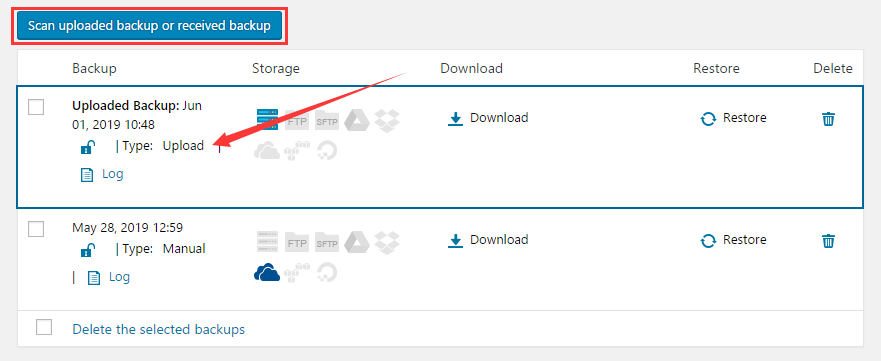
Once the upload succeeds, you will see the backup in Backups list. If you upload the backup via FTP client, you need to click on Scan uploaded backup or received backup button to show it up.
Restore website via WPvivid
After the backup shows in Backup list, you need to click on Restore icon next to the backup.
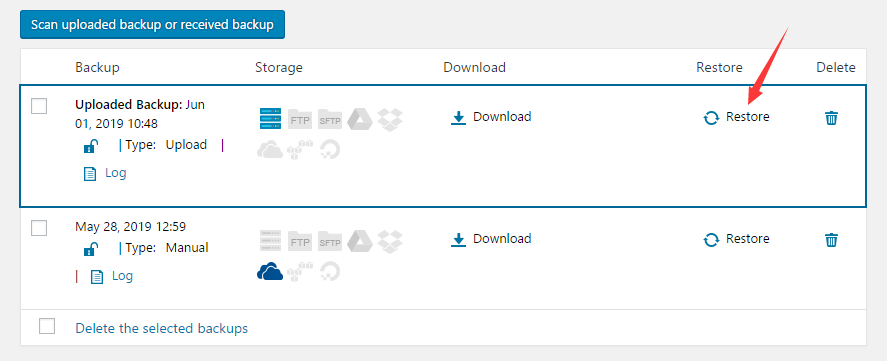
Clicking on Restore icon will take you to Restore page. You will see two option there. The first option is for replacing the original domain with the new one and the second one is for keeping the original domain. Then choose one of them as needed click Restore button.

Once you click on Restore button, you are asked to confirm the restore task to perform. After that, you will see the files being extracted and restored through the log.
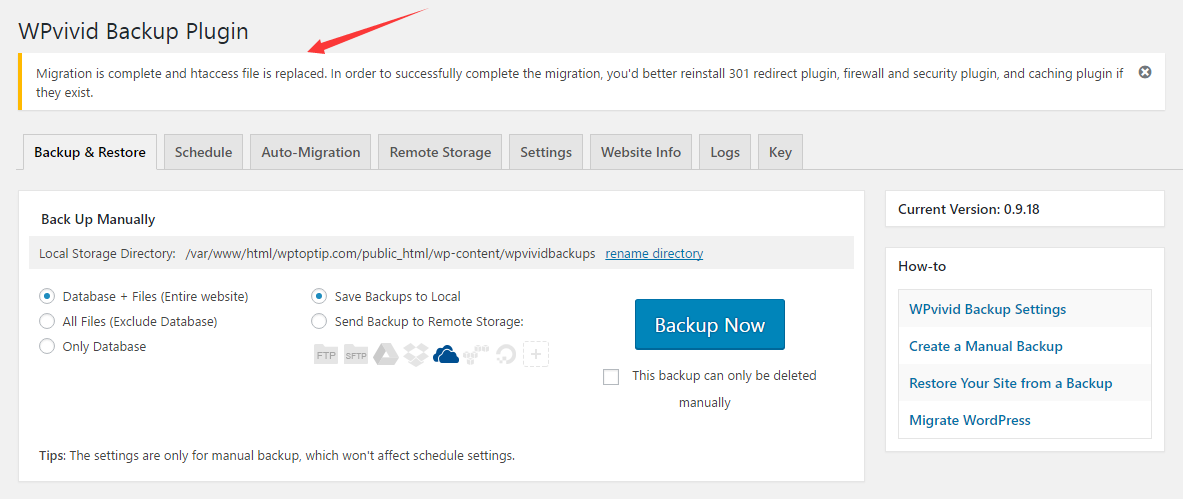
At last, a notification shows on the tap bar and tells you that Migration is complete.
I hope this tutorial helps you learn how to migrate a WordPress site to a new host. You may also want to see our guide on how to backup and restore your WordPress site with UpdraftPlus.
0 Comments