Are you looking for a good free WordPress backup plugin? If yes, you are in the right place. With over one million active installation, UpdraftPlus is one of the most popular free backup plugins in the market today. In this post, I will walk you through the step by step guide on how to back up and restore WordPress site.
Why you need backups for WordPress site?
Nothing on the internet is uncrackble, so is WordPress site. For a website owner, the worst thing should be the website crash without a backup. There are some common scenarios, which may make you lose all your data:
- Server crashes
- Hacking
- Plugin error
- Security flaws
- Insecure web host
There are more reasons to cause losing your website and data, along with all your efforts for a few past years.
Therefore, backup is the ultimate solution to avoid the tragedy happening. We need to create backups for websites regularly, and when the worst happen, only backups give you peace of mind and allow you to restore your site anytime. It is what UpdraftPlus does.
UpdraftPlus is one of the best backup and restore plugins. Using it, you can easily peform manual and scheduled backups, and restore your website with a single click.
By now, let’s take a look at how to back up and restore WordPress site.
Create scheduled tasks with UpdraftPlus
First, you need to install and activate UpdraftPlus on your WordPress site. For more details, see our step by step guide on how to install WordPress plugin.
Upon activation, click settings > UpdraftPlus Backups > settings to configure UpdraftPlus settings.
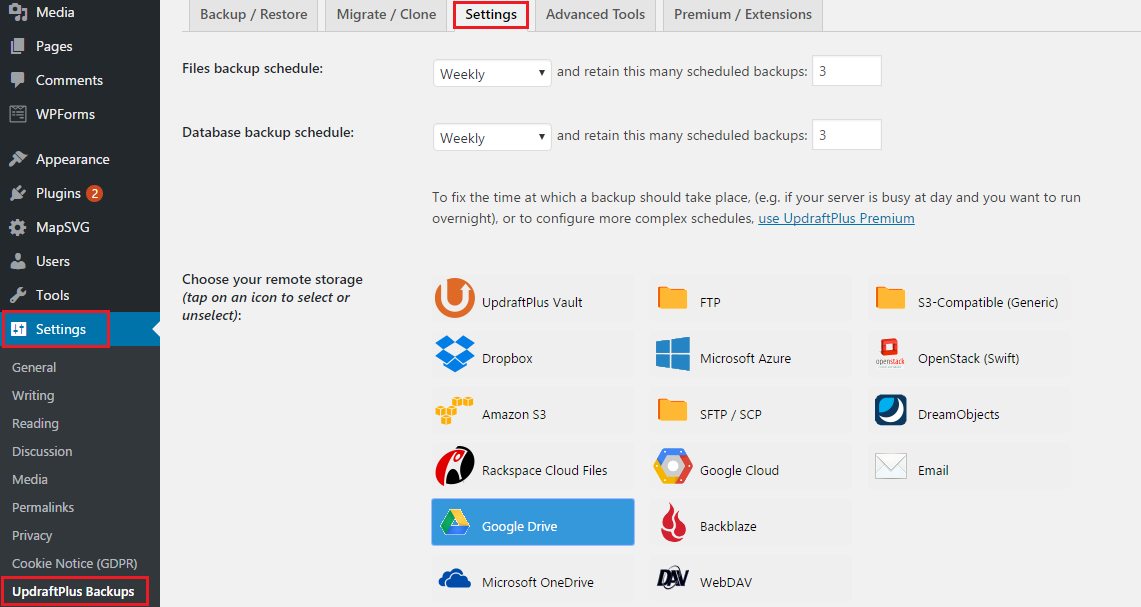
UpdraftPlus provides every 4, 8, 12 hours, daily, weekly, fornightly, and monthly schedules and allows you to set a specific number for backup retention. Select the backup frequence and backup retention depending on your need.
It also has an ability to store all backups to remote storage locations which includes Dropbox, Amazon S3, Google Drive, Microsoft Azure, FTP/SFTP, email and more options. Choose one of remote storages to store your backups.
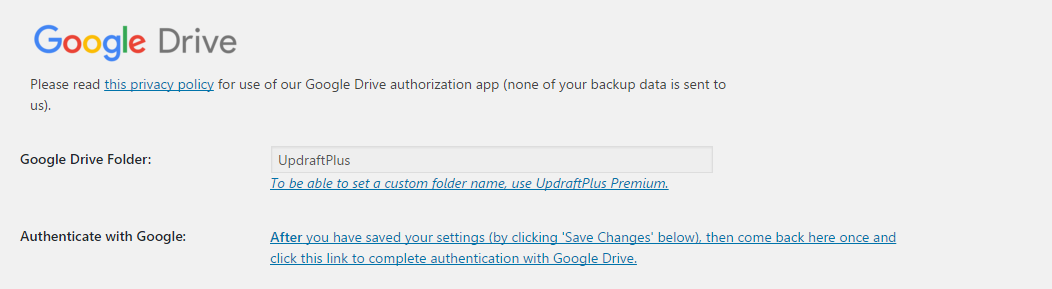
In this tutorial, we choose Google Drive as a remote storage location. After saving all configuration, you visit this page again and click the link to give UpdraftPlus the authentication to access Google Drive.
UpdraftPlus allows you to customize the backup contents. So check the backup selection including plugins, themes, upload and other directories in wp-content.
Once backups complete, UpdraftPlus sends you a basic report if you check email option.
Finally, click Save Changes button to make all configurations effective. After that, UpdraftPlus will follow the schedule tasks to automatically create backups and store them the remote storages.
Create backups manually with UpdraftPlus
Besides backing up in schedules, UpdraftPlus also create manual backups at anytime you want.
First, you need to visit Settings > UpdraftPlus Backups and click Backup Now button.
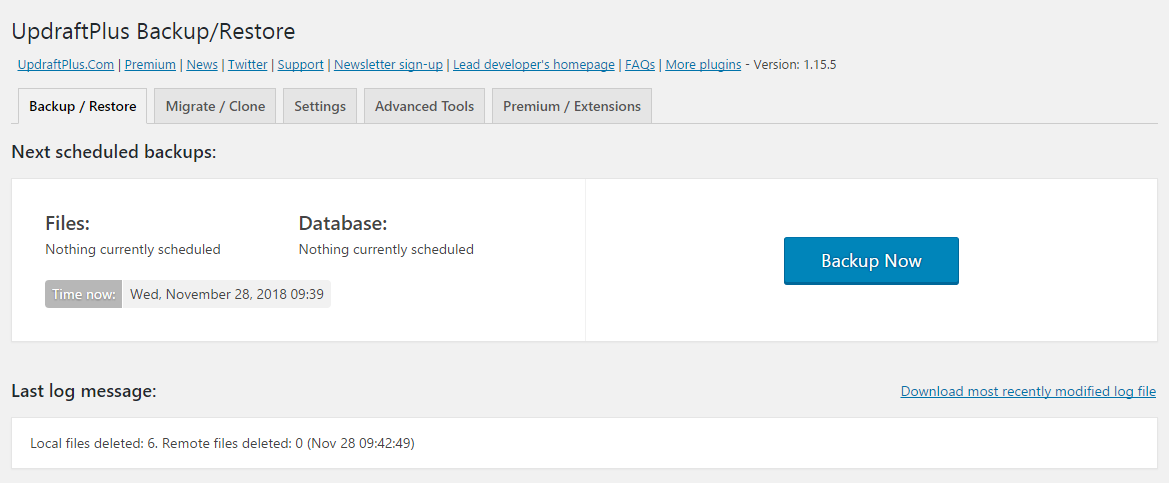
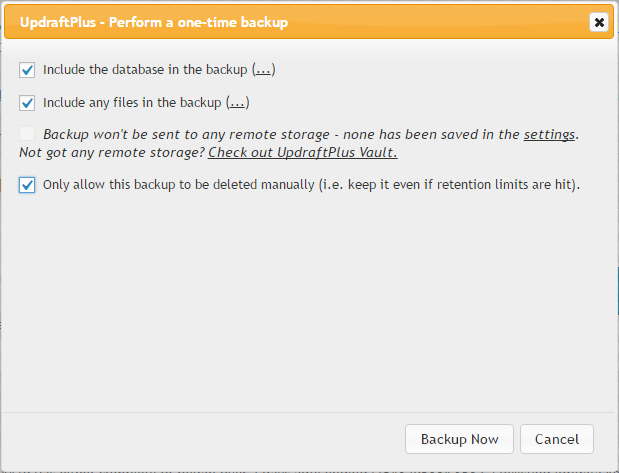
Once clicking Backup Now button, a pop-up window asks you to select backup content which includes files and database, and there is a option for deleting this backup only manually even if hitting the backup retention. At last, click Backup Now button.
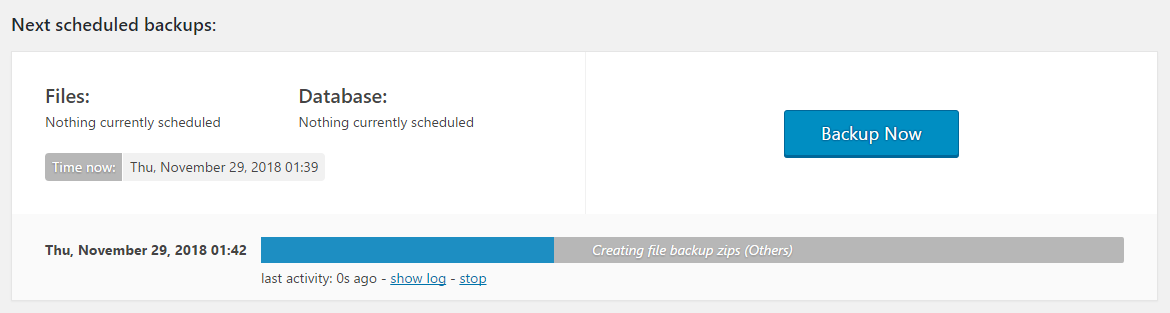
After that, UpdraftPlus starts backing up files and database and uploading to remote storage. Meanwhile, you will see the progress on the page. It will take a few miuntes depending on the size of website.
Restore your WordPress site with UpdraftPlus
Upon further investigation, most freemium backup plugins on the market allow you to easily create backups. However, the restoration feature is locked in free version, you have to upgrade to pro version to unlock it. But UpdraftPlus is the exception, the free version totally covers the backup and restore features.
UpdraftPlus makes WordPress restoration as simple as backing up WordPress.
If your website is hacked or you want to start fresh, then you need to delete everything and install WordPress again. Then, install and activate UpdraftPlus on the new WordPress site.
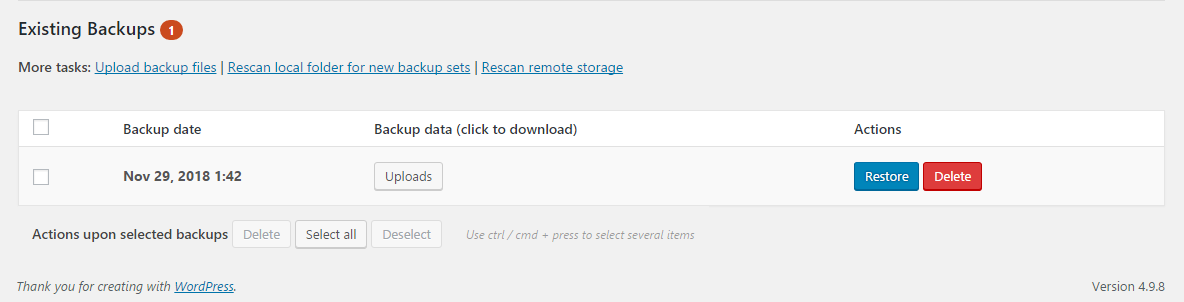
Next, you need to visit Settings > UpdraftPlus Backups > Bacukup/Restore. You will see any backup files listed in Existing Backups. There are three options to retrieve the existing backups.
- Upload backup files: if you saved your backup files on your computer, you can click the option and upload backup files to the same location as your new WordPress site.
- Rescan local folder for new backup sets: you delete everything and reinstall WordPress so you can’t be able to find any backup files.
- Rescan remote storage: if you saved your backup files on remote storage, click settings tab and choose the earlier remote storage in which you uploaded your backups and give UpdraftPlus the authentication to access this remote storage.

After retrieving backup files, you will see them listed Existing Backups. Then click Restore button.
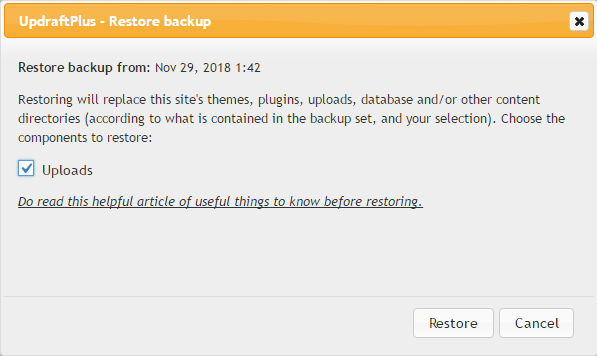
Once clicking Restore button, UpdraftPlus tells you that depending on the backup files, it will replace this site’s plugins, themes, database and other directories.
It also ask you choose a component at least to restore. Check and the option and click Restore button.
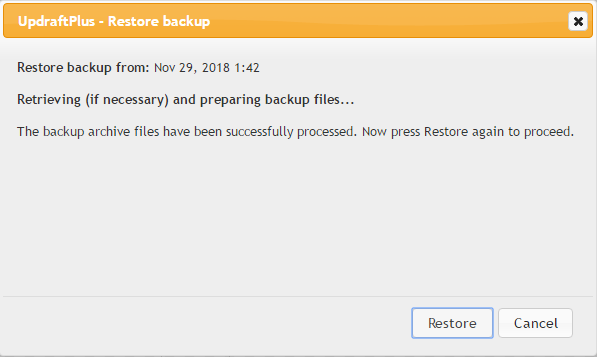
After that, UpdraftPlus tells you updraftplus is ready to restore on next screen and click Restore button.
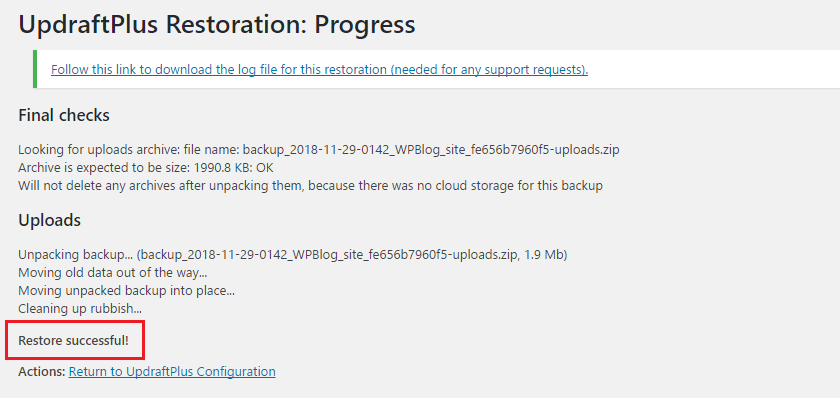
UpdraftPlus will start restoring your WordPress site from the backup, the restoration progress will take a few miuntes depending on the size of backups.
After the progress completes, UpdraftPlus tells you that it restores WordPress successfully. Then you need to click return to UpdraftPlus configuration option to continue.
Return to UpdarftPlus Backup/Restore page, a dialog box tells you that old directories exist and you need to delete them, so click the button to remove.

Final thought
Backup is the ultimate insurance, it can save you out of the emergency. Thus, please create backups for your site regularly. Otherwise, once any worst happened to your website, it would cost you dearly in time, money, and reputation.
I hope this post helped you learn how to backup and restore WordPress site. You may also want to see our guide on how to create a subdomain for your website.
0 Comments