Do you know that why WordPress website is so popular for now? Because WordPress supports to install the third party plugins and themes which make a website created with WordPress more powerful. Any kind of needs on WordPress website can solved by plugins and themes. There are tons of free and paid themes available for WordPress website. In this article, I walk you through how to install WordPress theme with three different ways.
Before you begin
This guide assumes you created your website with WordPress.org, because WordPress.com has its limitation. This includes theme support limitation, no plugin allowed and limited monetization unless you upgrade to their premium version.
Contrarily, WordPress.org allows you to design and customize your website with WordPress plugin and theme.
Install theme with the automated theme installer
For beginners, the easiest way of installing a WordPress theme is to use the automated theme installer. The automated theme installer can be used to install all themes listed in the WordPress theme repository.
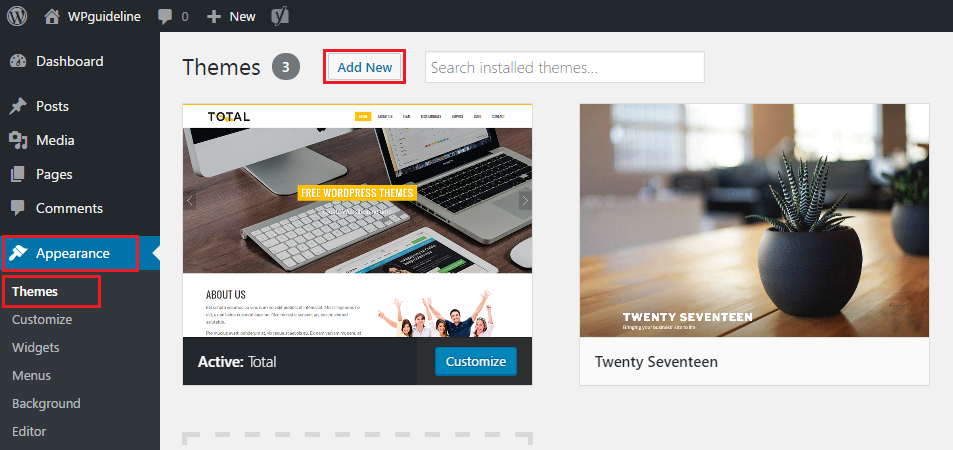
Go to WordPress admin area, click on Appearance>> Themes>> Add New. In general, the current active theme appears first in the top left corner.
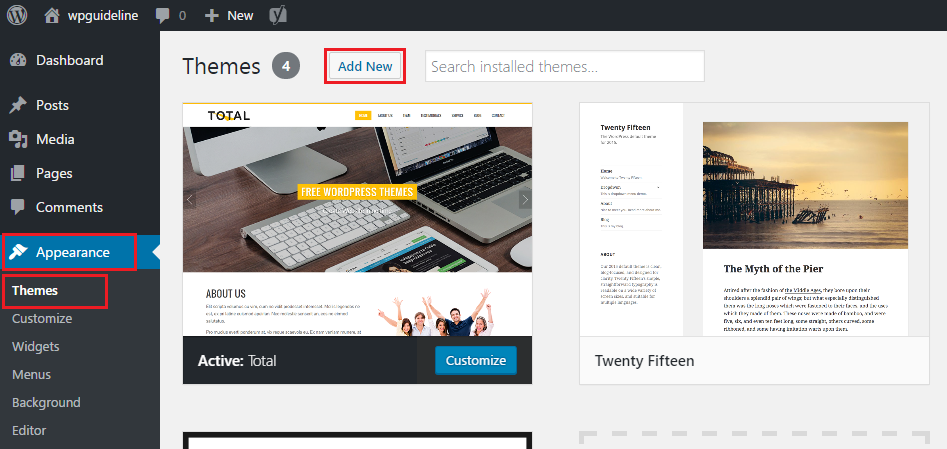
This will take you to next page on which you can find addtional themes for your site. Using one of the three search methods below, you can find the preferable theme to install it:
Filter search – themes are classified three categories including Featured, Popular and Latest.
Keyword search – enter keyword such as theme name, author or tag.
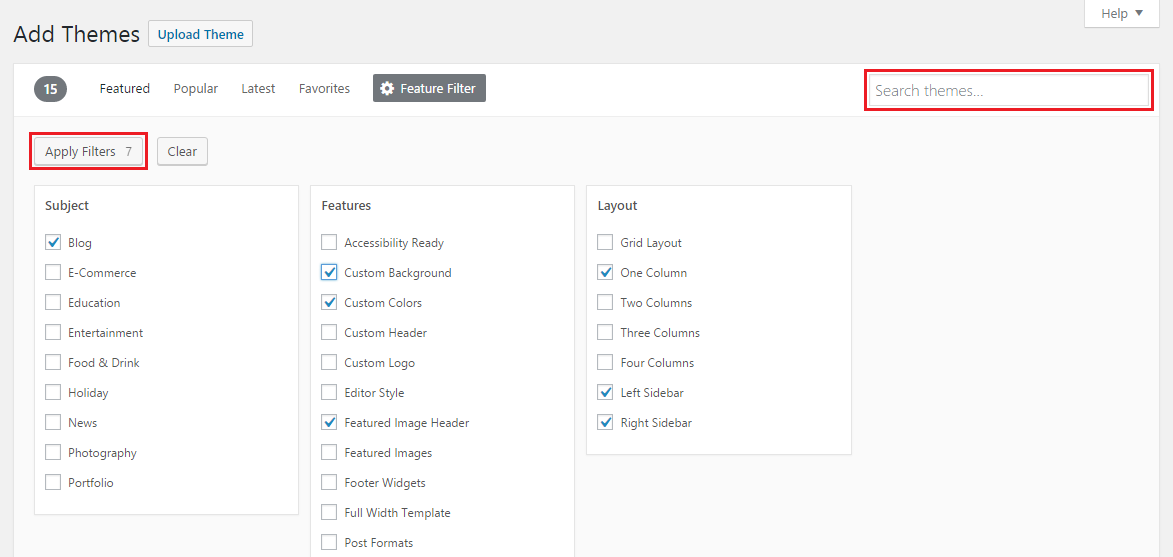
Attribute search – click on Apply Filters button and filter theme by using the attribute of Subject, Features and Layout.
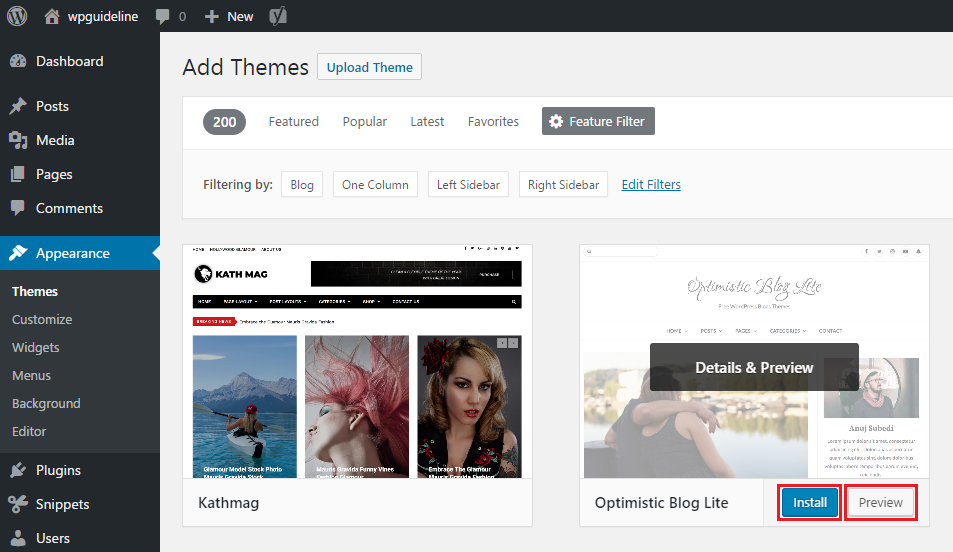
The search result will display a single theme or a list of themes filtered depending on your criteria. If you find the theme which you intend to install, move your cursor to the theme. This disclose the two button, Install and Preview buttons.
Once clicking on Preview button, you will be provided with theme name, version, author and a short description. Then click on Install button to install the theme.
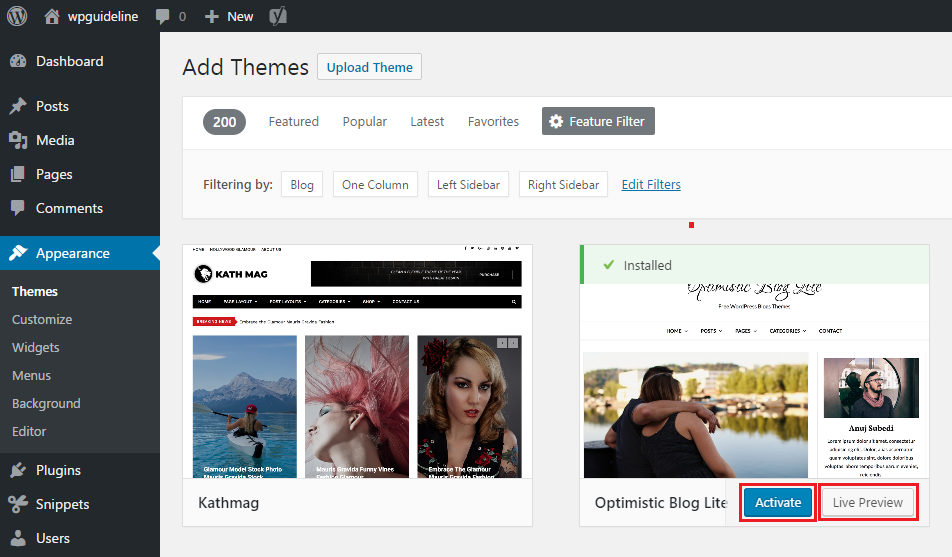
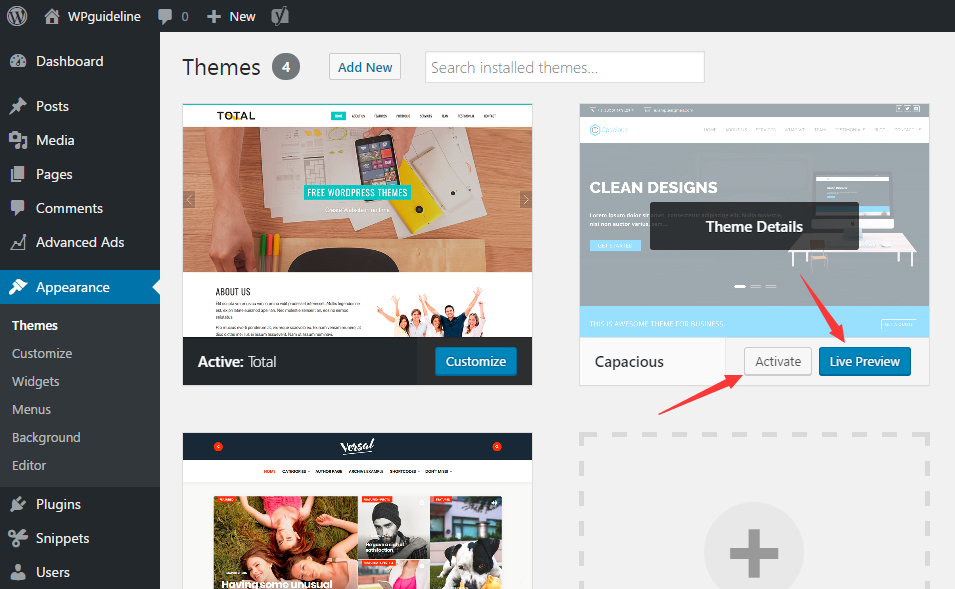
Once installed, the Install and Preview buttons are replaced by Activation and Live Preview buttons.
Upon installation, click on Live Preview button and you can preview how your blog will appear with this installed theme.
Although theme installation is complete, the theme doesn’t work yet. Unless you activate the installed theme by clicking on Activation button.
Upon activation, you may need to configure addtional setting for your website depending on the theme. This method just works to install a theme listed in WordPress theme repository.
Install WordPress theme using the upload method
What if you want to install a theme purchased from the theme provider? Well, WordPress is designed to install a paid theme or a custom theme by uploading.
The upload method is for any theme that is located in a zip file on your computer. In this part, we will describe how to install the WordPress theme by uploading.
First, download the WordPress theme from the theme provider and save the zip file on your computer.
Go to WordPress admin area, and click on Appearance>> Themes>> Add New.
On the next page, click on Upload Theme button at the upper left corner to upload theme page. Click on Choose File button to choose the earlier downloaded file on your computer.
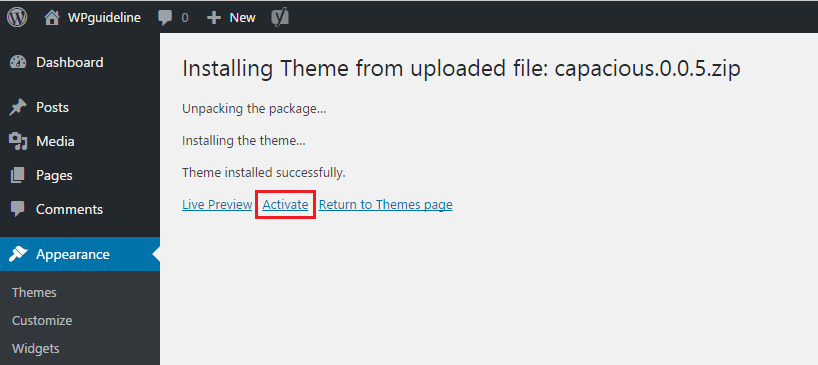
Next, click on Install Now button to start uploading and installing theme. It lasts for a little bit while depending on the size of theme file and network performance.

Once installed, you are taken to the next page. Then you need to click on Activate link to make the installed theme take effect.
After activation, you need to configure addtional setting for your website depending on the theme. This method works for all free and paid themes which are zip files located on your computer.
A manual method via SFTP connection to install WordPress theme
There is an alternative method to install WordPress theme, but it might be a little bit challenge to beginners.
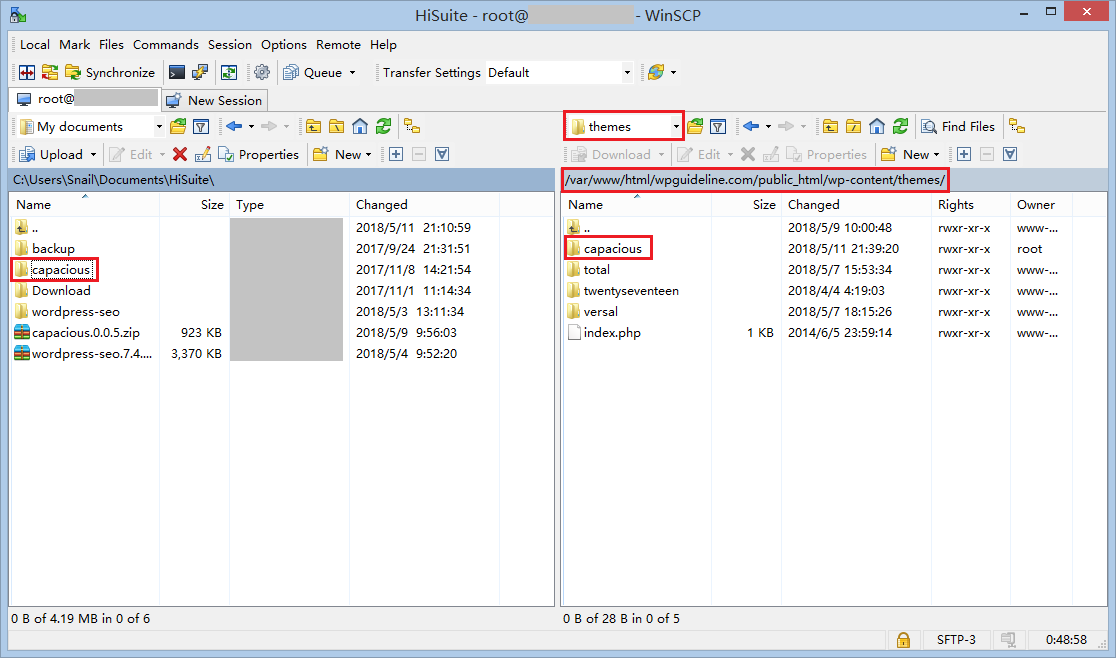
There are many free and paid FTP clients for any system, choose the preferable one to upload the theme file. In this guide, we use WinSCP to upload the theme file.
First, we need to download WinSCP and install it. When you log in WinSCP, you need host name, user name and password. You can get these information from your web hosting.
Once connected to your server with WinSCP, you will find that the control panel consists of two file manager panels.
The right file manager panel is for files on server and the left one for the local files. You need to go to the path (/wp-content/theme/) in which you need to upload the theme file.
Before upload the theme file, you need to extract the theme file with zip format.
After that, choose the extracted theme folder from the left file manager panel. Then drag it and drop it in the right one. And a window pops up, you can see the uploading process on the window.
The uploading process will lasts for a little while depending on the theme file and network performance.
Once uploaded, you need to go to WordPress admin area, click on Appearance>> Theme.
Then you will see the earlier uploaded theme. After that, you need to activate it manually by clicking on Activate button.
Upon activation, you need to configure the addtional setting for your website depending on the theme.
I hope this article helped you learn how to install a WordPress theme. You may also want to see our guide on how to install a WordPress plugin.
How does you install WordPress theme? Let me know in the comments!
0 Comments