WordPress comes with the option to create its own RSS feed. However, what if you want to create a custom RSS feed to showcase posts and articles published by other websites?
In that case, you can take advantage of the WP RSS Aggregator WordPress plugin.
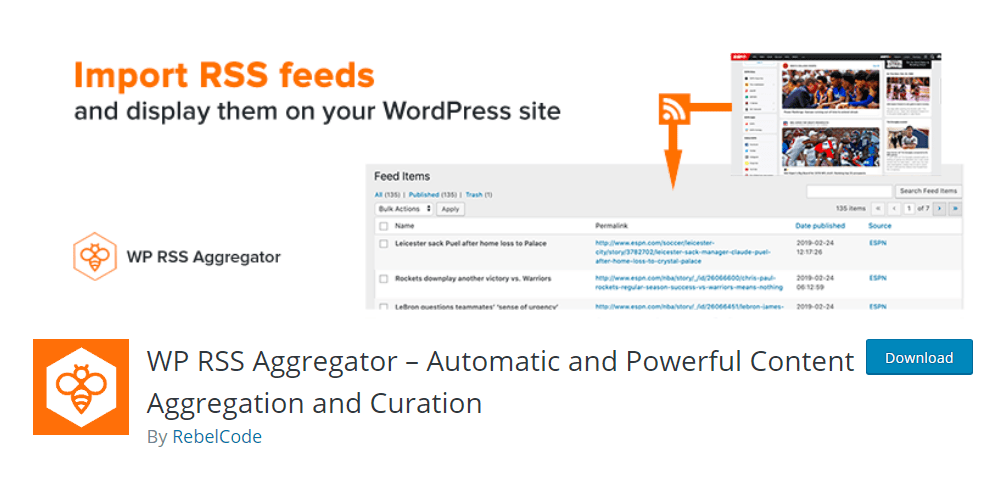
It is one of the most popular and feature-packed RSS feed plugins for WordPress that can help you import, merge, and display RSS and Atom feed, anywhere on your website.
So, if that sounds interesting, here is our full in-depth guide on how to use the plugin to create RSS feed in WordPress.
How To Create Custom RSS Feed in WordPress
Here is our step-by-step guide on how to use WP RSS Aggregator to create RSS feed on your WordPress website.
Step 1: Install the Plugin
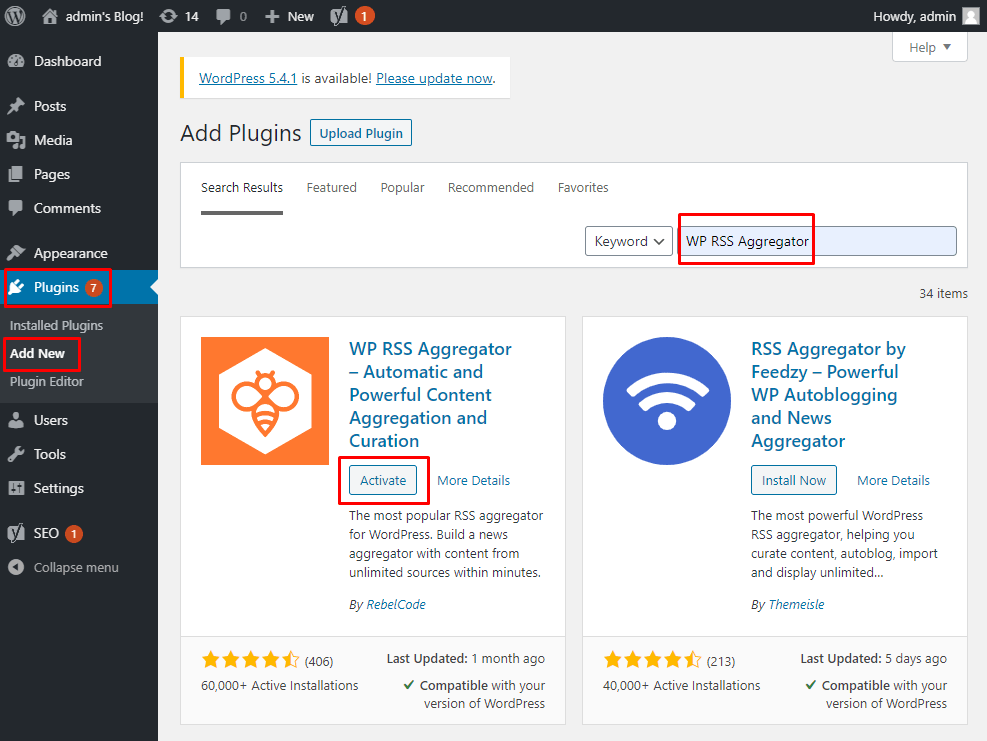
First things first, you will need to install the plugin on your WordPress website. To do this, head on over to the backend dashboard, and navigate to Plugins > Add New. Next, on the provided search field type in WP RSS Aggregator and hit enter.
Now, as shown in the image, click on Install Now followed by Activate.
Step 2: Plugin Interface
With the plugin installed, you will be taken to the following screen to help you set up your first RSS feed.
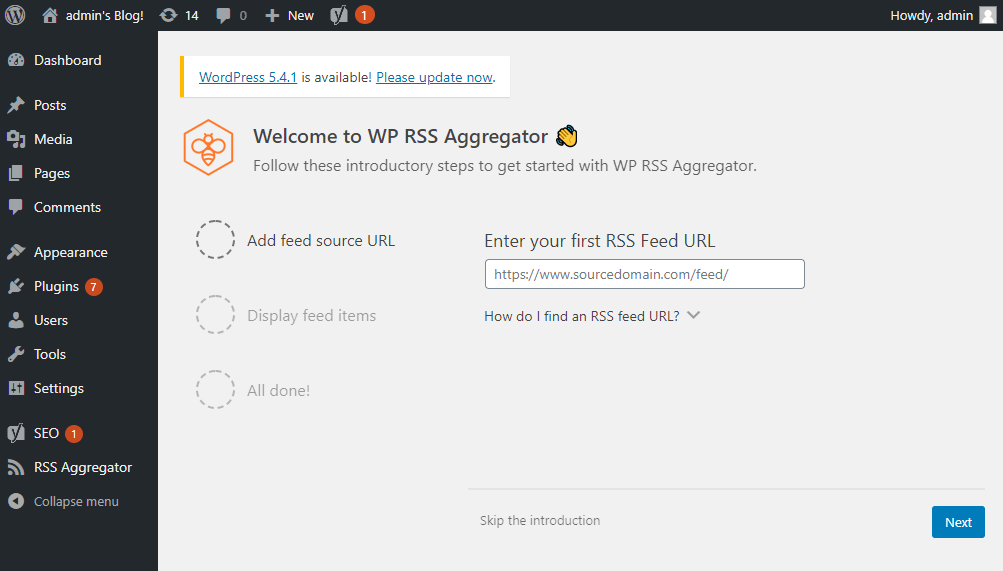
We recommend that you “skip the introduction” and then access the core settings that gives you much more custom control over the RSS feed.
Now on the left-hand sidebar, you should notice a new option – RSS Aggregator. Hover your mouse over it to open up a menu consisting of all the plugin options and settings.
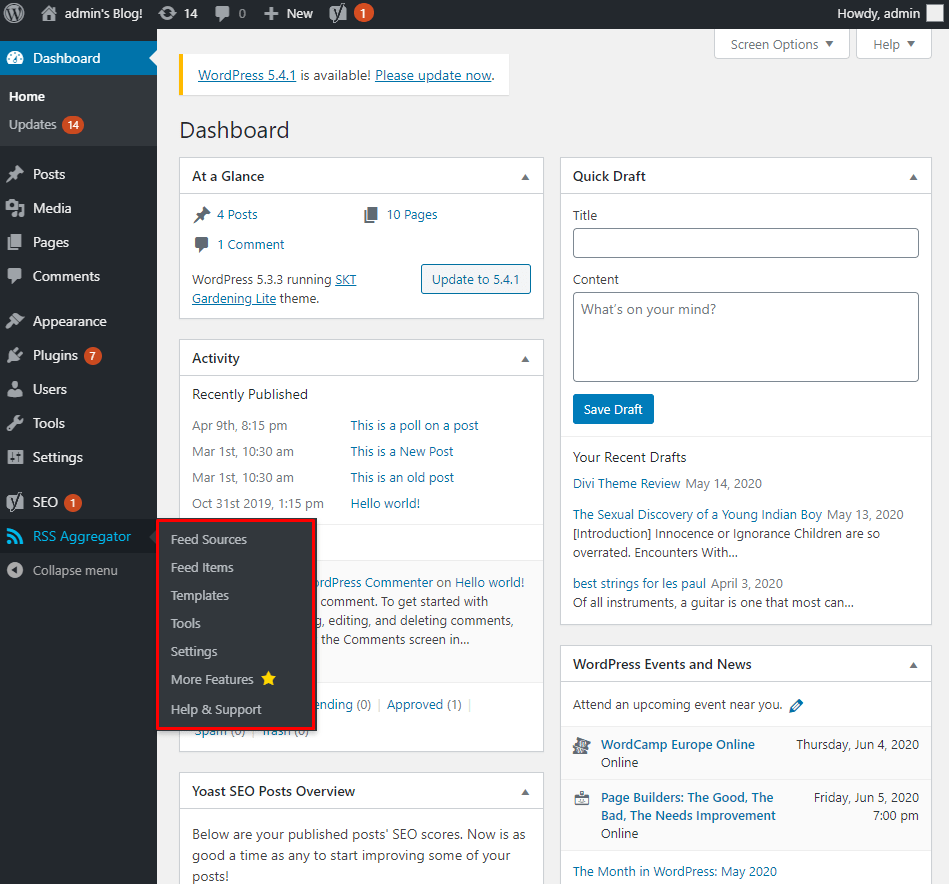
As you can see, you will be greeted with tons of options. Let’s see what each of these sections has to offer:
- Feed Sources: Here you get an ability to add new RSS feed sources to the plugin to display on your website.
- Feed Item: All the feed items that you have imported using your feeds will show up here.
- Templates: Here you can create and set up different templates to help you showcase your feed items.
- Tools: Under the tools section, you have the option to add bulk sources, blacklist certain feed items, export/import RSS feeds, and so on.
- Settings: Here you get access to tons of settings and options to help you control how your RSS feeds work.
- More Features: From the ‘More Features’ section you can purchase premium add-ons to include more advanced features.
- Help & Support: Here you will find shortcut links to access their FAQ sections and support forms to help you out when you run into any problem or issue with the plugin.
As such, there are so many things you can do with the plugin. For this tutorial, we will show how you can add a new RSS feed, create a custom RSS template, and customize its look and feel from the Settings page.
Step 3: Add a Custom RSS Feed Source
To add a new feed source, head over to RSS Aggregator > Feed Sources > Add New.
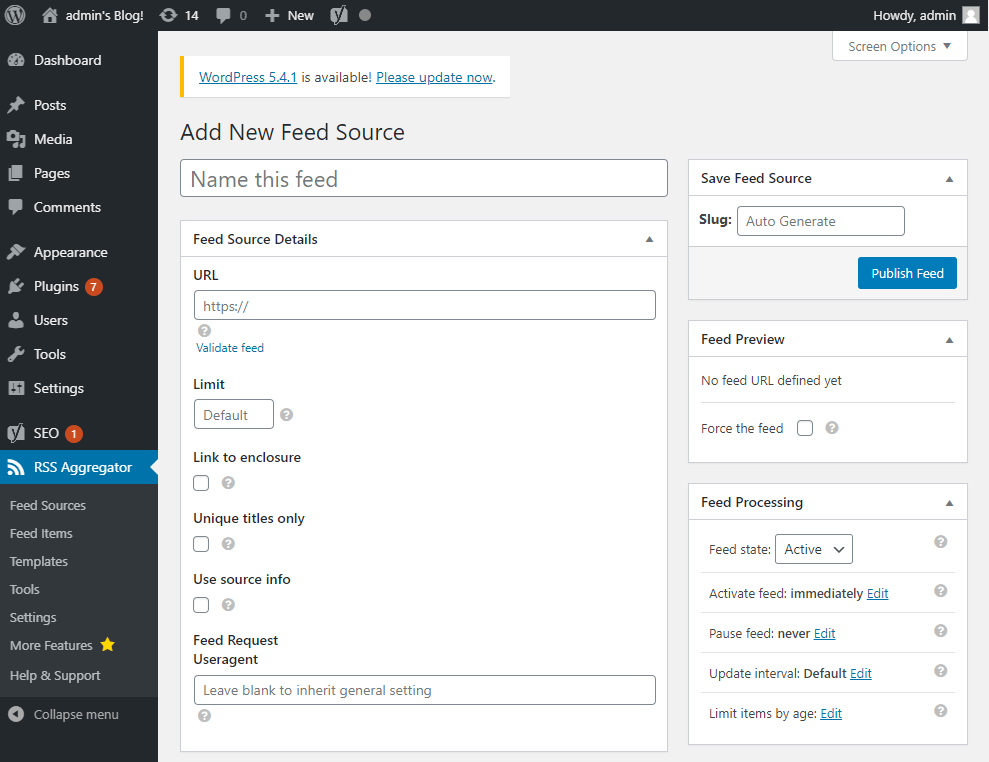
First, give a name to the Feed Source which you will use to identify the RSS feed.
Next, under the URL section, you will need to enter the website URL. The plugin will then automatically fetch the RSS Feed for that website.
For the sake of this tutorial, we are using WPBeginner.
Next up, you can specify how many items you want to import via the RSS feed, as well as whether you want to enable links to the enclosures, source info, and so on.
Once done, just hit the “Publish Feed” button and you are done.
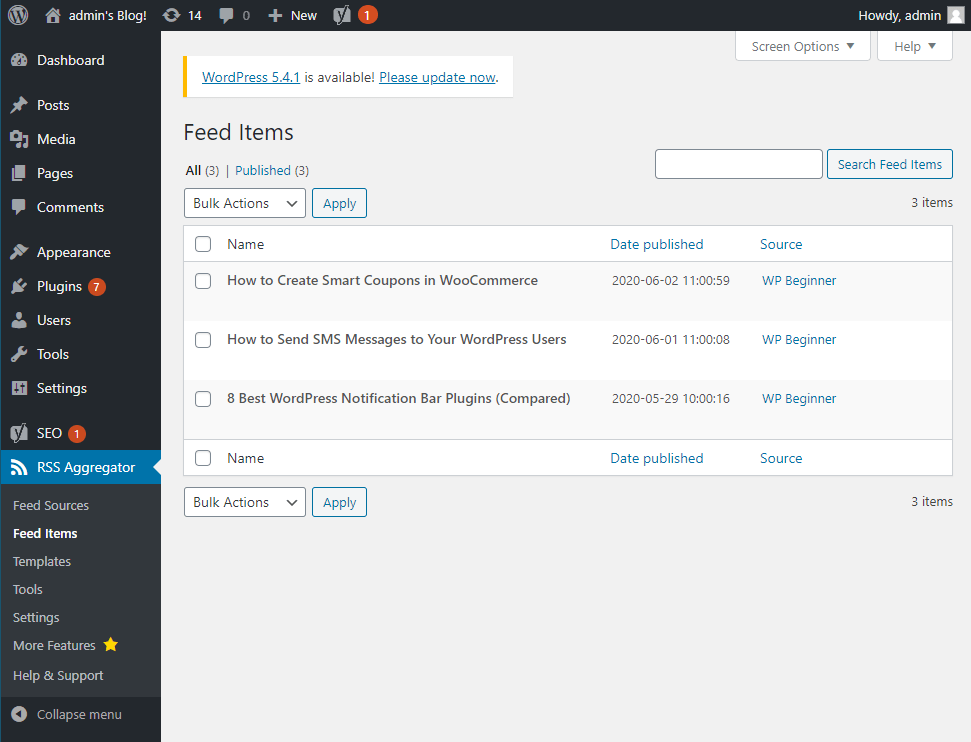
As you can see, as soon as we created the RSS feed, the Feed Items section has been updated with some of the latest posts published by WPBeginner.
Step 4: Create a Custom RSS Feed Template
To create a custom RSS Feed Template, you will need to navigate to RSS Aggregator > Templates > Add New from the left-hand sidebar.

From here, you can create the custom templates that will be used to display the items imported using the plugin.
As you can see, you get to set the template name, customize the length of the titles of each item, tweak the formatting of the published date & time, choose to show/hide source name, author name, and so on. It allows you to include pagination and bullet points in your RSS Feed.
Once you have set it up properly, you can click on the “Publish” button and the template is ready to be used on your different RSS feeds.
Step 5: WP RSS Aggregator Settings
The Settings section for the plugin is loaded with tons of options giving you granular control over what you can do with the plugin.
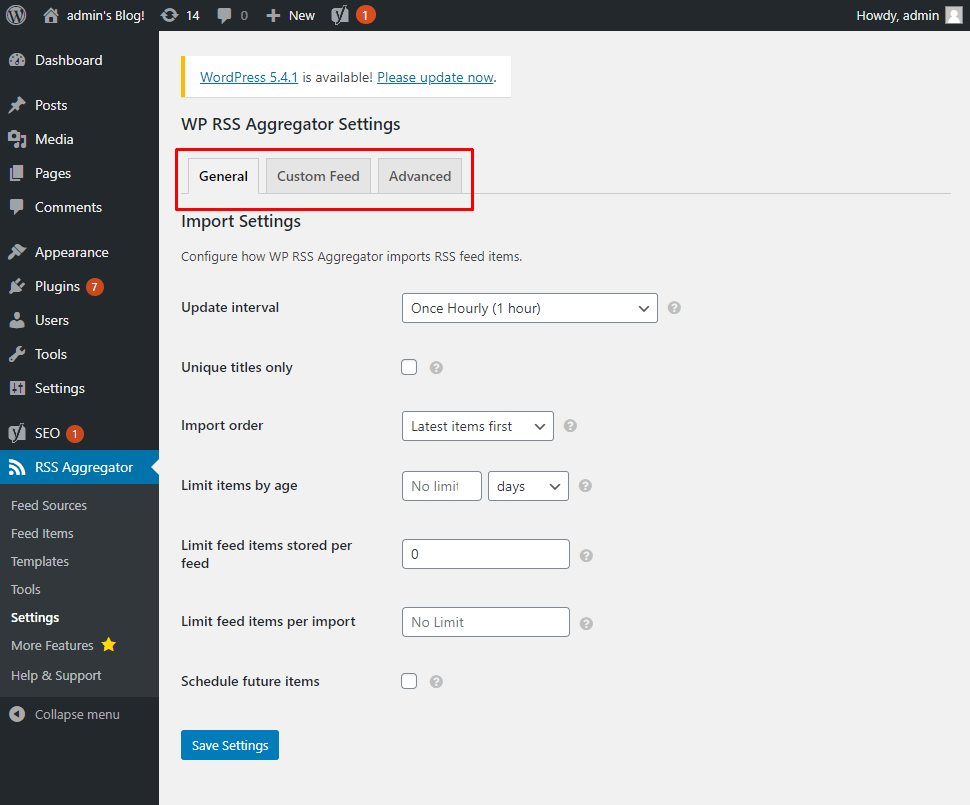
As you can see, all the options are divided into three tabs – General, Custom Feed, and Advanced.
Under the General tab, you get the basic settings like setting the update intervals, import order, and so on.
Heading over to the Custom Feed tab, you can set up a custom RSS Feed URL. This is basically a dedicated page to show all the imported items from all RSS Feeds.
Finally, we have the Advanced Settings tab, which houses options involving the certificate path, feed requests, user-agents, option to enable feed caching, and so on. We recommend that you don’t tweak these options unless you are sure of what you are doing.
Conclusion
So this is our quick read on how to create RSS feed using the WP RSS Aggregator WordPress plugin. We hope you found the read to be useful and that it helped you in setting up a custom RSS feed on your WordPress website.
However, if you still have some confusion, then feel free to leave a comment down below. We will surely try and help you to create RSS feed on your WordPress website.
You may also want to see our in-depth step by step guide on how to set up Akismet anti-spam plugin in WordPress.
0 Comments