If you wish to show fresh contents to your visitors on regular basis, you’d better to schedule your posts and publish them. Once you scheduled your articles at a specific date and time, they will go live on the date and time that you choosed, even if you are on vacation. In this aticles, I will show you how to schedule posts in WordPress with two different methods:
- The build-in WordPress post editor
- A WordPress plugin
Schedule posts in WordPress via block editor
WordPress has an ability to schedule posts and publish them at a future time. Let’s take a look at how to schedule posts in WordPress via post editor.
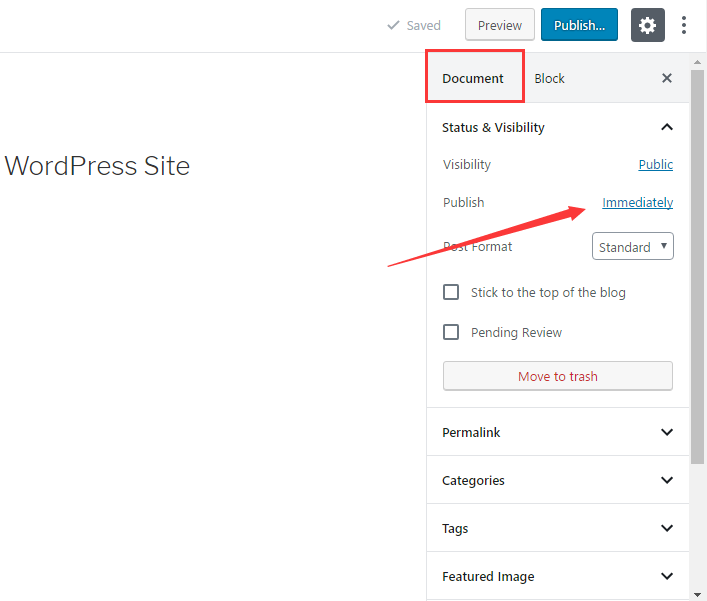
Head over to Gutenberg editor menu > Document > Status & Visibility > Publish and click on Immediately link text.
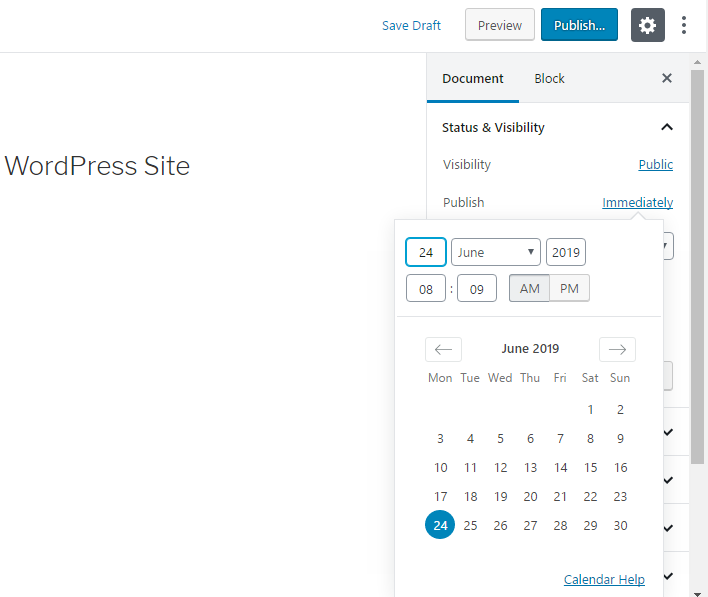
Once clicking on Immdiately link text, you are able to see a post schedule calender. Then, you can pick a date and time for publishing this article.
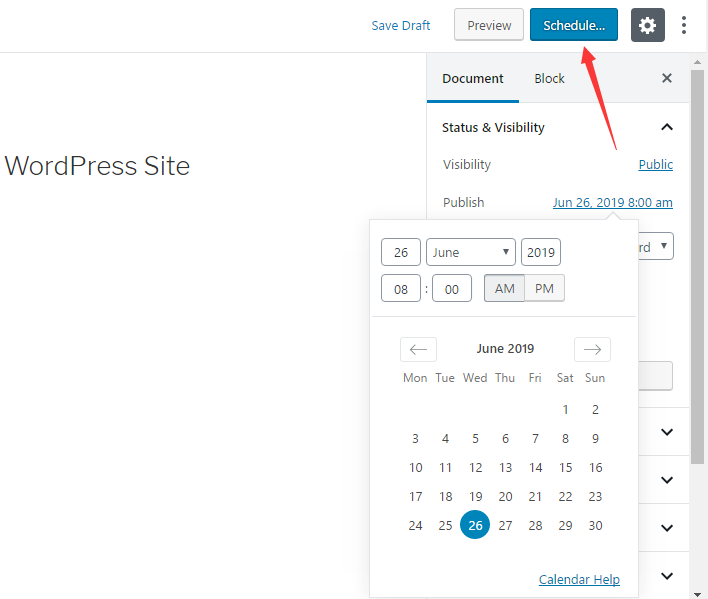
After you set the publication date for this article, you will find that Publish button is replaced with Schedule button. Then, click on Schedule button and WordPress will publish your article at specified date and time.
That’s all. You have successfully scheduled your post in WordPress.
Schedule posts in WordPress via a plugin
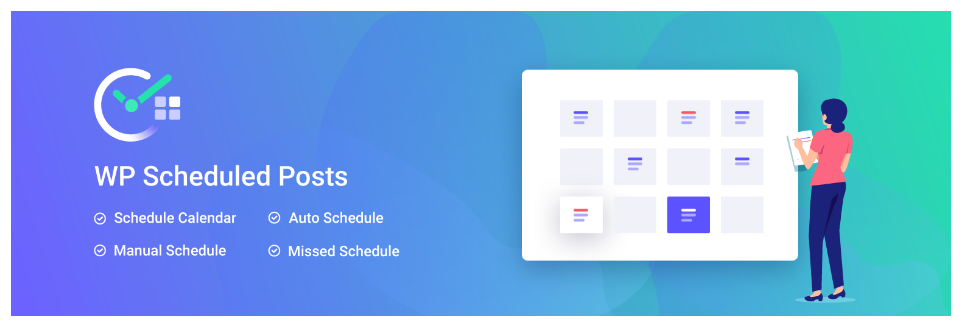
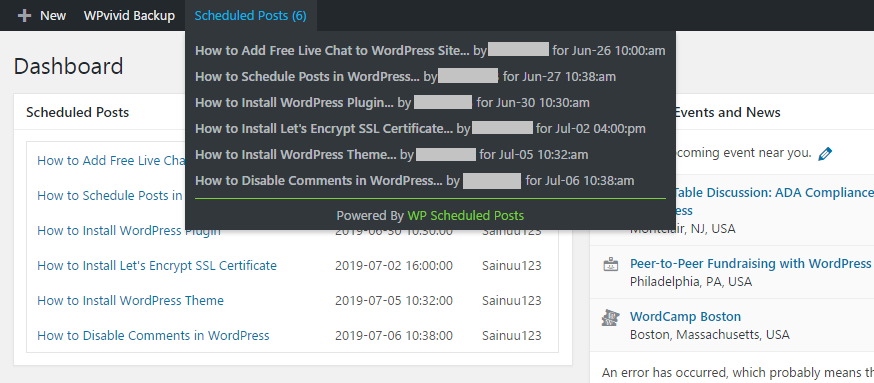
If you wish to see your all scheduled posts with a bird’s eye view, WP Scheduled Posts is a perfect tool for that. It allows you to see all your content and publication date in one place.
WP Scheduled Posts plugin will do all rest of job once you have created your articles and set up the desired publication date and time.
The spotlight features of free version:
- Schedule calendar: You can see and manage all your content and publication date from one place.
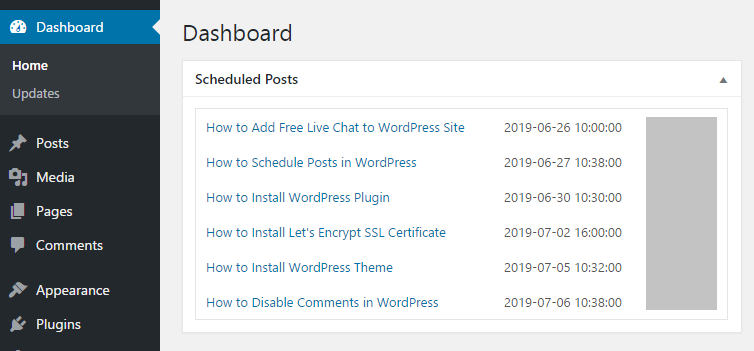
- Dashboard widget: It allows you to check your scheduled content and see their status right from WordPress admin dashboard.
- Drag & drop feature: You can organize your content in schedule calendar with drag and drop feature.
- Create posts directly in calendar: You can create new content in calendar without going back to Add New page.
- Manage multiple authors: If you are running a blog with a multiple authors, it helps you manage their work from one place.
That being said, let’s take a look at how to easily schedule posts in WordPress with WP Scheduled Posts.
First things you need to do is install and activate WP Scheduled Posts plugin. For more details, please see our step by step guideline on how to install WordPress plugin.
Upon activation, head over to WordPress admin dashboard > Scheduled Posts.
WP Scheduled Posts Options
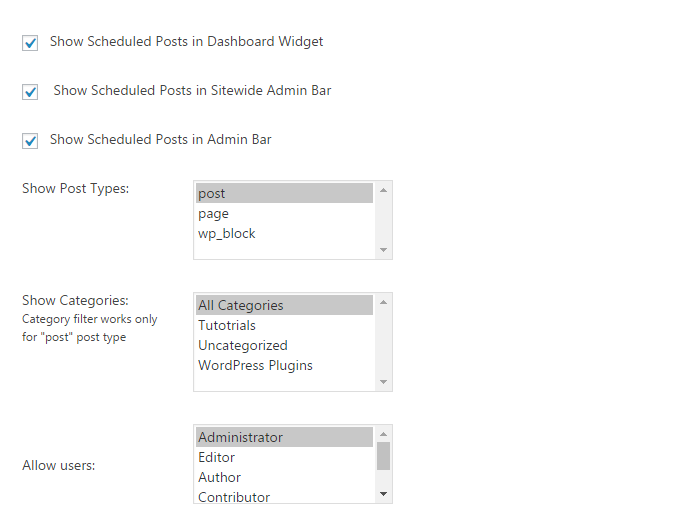
If you check the box of ‘Show Scheduled Posts in Dashboard Widget‘, you are able to see schedueld posts in WordPress admin dashboard.
By checking the box of ‘Show Scheduled Posts in Sidewide Admin Bar‘, you can view the list of scheduled posts in frontend admin bar.
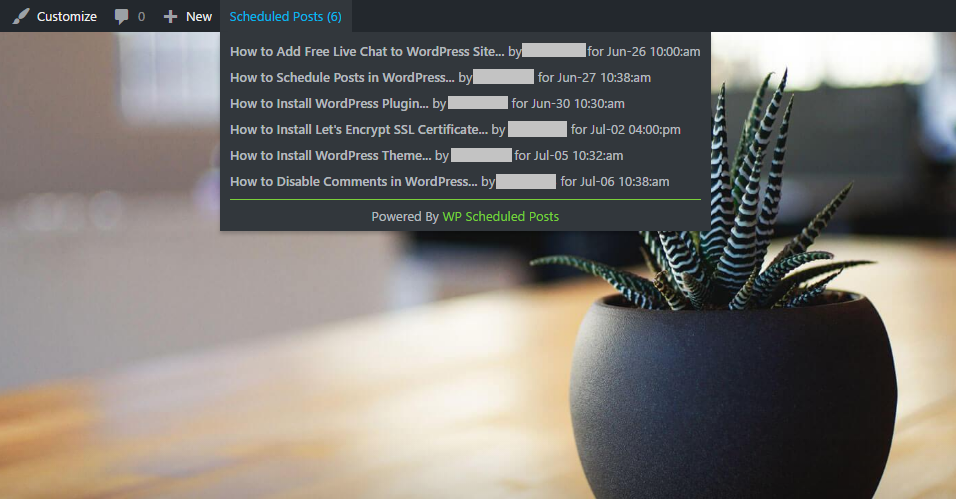
Enable the option of ‘Show Scheduled Posts in Admin Bar‘ to display scheduled posts in admin bar.
Besides, you can show the upcoming articles in schedule calendar based on post types, catergories and user roles.
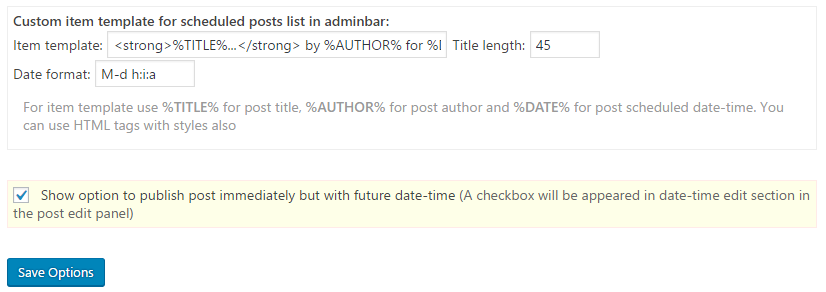
Furthermore, you can also modify your item template with your desired HTML tags. Besides, you can set title length and date format as well.
In addition, if you want to show ‘Publish future post immediately’ in post edit panel, check the box of ‘ show option to publish post immediately but with future date time’.
Once all done, click on Save Options button.
Schedule Calendar
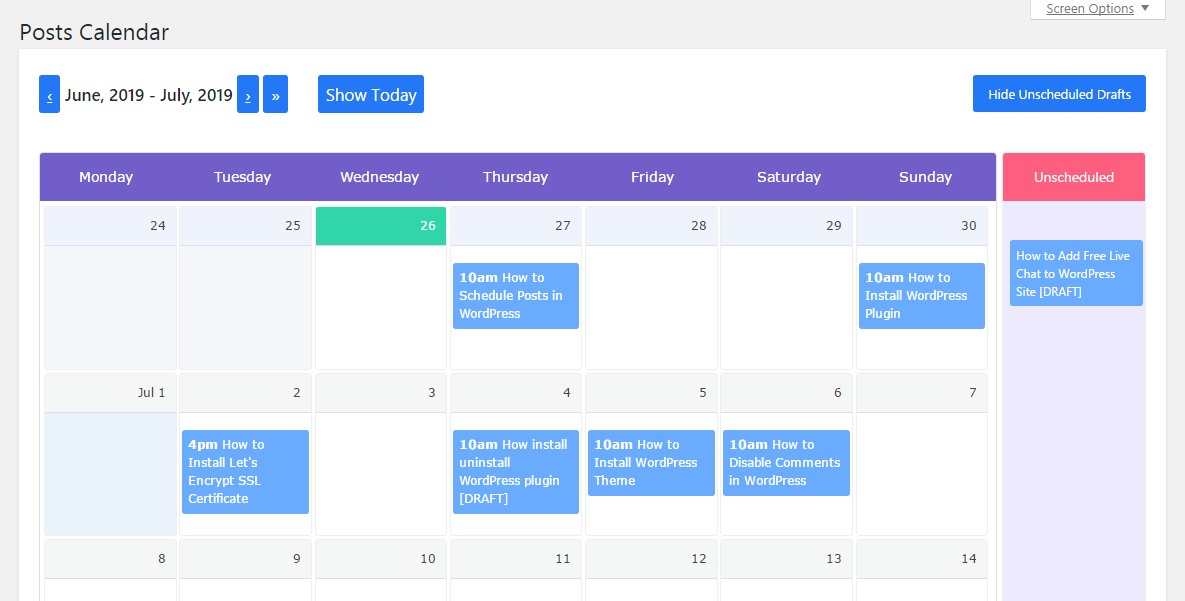
You can view all scheduled posts in the beautifully designed layout. Furthermore, Schedule calendar allows you to create, schedule and manage posts from this central place.
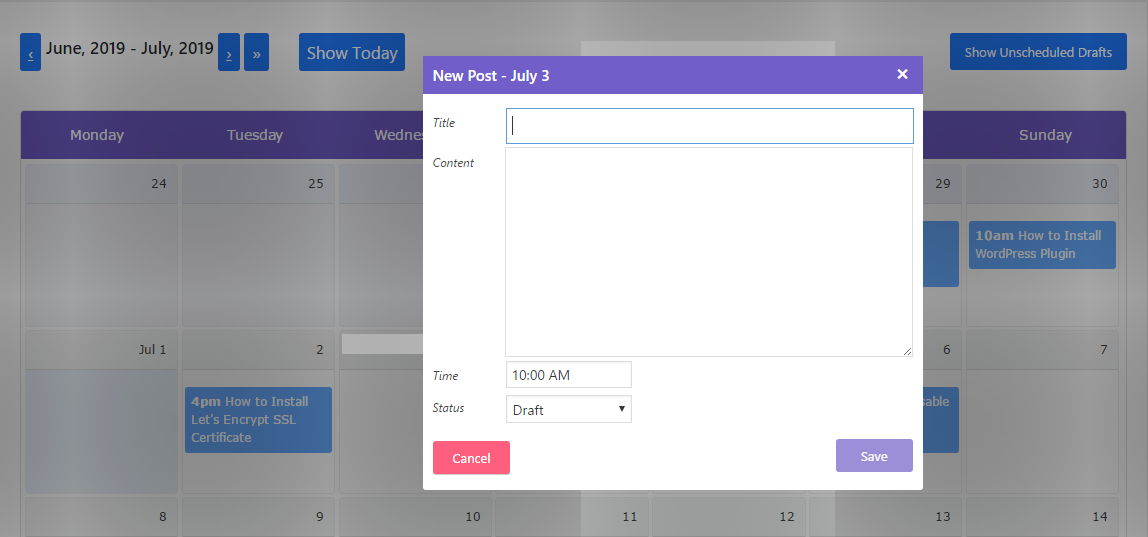
You are able to create a new post right from the post calendar without going back to Add New page. Hover over the desired date you want to publish, you will see that a text link of New Post appears. Then click on it.

Once clicking on New Post, a new window pops up. You are allowed to create new content, set the publication time and choose the content status.
The content status inludes Draft, Pending Review and Scheduled. Please keep in your mind that the content won’t be published upon the content status of draft and pending review.
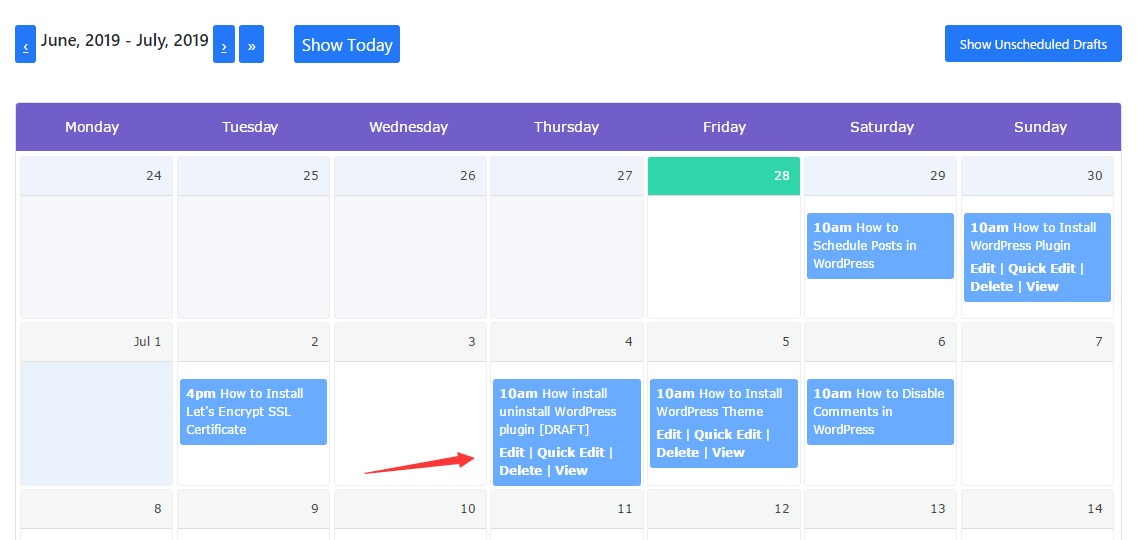
Moreover, you can edit your scheduled or unschedule content with ‘Quick Edit’ feature. Beside editing your content, you are able to view and delete your content right from the post schedule as well.
Once all done, click on Save button.
With the drag and drop feature, you can move your post to the new date and reschedule it. Also, you are able to change the pulication time by clicking on ‘Quick Edit’ option.
I hope this article helped you learn how to easily schedule posts in WordPress. You may also want to see our guide on how to add social share buttons to WordPress site.
0 Comments