Sometimes, some of your well-researched and best-written content will slowly start to receive less and less traffic solely because they have become old. This isn’t to say that your content has become irrelevant. But instead, your evergreen articles can get drowned by the vast amount of new content you keep publishing. This can reduce its exposure resulting in a lower-traffic inflow.
Now, one of the ways you can bring those old posts back into the spotlight would be sharing them on social media. And this is where Revive Old Posts come into the picture.
What is Revive Old Posts?
Revive Old Posts is an excellent WordPress plugin that can help you automatically share old as well as new blog posts and pages on various social media platforms. You can set up a schedule as to when and where you want to share which one of your posts and the plugin will handle it for you.
As you can imagine, the plugin can be an extremely handy tool to help keep your followers engaged, and at the same time grow your website traffic. With this in mind, we have put together this detailed comprehensive guide on how to automatically share old blog posts on social media with Revive Old Posts.
So without further ado, let’s get started.
Install the Plugin
First things first, let’s install the plugin on your WordPress website. For this, log in to your WordPress backend dashboard and from the left-hand sidebar, go to Plugins > Add New. Now, search for Revive Old Posts in the search bar.

As shown in the image, you will need to click on Install Now followed by Activate. Once done, the plugin is now active on your website.
Connect to Your Social Media Profile
With the plugin installed, you will notice a new option on the left-hand sidebar called Revive Old Posts.
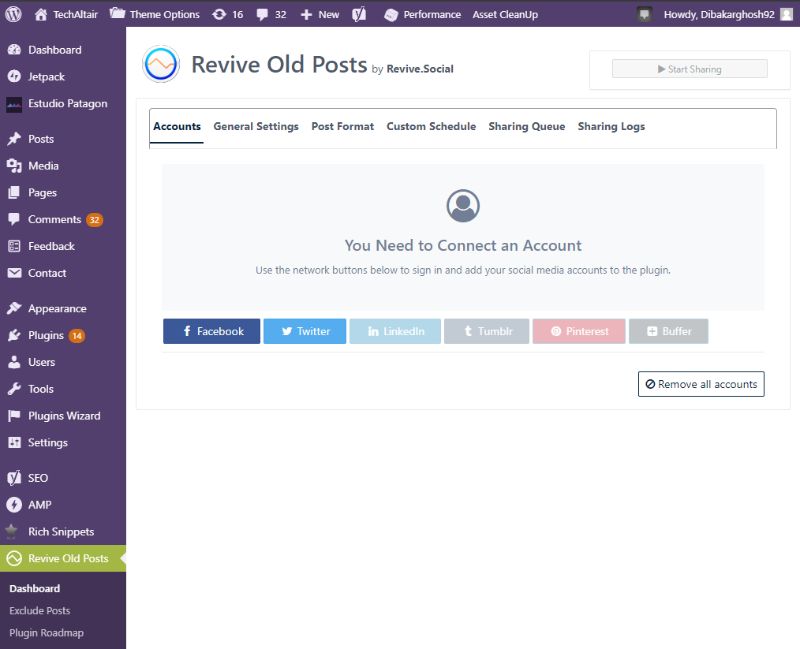
From here, you will need to go to its dashboard to configure the plugin.
The first time you visit, you will see a message, “You Need to Connect an Account.”
The free version of the plugin only supports Facebook and Twitter. If you upgrade it to the pro version, you will be able to connect to other social media accounts including LinkedIn, Tumblr, Pinterest, and Buffer.
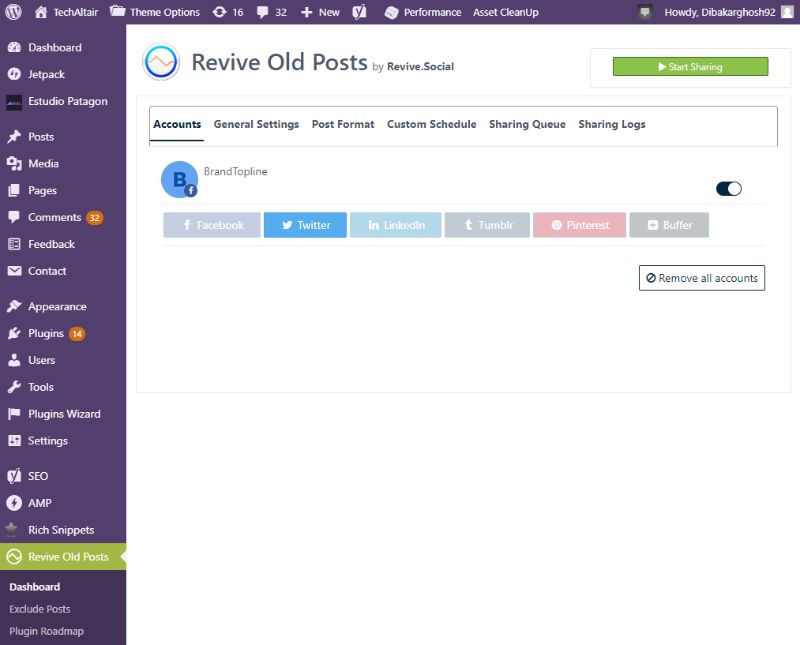
For the purpose of this read, we will connect to Facebook.
First, click on the Facebook icon. It will open a pop-up window where you will need to log-in to your Facebook account and provide permission to the plugin.

Next, you will have to select a Facebook page where you want to re-publish your posts using the plugin. It will ask permission to receive your email address, manage the selected pages, and publish as Facebook pages.
Once you provide all the permissions, the Facebook page will be added to your Revive Old Posts Dashboard, as shown in the image below.
Configure the Plugin Settings
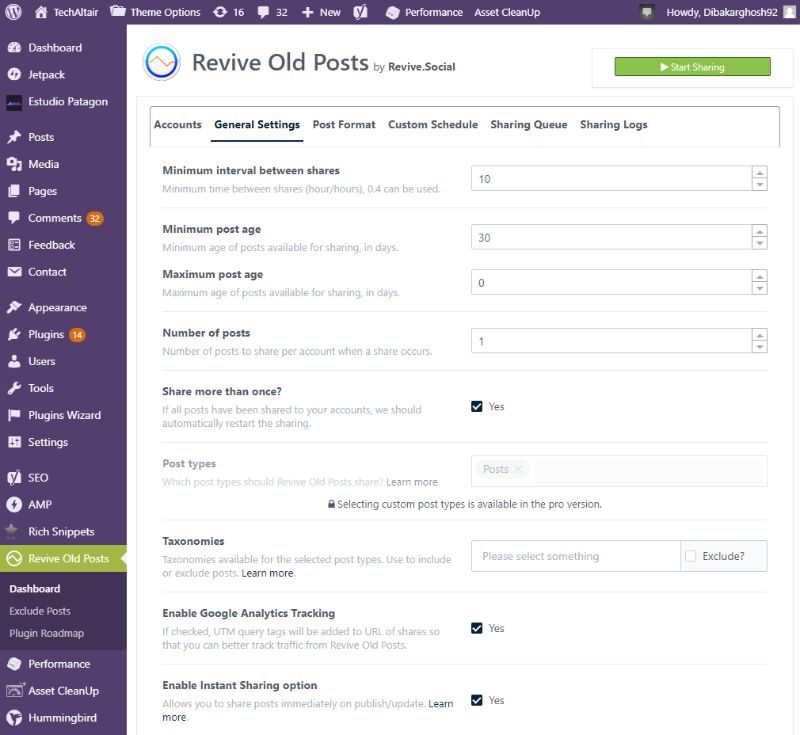
Next, head on over to the General Settings Tab. Here you will find all the necessary settings and options to control the plugin. Some notable options include:
- Set the minimum time between shares.
- Configure the minimum and maximum age of a post for sharing.
- A total number of posts to share at each instance.
- Enable/disable repeated sharing of same posts if all other posts have been already shared.
- Exclude posts based on taxonomies.
- Enable/disable Google Analytics.
- Enable/disable instant share of posts as soon as they are published or updated.
- Option to automatically delete all saved data of a post once you have deleted from your website.
Here, you will need to provide the specific values like when to publish the articles, which articles to publish, and also enable or disable the various other options involving your post-publication.
Once done, hit on Save.
Configure the Post Format
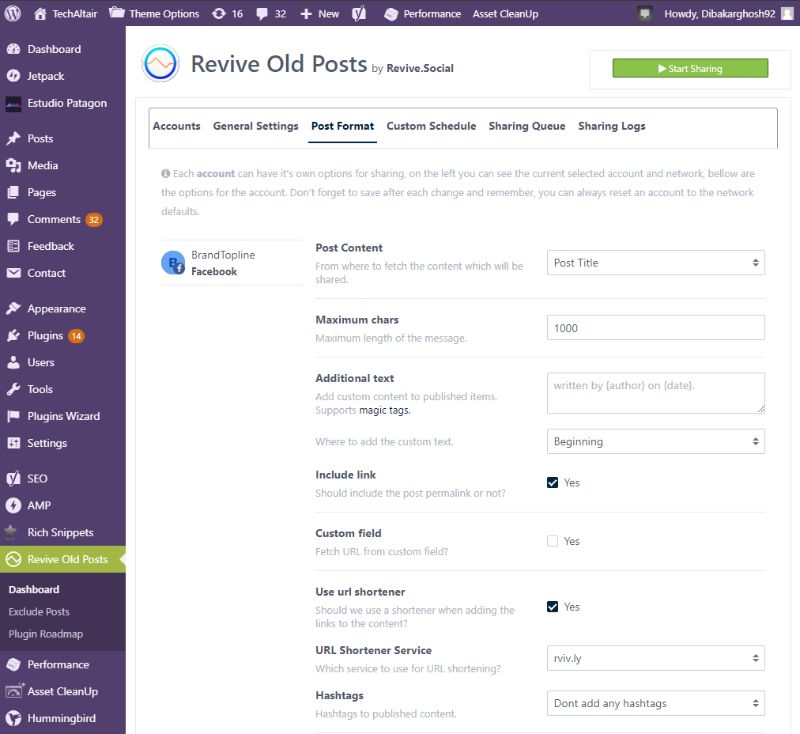
Next, head on over to the Post Format tab.
From here, you can configure the default post title, maximum characters to show in messages and even input any additional text based on the social media network where your posts will get published.
There is also an option to include/exclude the post permalink, shorten post URL when sharing, use hashtags with published content, include the post’s featured images, and much more.
You can tweak around with these settings to specify how you want the shared content to appear on the social media platform.
Set a Custom Sharing Schedule
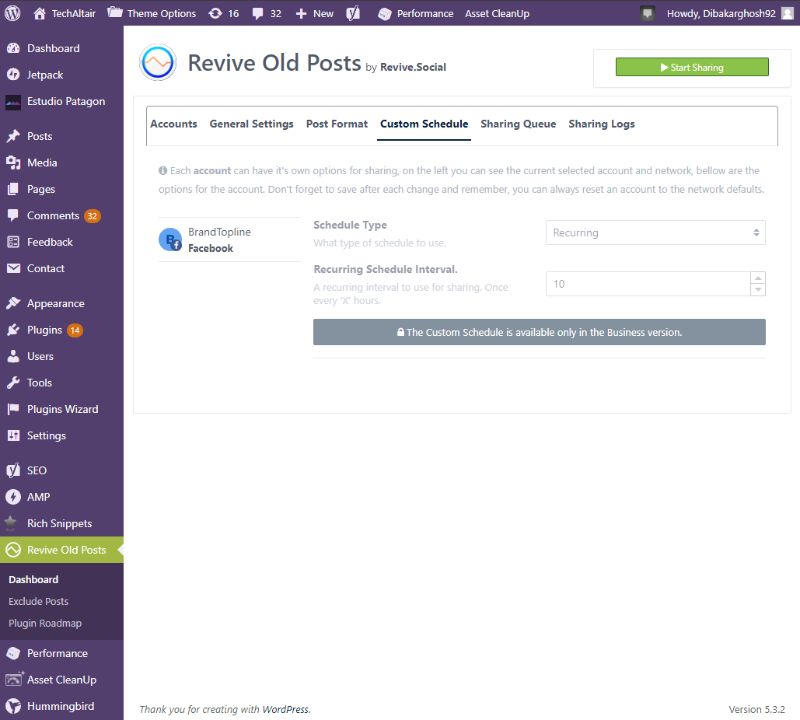
Once you are done, you can head over to the custom schedule tab.
This is a pro feature, and won’t be accessible from the free version of the plugin.
However, if you did get the pro version of the plugin, you will be able to set up the schedule type and schedule interval of your posts specific to each social media platform.
How to Exclude Posts from Automatic Sharing?
Now, you might not need or want to share all your old posts to your social media channels. In that case, the plugin also offers an option to exclude certain posts from the automatic social share functionality.
All you have to do is head over to Revive Old Posts > Exclude Posts from the left-hand sidebar in your WordPress dashboard.
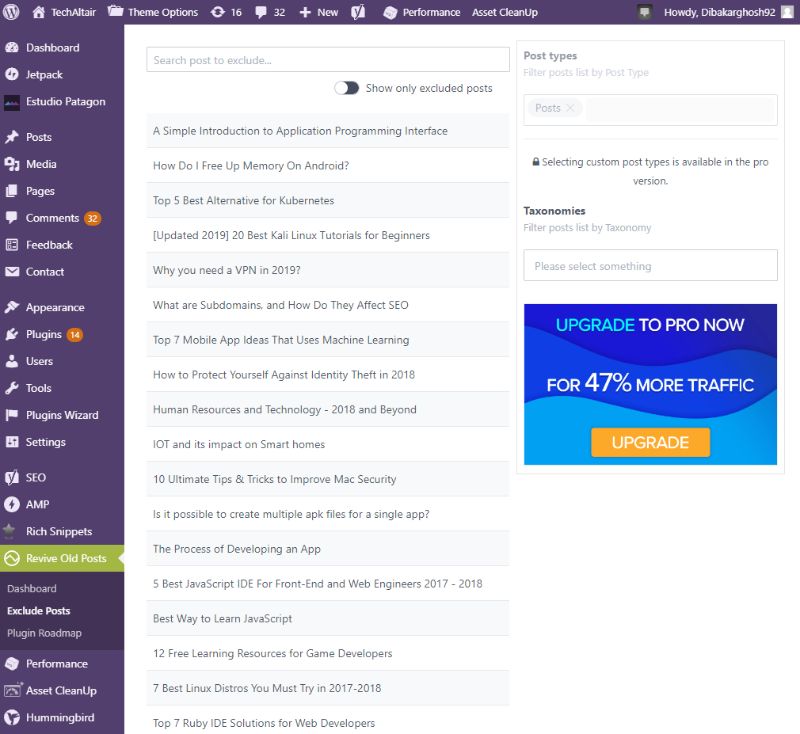
Here, you will get to see all the posts on your WordPress website and select them on a-per-post basis and exclude them for social sharing. There are also options to exclude an entire post type or filter posts based on taxonomies.
Wrapping Up
As you can see, Revive Old Post is excellent for increasing traction to your website, engaging your social media following, and giving your old evergreen posts some love and exposure.
Most impressive of all is that the free version of the plugin comes loaded with all the necessary bells and whistles, but mainly with the limitation that you can only connect with a single Facebook and Twitter account. Other social media platforms are only available with the premium version.
I hope this article helped you learn how to auto-share your old blog posts on social media. You may also want to see our guide on how to set up WooCommerce in WordPress.
0 Comments