Optimizing your website’s conversion rate is all about providing your users with the utmost convenience – even while creating an account. The act of creating an email and brainstorming a unique password takes time and effort, which your users might not want to spend.
However, the problem can be easily resolved by integrating social login to WordPress. This is where Nextend Social Login comes into the picture.
What is Nextend Social Login?
Nextend Social Login is a WordPress plugin that allows visitors to login and register to your website using their social media profiles, e.g. Facebook, Google, Twitter, and so on. Once installed, the plugin will automatically integrate a social login functionality to the existing WordPress login and registration form without any hiccups.
By using the social login feature, users can simply click on a button and access your WordPress website, instead of spending time on filling up the registration form or entering the login credentials.
Apart from the obvious time convenience, there is no headache involving email verifications or keeping track of any username or password. Users will also get the option to add or remove their social accounts directly from their WordPress profile page.
Features of Nextend Social Login
Now, the plugin is available in a free version covering all the basic functionalities, as well as a paid version bundling in more advanced features. So let’s get familiar with some of its bells and whistles:
- Social login support via Facebook, Google, and Twitter for the free version.
- Social login support via plenty more social media channels including Yahoo!, VKontakte, PayPal, LinkedIn, Disqus, and Amazon.
- One-click registration and login using social media networks.
- Option to define custom redirect URL after the registration and login.
- Users can use social media profile pictures as their avatar on your website.
- Customize its design and style to match your site’s aesthetics.
- Compatible with many popular WordPress plugins like WooCommerce, BuddyPress, and so on. (Premium)
- Supports shortcodes and widget.
And much more.
How to Add Social Login to WordPress Site Using Nextend Social Login
Now that you have a basic idea on Nextend Social Login and what it can do, here is a comprehensive guide on how to use the plugin to add social login to your WordPress site:
Note: For the purpose of this tutorial, we will be using the free version of the plugin.
Step 1: Installing The Plugin
The very first step would be to install the Nextend Social Login plugin on your WordPress website.
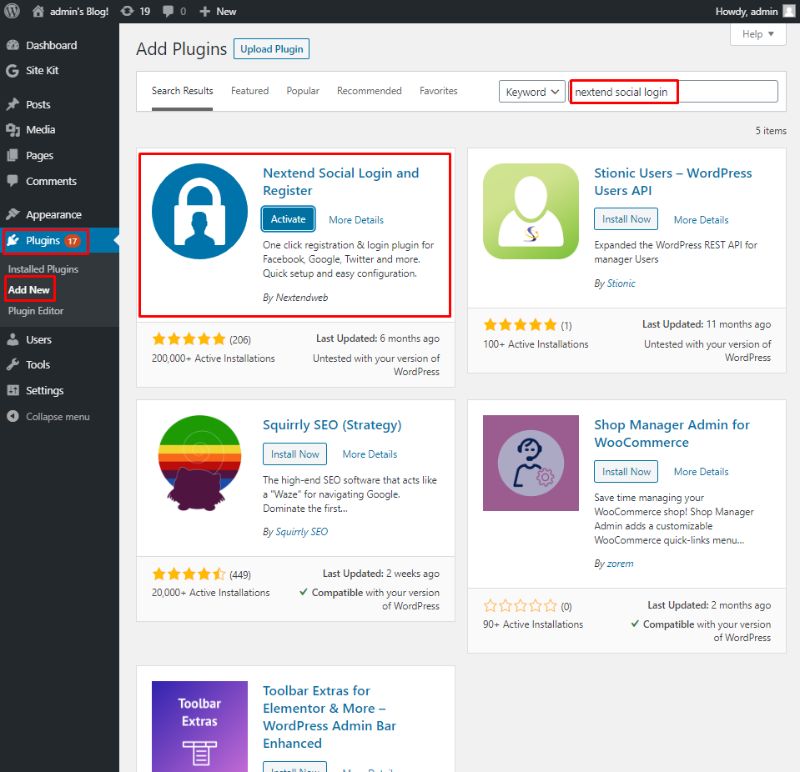
To do this, head to your WordPress backend dashboard, and from there, navigate to Plugins > Add New. Now in the search field, type in Nextend Social Login. Install and Activate the plugin as shown in the image below.
Step 2: Choose Your Social Login
With the plugin installed and activated, you should see a new Nextend Social Login option under the Settings section of your WordPress backend. Enter it, and you will get the following interface.
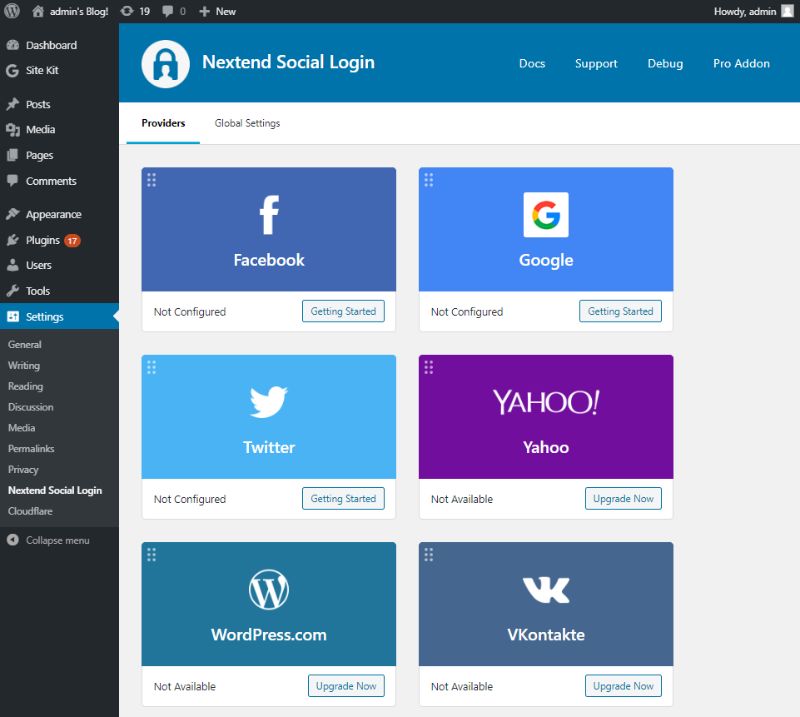
As you can see, here is a whole line of social media networks that you can offer to your users to easily sign up to your website. For the purpose of this tutorial, we will be using Google (or rather Gmail). So let’s get started by clicking the “Getting Started” button.
Step 3: Create a Developer App
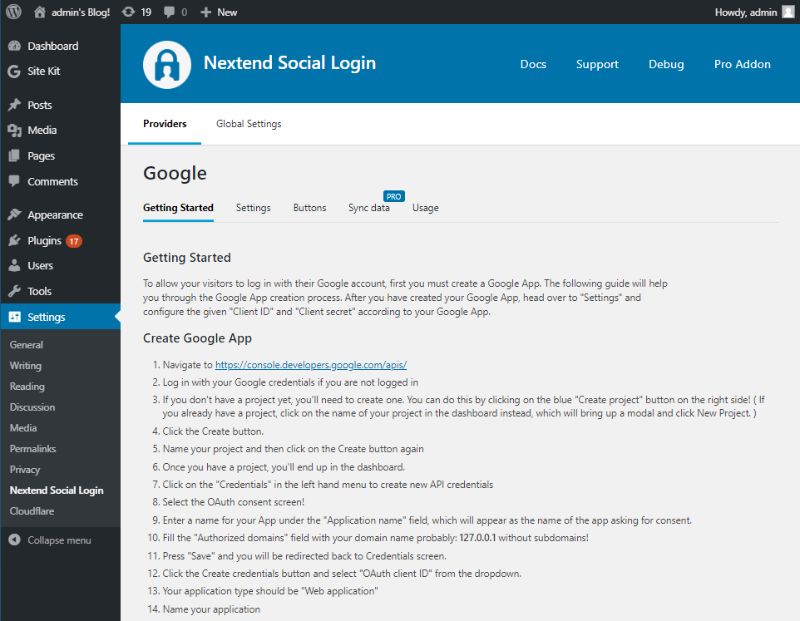
Here, you will be asked to create a developer app that you will need to use to authorize apps through Google.
If you choose Facebook or Twitter, there too, you would have to create a developer app for the corresponding social media platform.
Now the process of creating the developer app will be different depending on the platform. However, the plugin does provide a dedicated step-by-step guide to help you along the way.
Once you are done creating your Google developer app, scroll down and hit the “I am done setting up my Google App” button.
Step 4: Configure The Settings
Now that you have your Google app developed, you will need to go through some basic settings to configure the app to allow social login to WordPress.
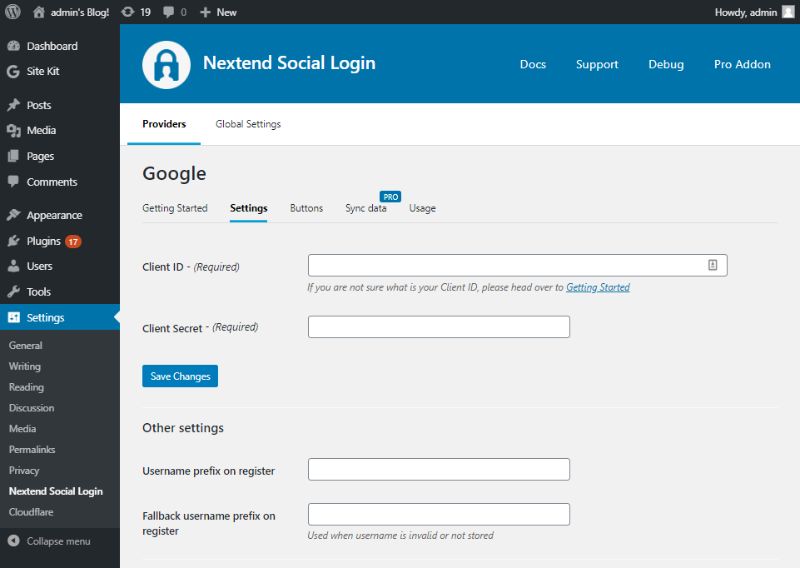
As shown in the image, you will need to provide the Client ID and the Client Secret and hit the Save Changes button.
Down below, you get other settings to add a username prefix on registration as well as a fallback username prefix on registration.
Step 5: Design The Buttons
With the Google Login all set-up, it’s time to choose the look and feel of your Google social login button.
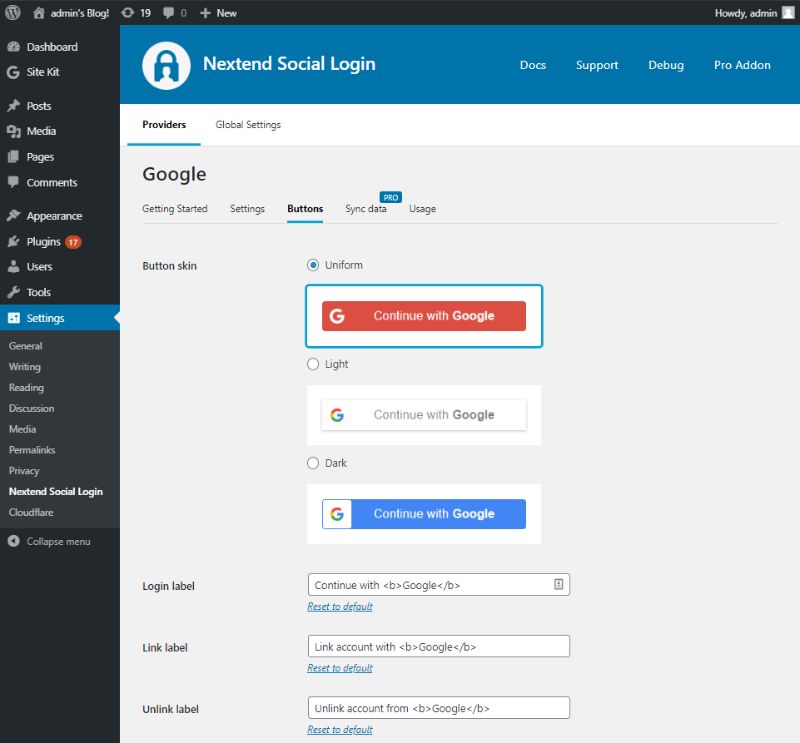
Under the buttons tab, you will get to choose the Button Skin and can also configure the login label, link label, unlink label, and the option to use it as the default button.
Step 6: Configuring The Global Settings
And finally, we head on over to the Global settings. Most of these options are saved for the Pro version of the plugin, but you can still access the General tab, Privacy tab, and Login Form tab.
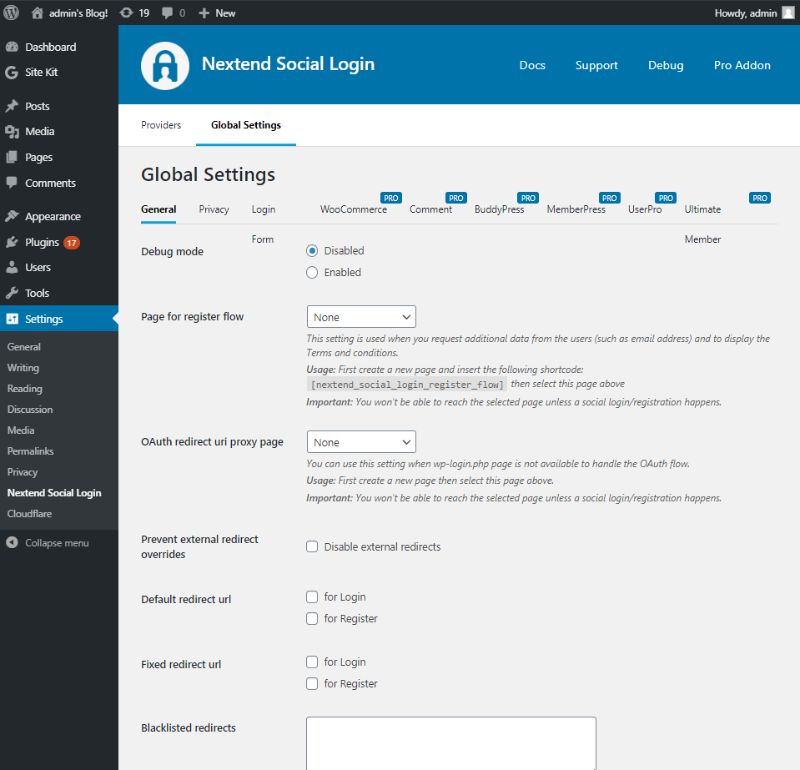
The General Tab covers all the basic settings along with options to include the default redirect URL for login and registration. You can even add certain redirects to a blacklist.
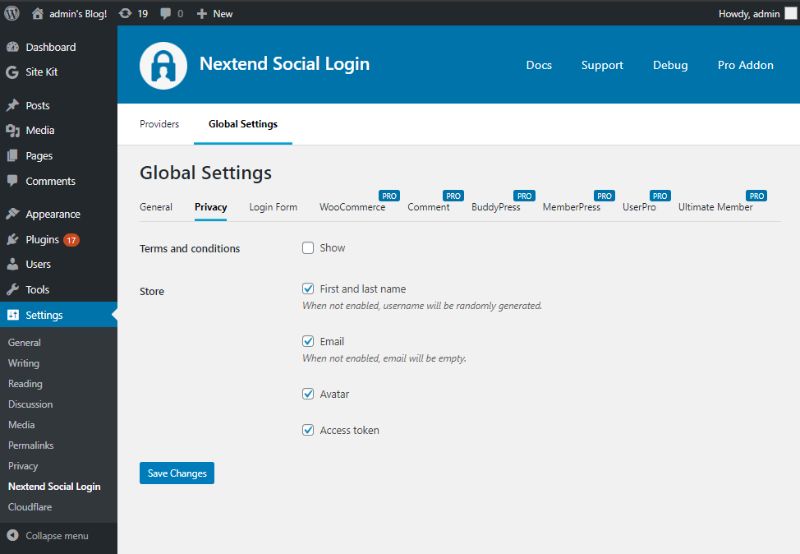
Next is the Privacy tab. From here you can either show/hide the terms and conditions on the login page.
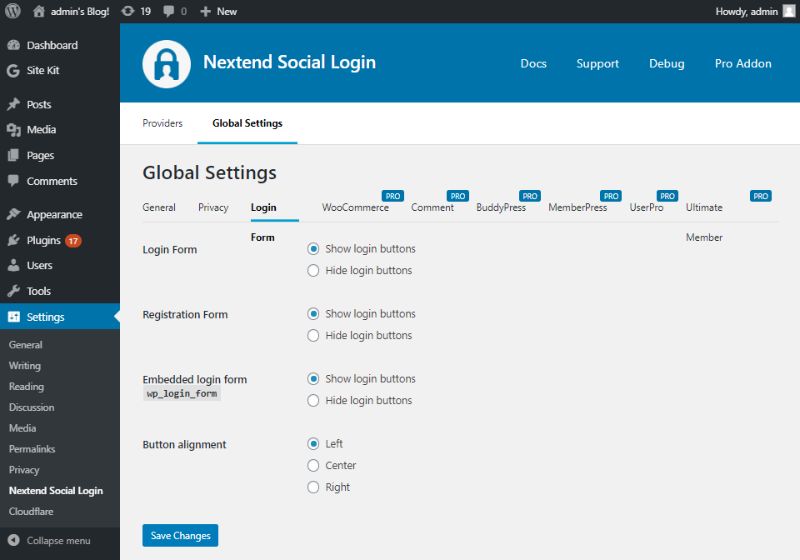
And finally, we have the Login Form tab. Here you get options to show/hide the login form buttons, registration form buttons, any buttons that come with the embedded login form and also configure the button alignment.
How Does The Social Login to WordPress Look?
Using the above steps we have configured and added social login to WordPress option using Google, Facebook, and Twitter. Here’s how it looks like from the front-end.
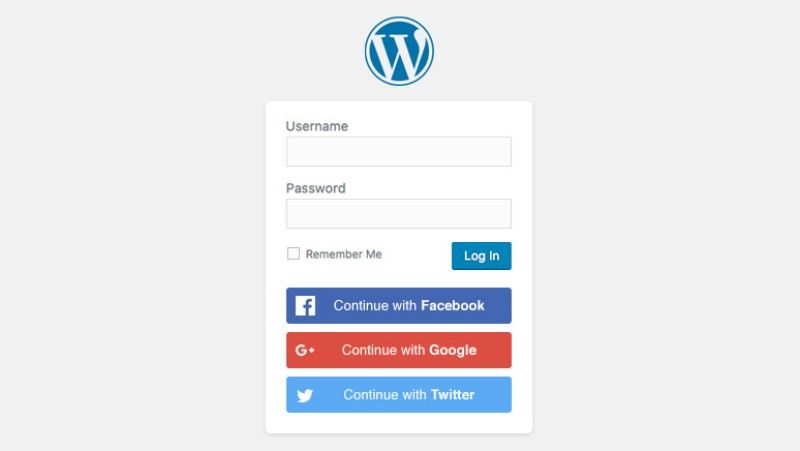
Now, one of your WordPress users can simply use the social login buttons to one-click Social Login to WordPress, without having to enter their username or password.
I hope this artcile helped you learn how to add social login to WordPress site. You may also want to see our setp by step guide on how to manage user roles and capabilities in WordPress.
0 Comments