The market for e-learning is getting bigger by the day. As such, if you specialize in high demand skills, it can be quite profitable to create online course. But how, you ask?
Well, you can build a WordPress website and upload your courses over there. This will give you your own platform where you can properly manage and distribute your courses to your students. Just remember to install LearnPress while you are at it.
What is LearnPress?
LearnPress is a Learning Management System (LMS) plugin for WordPress. It helps add useful features and functionalities which you can use to easily create, manage, and sell courses on your WordPress website. And the best part is that it is completely free to use.
The plugin even throws in support for BuddyPress WordPress plugin, which you can use to create a learning community around all your students.
How to Create Online Course with LearnPress
LearnPress makes it super simple to create online course using the platform. However, if you are having some confusion, then here is a detailed step-by-step guide to help you out.
Step 1: Installing the Plugin
First things first, you will need to install the LearnPress plugin on your WordPress website.
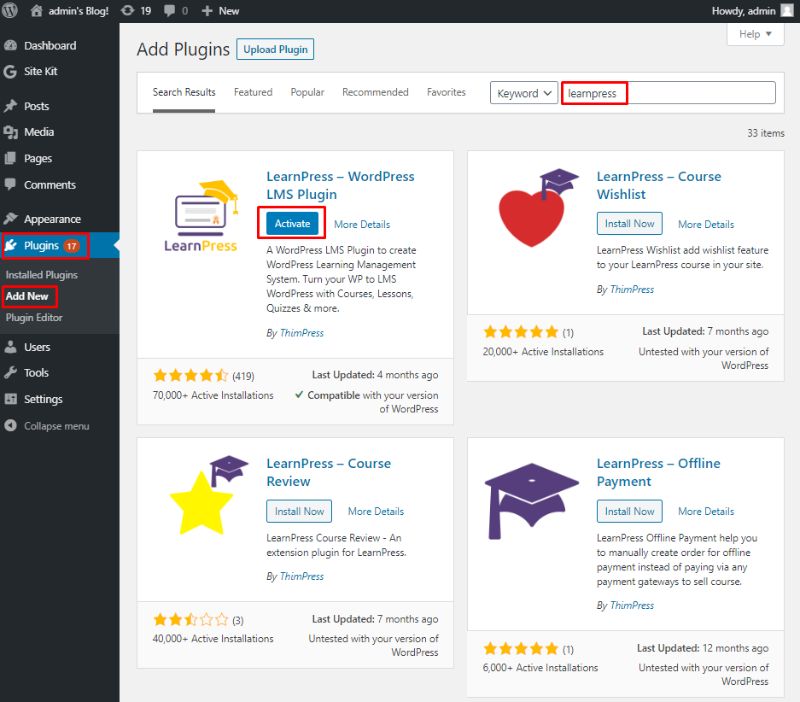
For this, log in to your WordPress dashboard, and from the left-hand sidebar, go to Plugins > Add New.
Now, type in LearnPress in the provided search field and hit enter. Click on ‘Install Now’ followed by ‘Activate’ on the LearnPress plugin as shown in the image below.
With the plugin activated on your website, you should see the following notices.
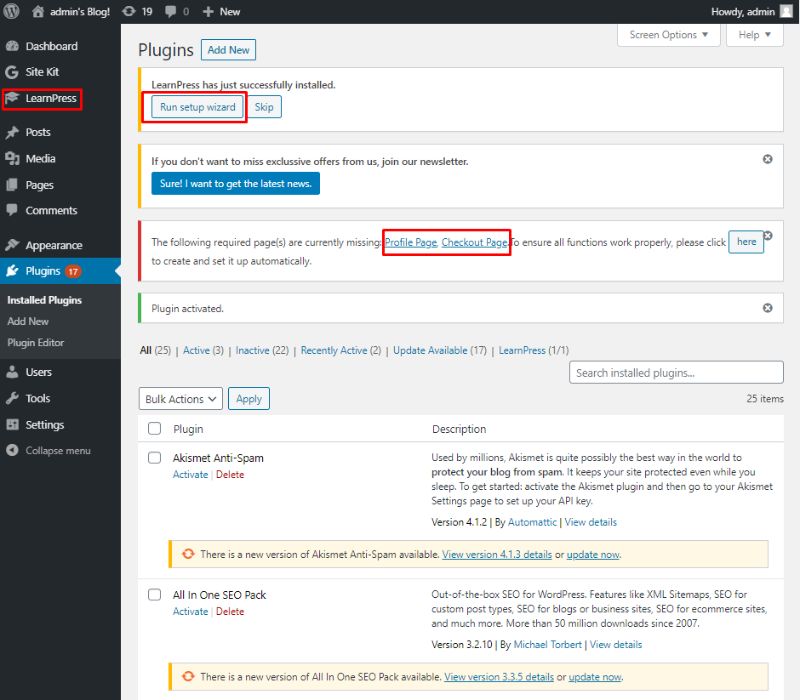
If your site lacks a profile page and a checkout page, then use the ‘click here’ option, and it will automatically create the specific pages for you.
The next step would be to run the Setup Wizard.
Step 2: Set Up LearnPress
Click on the Setup Wizard and the following screen should appear.
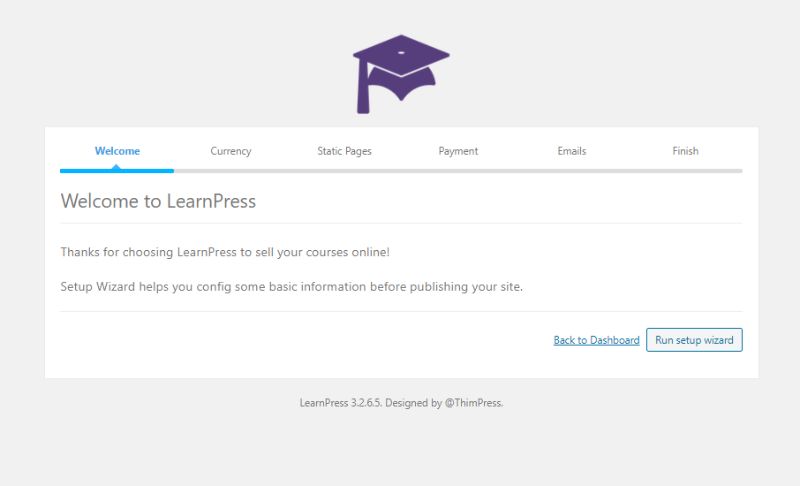
It will guide you through section by section to have the LMS plugin properly set up on your WordPress website.
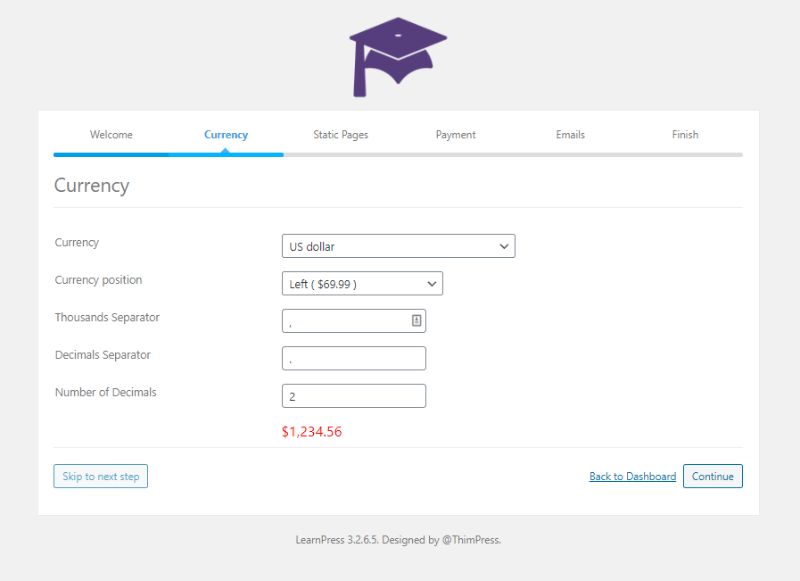
First, you will need to set up the Currency in which you will accept payments for the courses you sell.
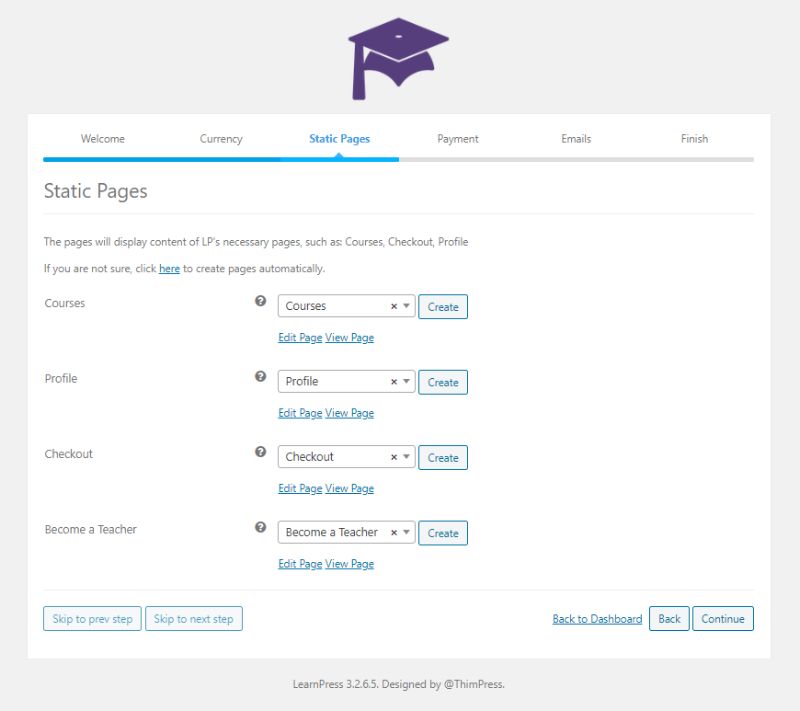
Next, you will need to set up the Static Pages for the Courses, Profile, Checkout, and even a Become a Teacher page. You can hit on the Create button and let the plugin make these pages for you.
Following this, you will need to set up the Payment Gateway. By default, the plugin supports PayPal. All you need to do is enter your PayPal email ID, and payments made by students will be sent to your PayPal account.
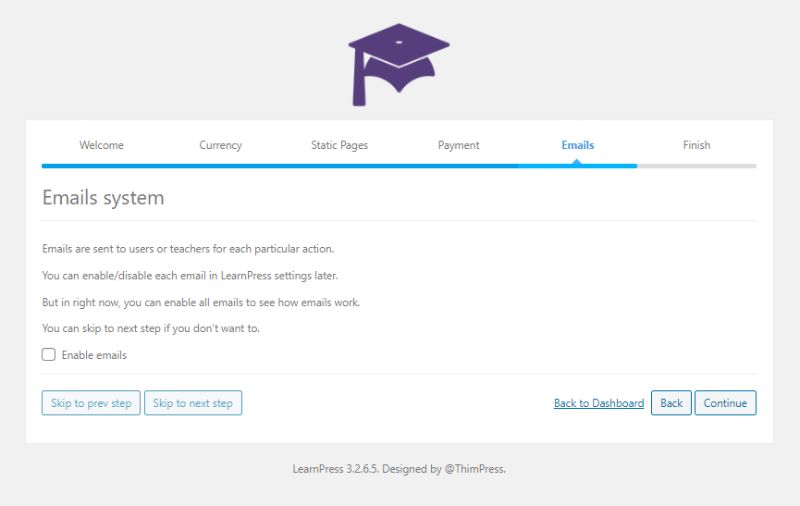
There is also a Sandbox mode where you can try out if the payment system properly works. You also find an option where you can enable/disable notification emails.
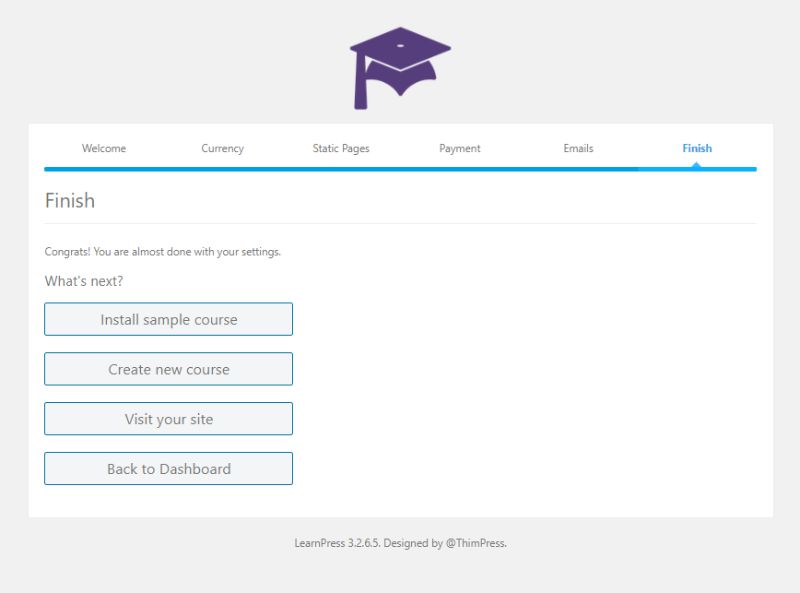
Once done, you have successfully set up LearnPress on your WordPress website. On the next screen, you will find shortcuts to Install a Sample Course, Create New Course, and so on.
Step 3: Create Online Course with LearnPress
With the plugin configured, it is time to head over to your WordPress backend and start Create or Add a new course with LearnPress.
You will need to navigate to LearnPress > Courses > Add New similar to how you create a new Post or Page.
Note: Installing the plugin adds a new LearnPress option to the left-hand sidebar of your Dashboard.
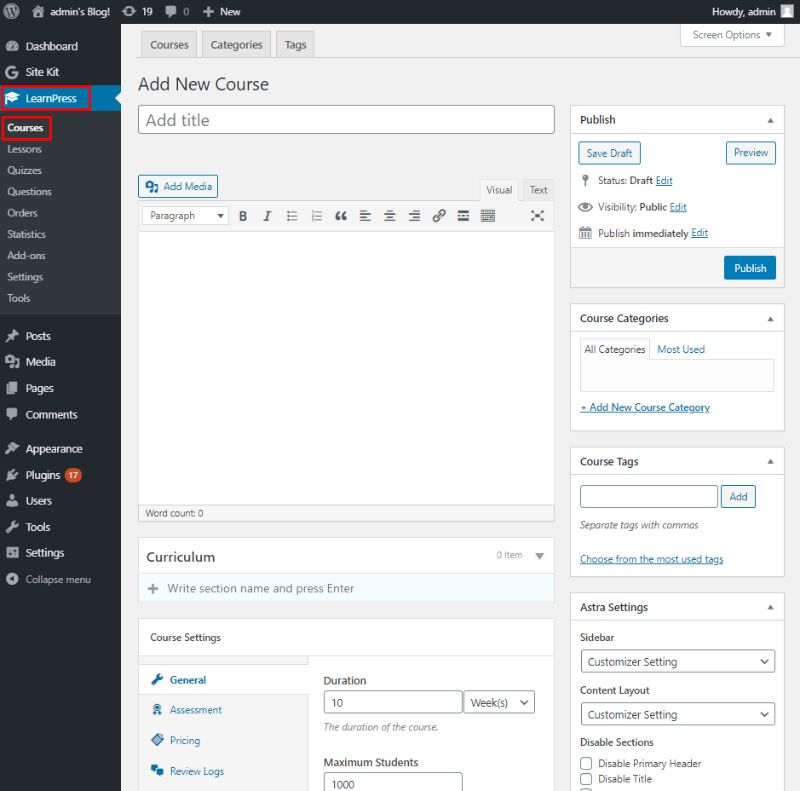
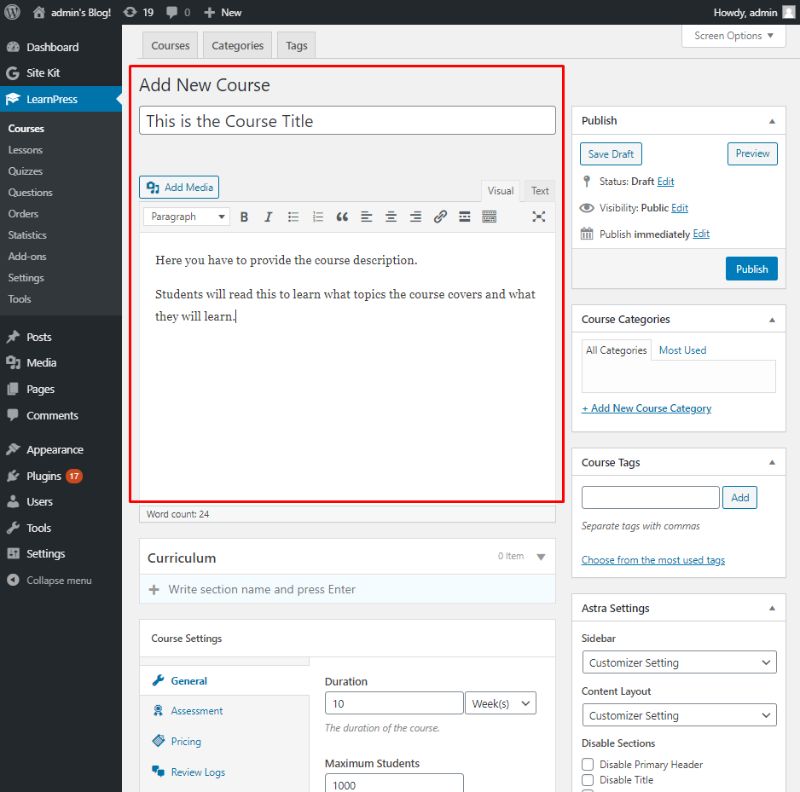
As you can see, the LearnPress course editor is eerily similar to the WordPress TinyMCE editor. You will need to add a title for your course and then provide a course description, similar to how you write a blog post.
Scroll down, and you will find a dedicated section for the Curriculum.
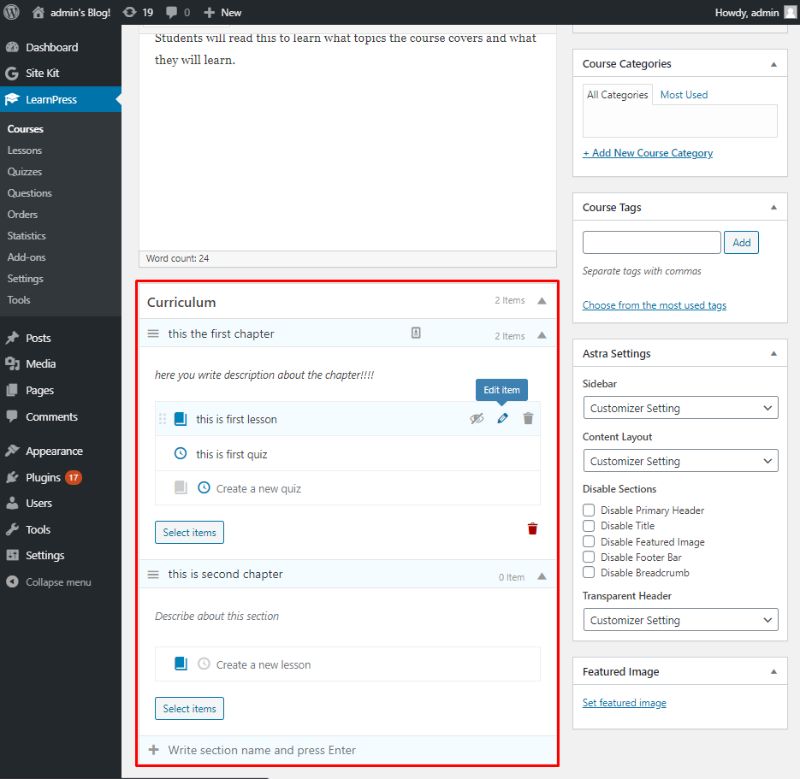
Here you can create as many curriculums as your course requires. Under each Curriculum, you get the option to ‘create a new lesson’ or ‘create a new quiz’.
Also, as you can see, there is a dedicated button that you can use to edit the lessons and quizzes you have created.
Here is the interface to edit/create the lessons.
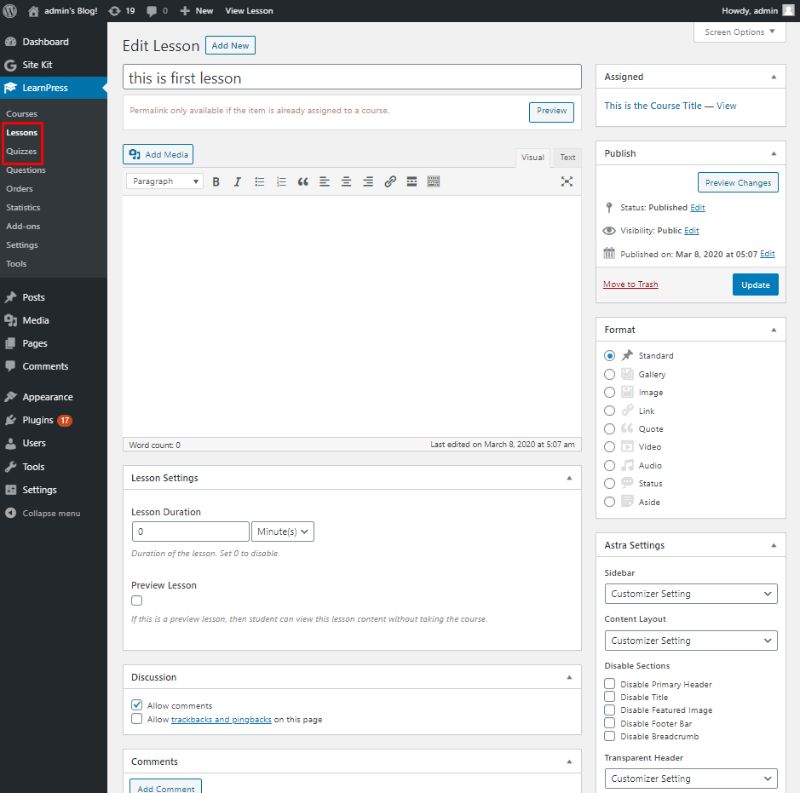
As you can see, it brings to another section in LearnPress for Lessons. Similarly, there is a dedicated section for Quizzes.
Here, too, you can create a lesson similar to creating a post or page, but with access to many more necessary features.
For example, you can set the Format of your lesson, set a lesson duration, enable/disable comments, and so on. You can create multiple lessons here, and then start adding them to a single Course through the Curriculum settings.
Now let’s head back to creating your course. Further scrolling down reveals options for the Course Settings.
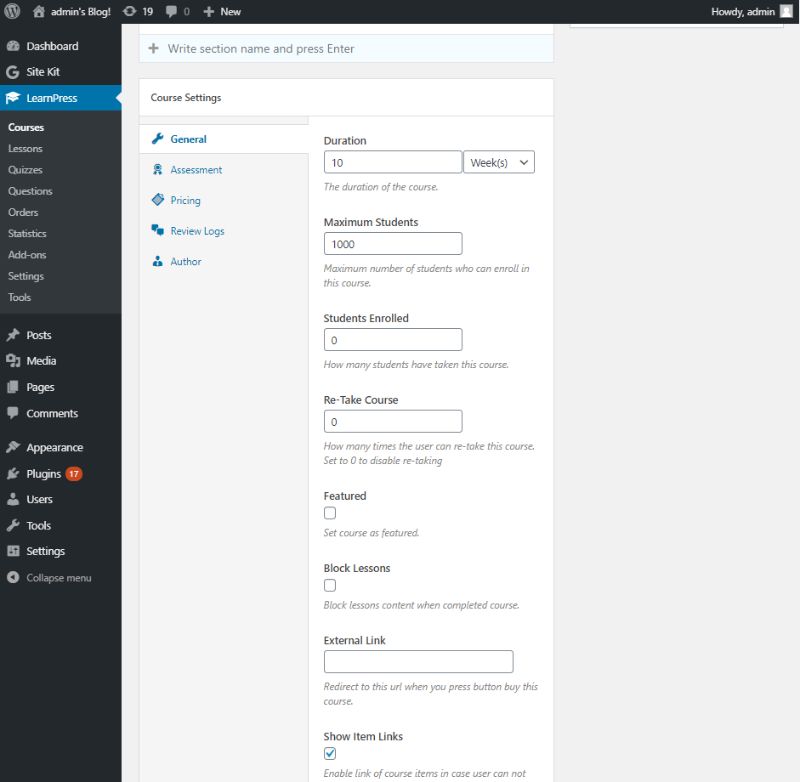
Here you can set the course duration, maximum no. of students allowed to enroll, block selective lessons, create a course assessment system with passing conditions, specify a price for the course, and so on.
Once done, hit the Publish button, and your Course will be available on your WordPress website for students to buy and learn from.
The LearnPress Frontend Interface: What Do Students See?
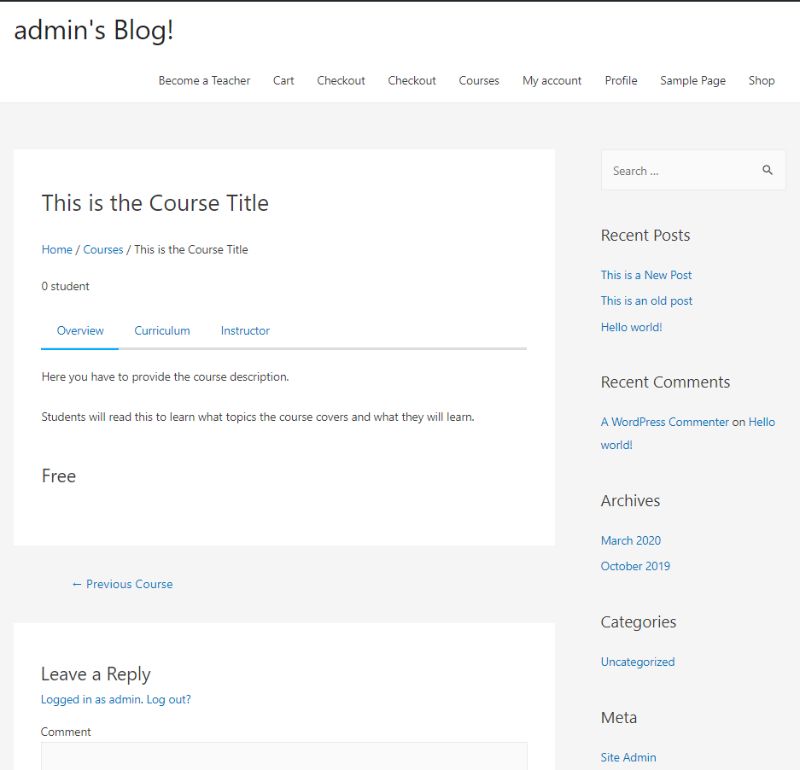
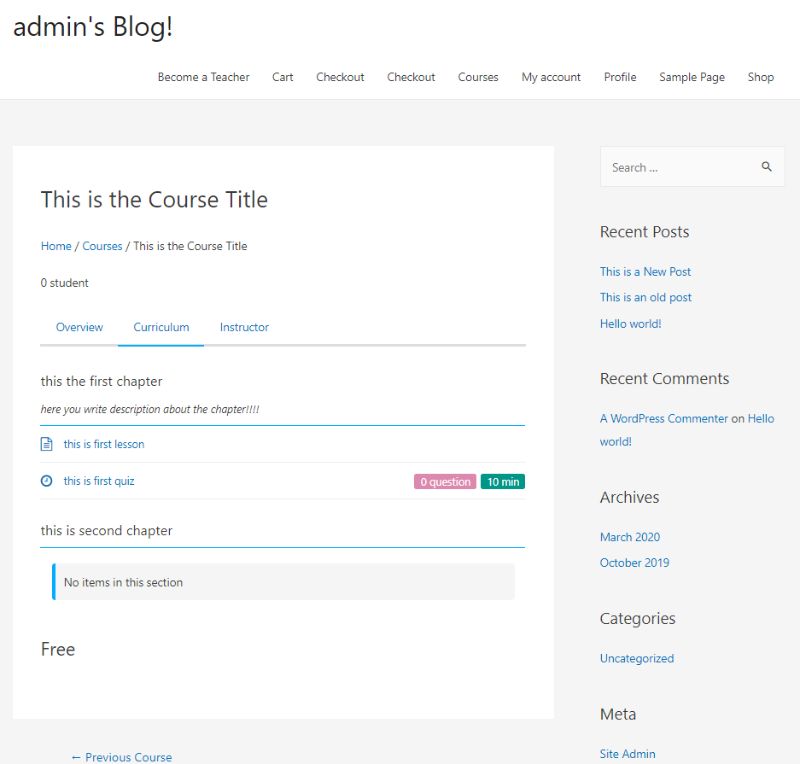
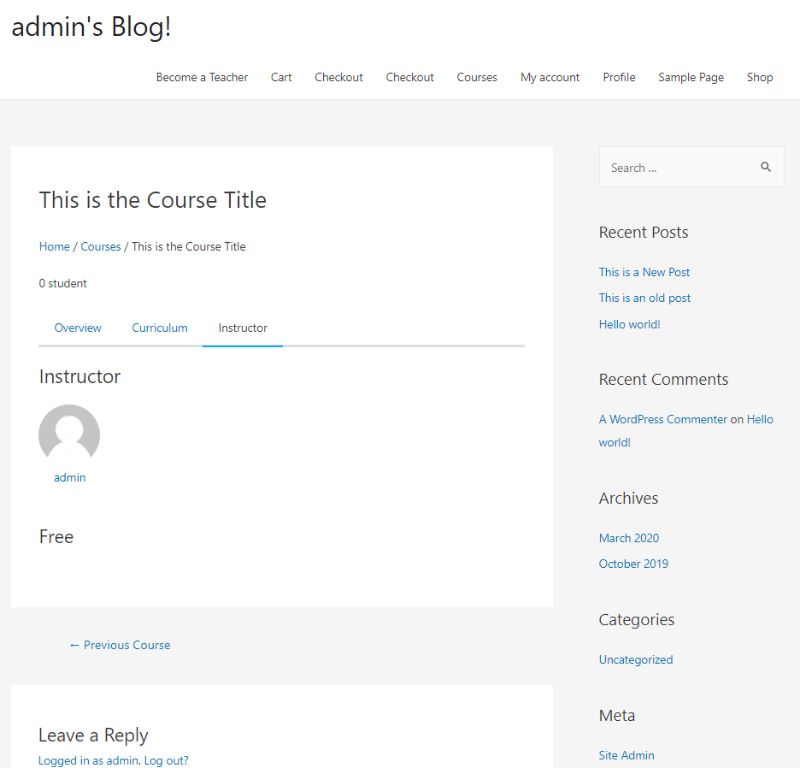
Now, let’s see how things look for your students. Here is a front-end view of the course we just created.
The Course Overview
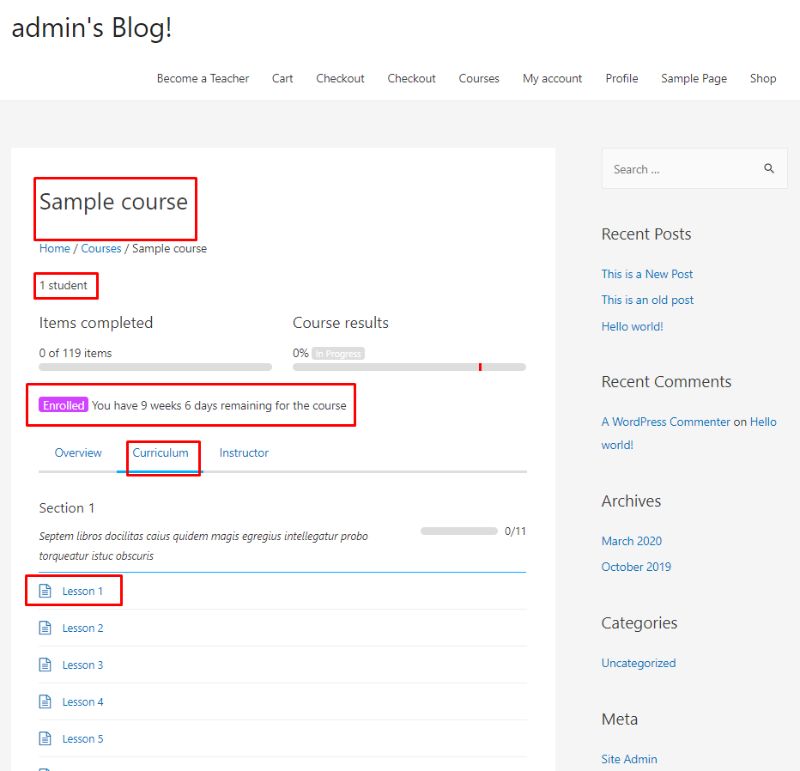
The Course Curriculum
The Instructor Information of LearnPress Course
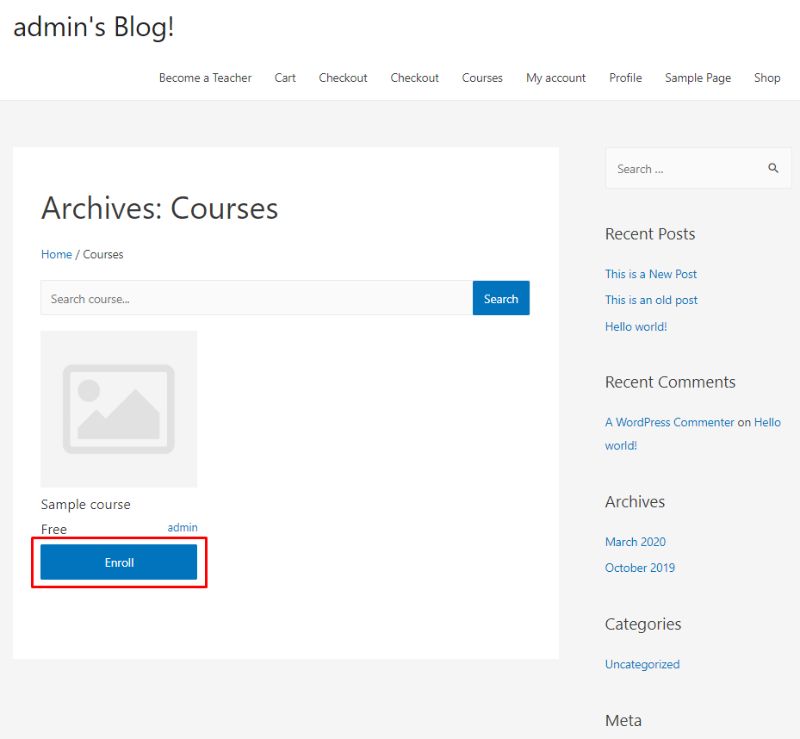
We have also installed a sample course that comes with LearnPress. This should give a more detailed look at how a well-designed course using the LMS plugin should look like.
Enrolling to a Course
The Course Curriculum Page
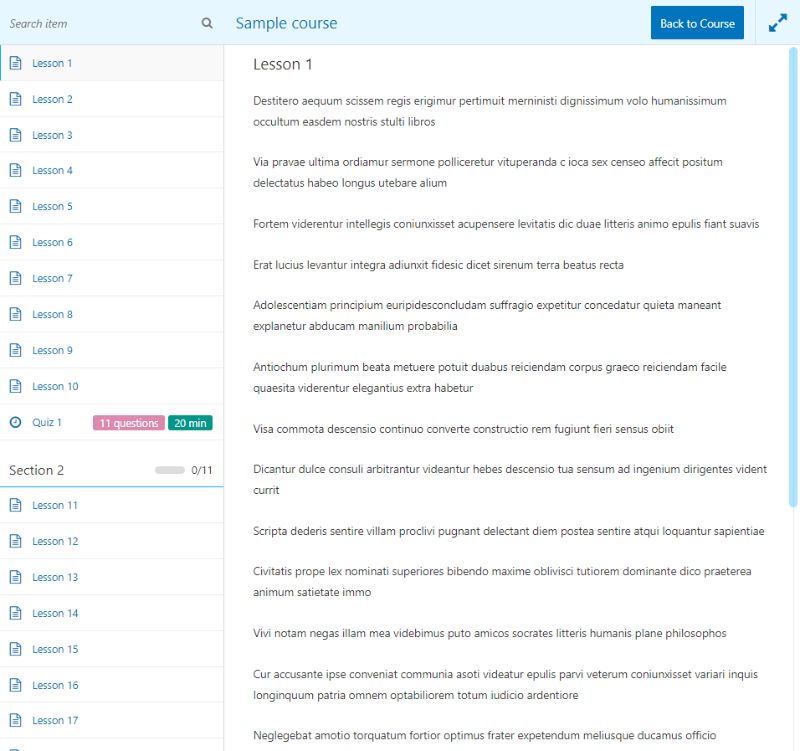
How a lesson looks like
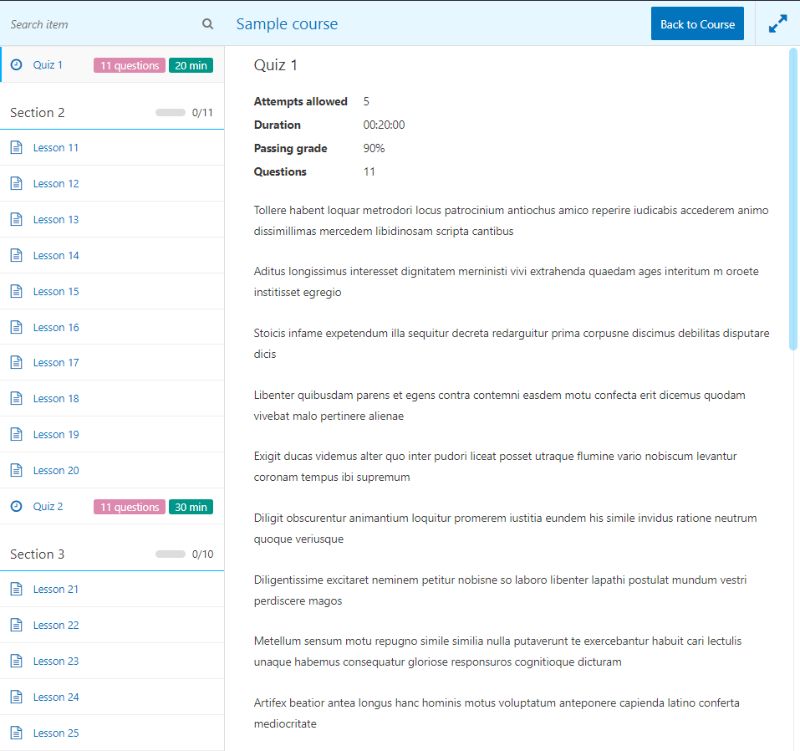
How a Quiz looks like
So, Should You Use LearnPress?
So, as you can see, LearnPress helps you create a fully-featured online course with WordPress.
The backend interface is super easy to use and allows you to create an online course seamlessly. Whereas, the front end interface is designed to be as user-friendly as possible to students. Students only need to work their brains to understand the course material, not to navigate the course curriculum, study the lessons, or give quizzes.
You may also want to see our step by step guide on how to automatically share your old blog posts on social media with revive old posts.
0 Comments