Does your WordPress site get spam registrations and spam emails time to time? One effecient way to prevent your site from spam is by using reCAPTCHA. It is an effective tools to block spam bots on login, registration, and comment forms. In this article, I will show you how to add Google reCAPTCHA to WordPress site.
How to add Google reCAPTCHA to WordPress site
In this tutorial, I will add Google reCAPTCHA to WordPress site by using reCaptcha by BestWebSoft plugin. It is one of the most popular Captcha plugins with over 200,000 active installations. The free version of this plugin provides the following features:
- Login form protection
- Registration form protection
- Comments form protection
- Reset password form protection
- Hide reCAPTCHA for the selected user roles
- Add IP address to Whitelist
- Add custome code
Let’s take a look at how to add Google reCAPTCHA to WordPress site with Google CAPTCHA plugin.
Step 1. Install Google Captcha plugin
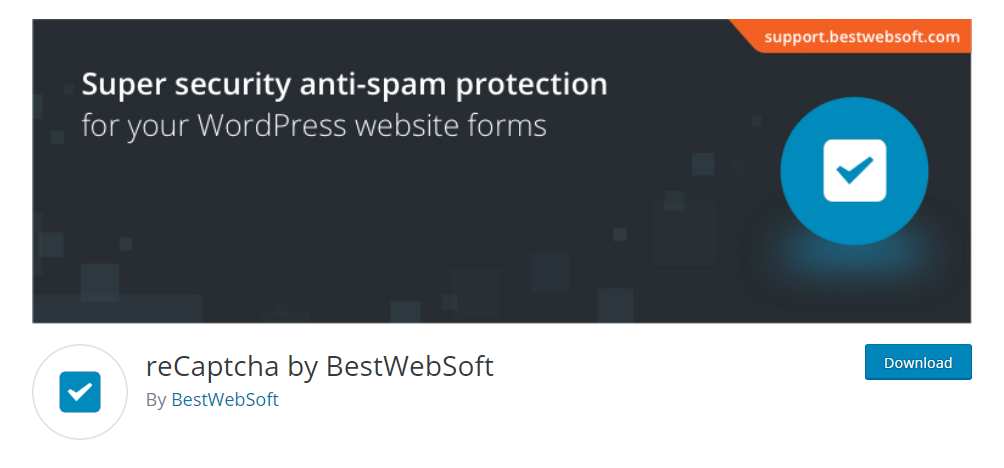
First thing you need to do is install and activate reCaptcha by BestWebSoft plugin. For more details, please see our step by step guide on how to install WordPress plugin.
Upon activation, click on Google Captcha in WordPress admin navigation bar. Clicking on it will take you to Google Captcha Settings.
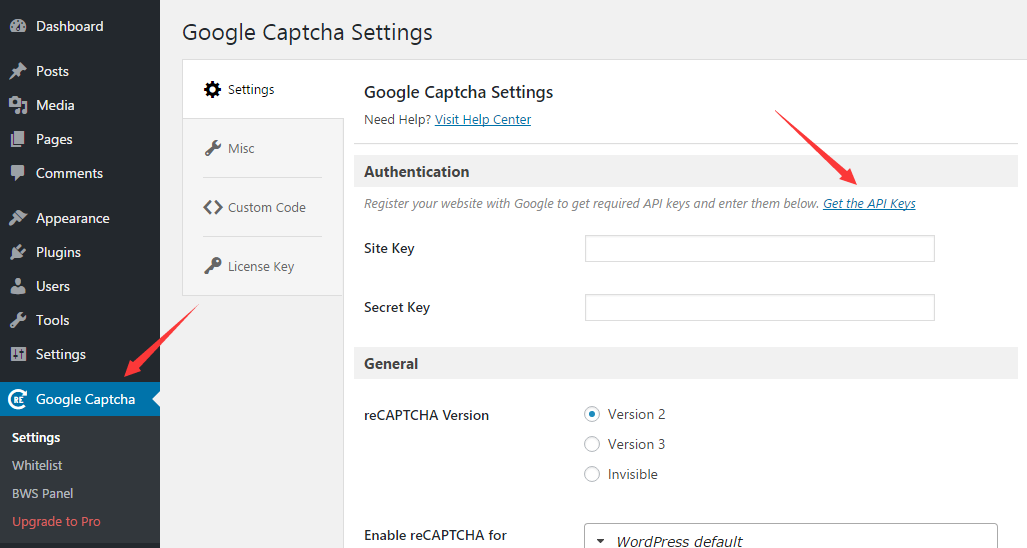
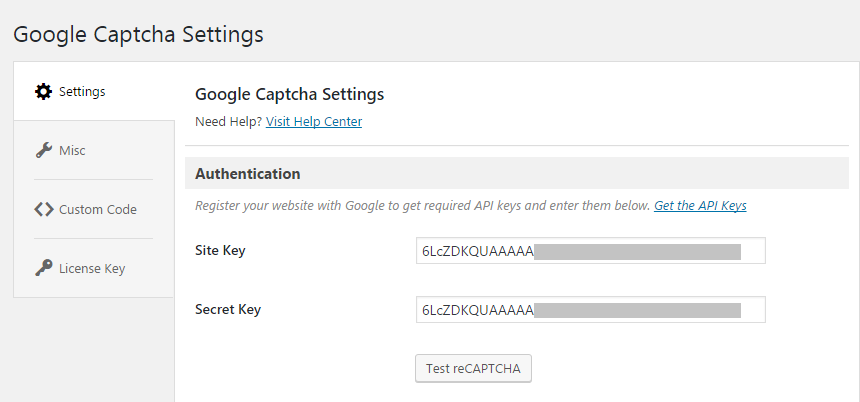
You will be asked to provide Site Key and Secret Key. To get Google reCAPTCHA keys, you need to click Get the API Keys text link to register your site on Google.
Step 2. Register your website with Google
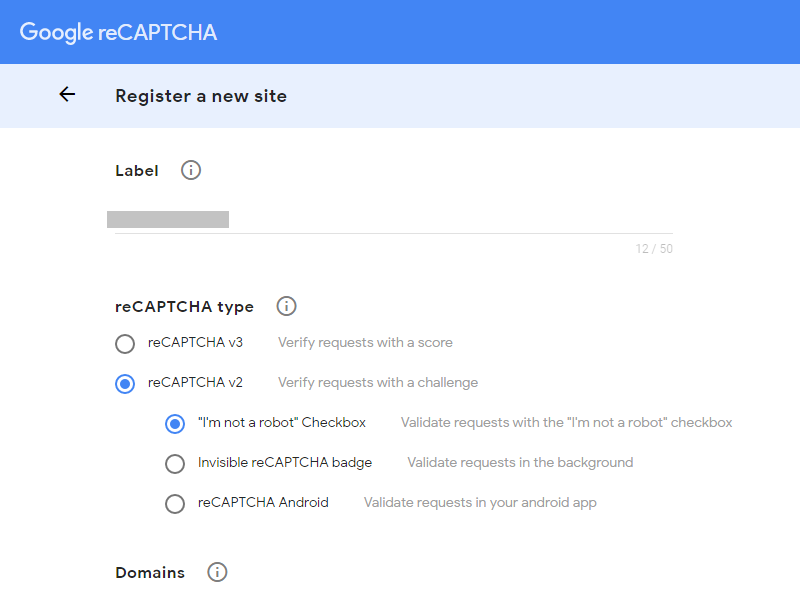
Once logging in to Google, you need to fill out all requested information in order to register your site, such as lable, reCAPTCHA type, domain and more. It’s completely up to you to select which reCAPTCHA type you use. Once all is done, click on SUBMIT button.
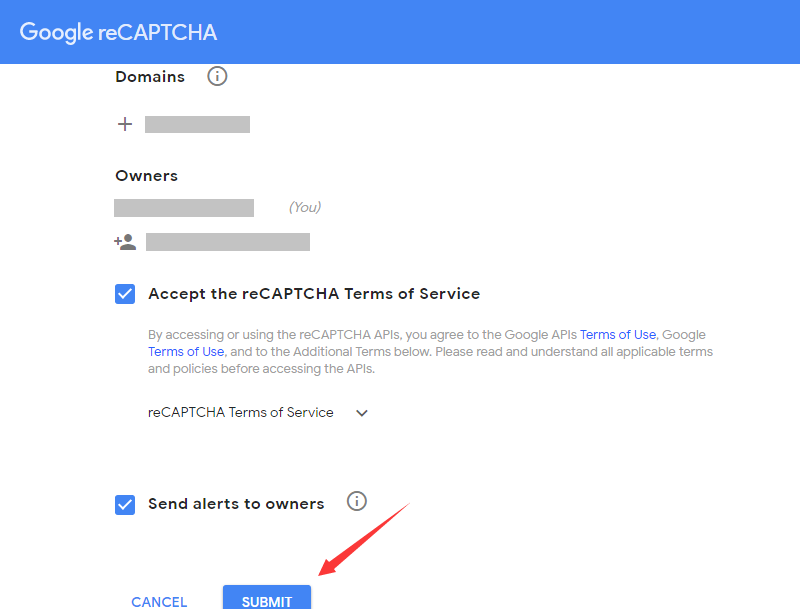
Clicking on Submit button will take you to the next page. You will get site key and secret key if you have successfully registered your site.
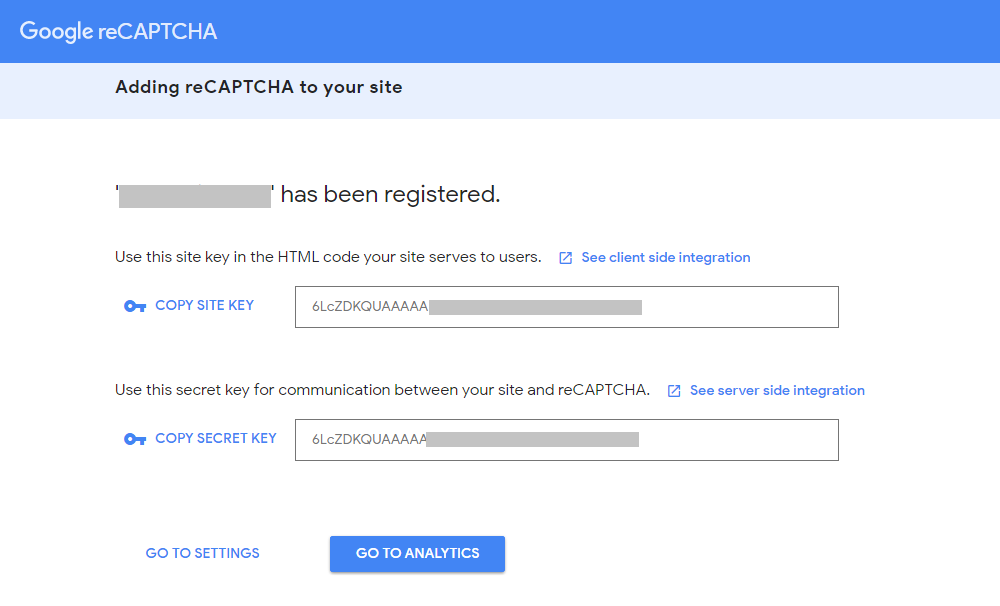
After getting site key and secret key, you need to go back to the plugin and paste them into authentication section. You can also test it by clicking Test reCAPTCHA button.
Step 3. Configure Google Captcha plugin settings
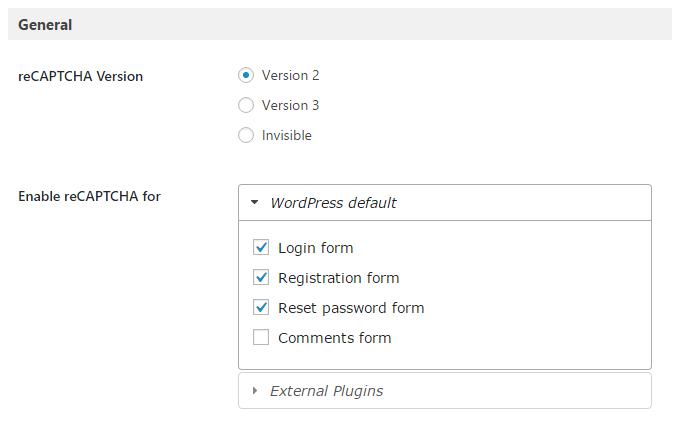
After the authentication is complete, you need to cofigure the general settings. Mark reCAPTCHA version and enable reCAPTCHA for the desired forms like login and registration froms.
Check the desired user roles for the option ‘Hide reCAPTCHA for‘ and choose reCAPTCHA theme. You can also customize whitelist notification and check or uncheck Advanced Protection and Disabled Submit Button.
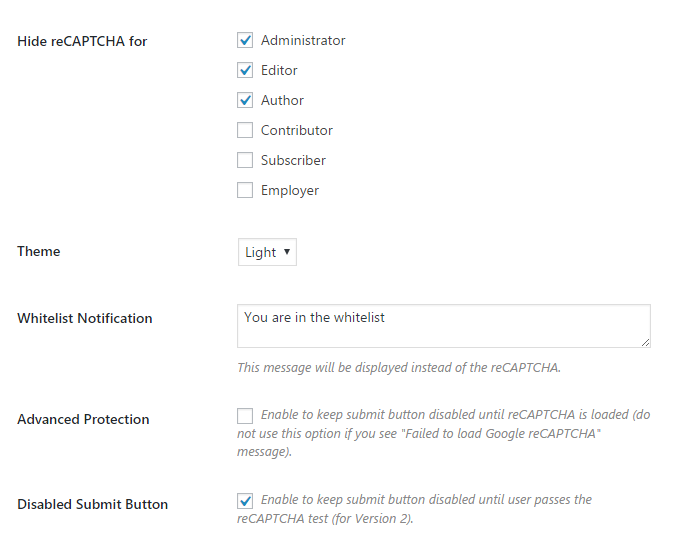
Once done, click on Save Changes button on the bottom of Settings page.
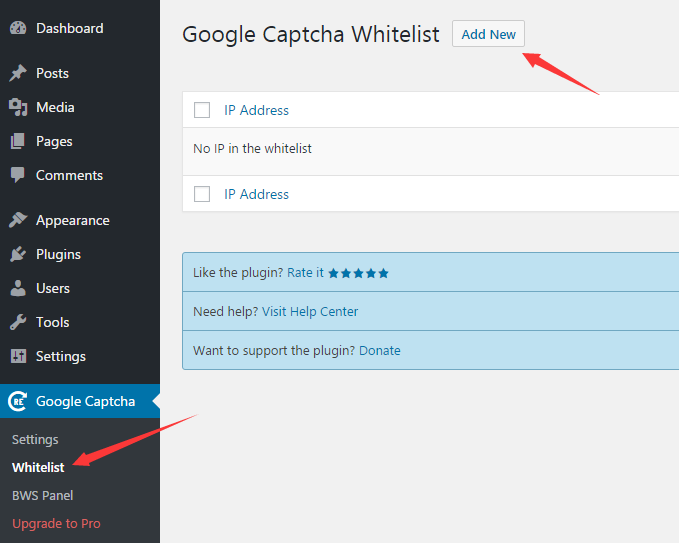
Google Captcha plugin offers Whitelist feature. This will hide Google reCAPTCHA for the Whitelisted IP addresses. Go to WordPress admin dashboard > Google Captcha > Whitelist and click Add New button.
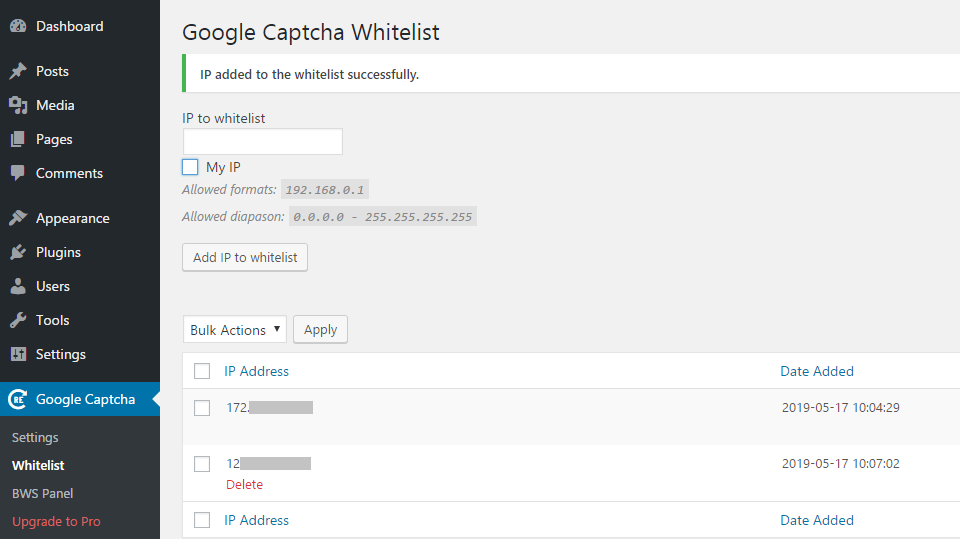
After that, enter IP address in appropriate field and click Add IP to whitelist button. Then the IP address will show in white list below. If you want to add your own IP address, simply check My IP option and add it.
You can also remove the whitelisted IP address by clicking on Delete underneath the IP address.
That’s it. I hope this article helped you learn how to add Google reCAPTCHA to WordPress site. You may also want to see our guide on how to hide a WordPress page from Google.
0 Comments