Are you looking to learn how to add two-factor authentication in WordPress? If you do, then you have come to the right place.
In this article, we will explore easy ways to achieve two-factor authentication.
But, before we do, let’s learn why do we need it in the first place.
Security has always been a top priority for any site. Apart from securing your site using a security plugin, you also need to make sure that you put a strong password, but also enable two-factor authentication.
Two-factor authentication (2FA) is a two-step process where you not only need to use your password to log in but also require a freshly generated code to log in.
In short, you can only successfully log in if both the conditions are met. This is super effective against bots or hackers that try to guess your password to get access to the WordPress back-end.
2FA is used by all the major companies. Some of them have it mandatory including Amazon, whereas some including Facebook needs the user to enable it first. The second-step authentication can be done via a code sent to your email or to your phone via SMS or authenticator app.
How to Add Two-Factor Authentication in WordPress
As a WordPress user, you can implement the two-factor authentication in WordPress in two ways.
- SMS verification → In this process, the verification code is sent via text message.
- Google Authenticator app → In this process, the verification code is served via the app.
To ensure that we are on the same page, we are going to use Google Authenticator. It is a popular WordPress Two Factor Authentication plugin with more than 20,000+ active installations.
It also offers both SMS verification and the Google Authenticator app.
But, before we decide to go through both the methods, let’s quickly take a look at the key features that it has to offer.
- Easy to use interface
- Supports 2FA for 3 users free of cost
- Supports login with phone number and passwordless login
- User login monitoring
- Supports a variety of authentication methods including Authy, LastPass Authenticator, Push Notifications, and so on!
- Protects against IP Blocking and force attack prevention
They also have paid options where they offer standard plugin and premium plugin. Both the plans have their own set of features and you can learn about it from their official page.
If you are an enterprise business, then also you can use the plugin as they offer an enterprise version of the plugin.
Install the Plugin
First, you need to install it in your WordPress site.
Simply go to Plugins > Add New and search for Google Authenticator. The one by miniOrange is you need to install.
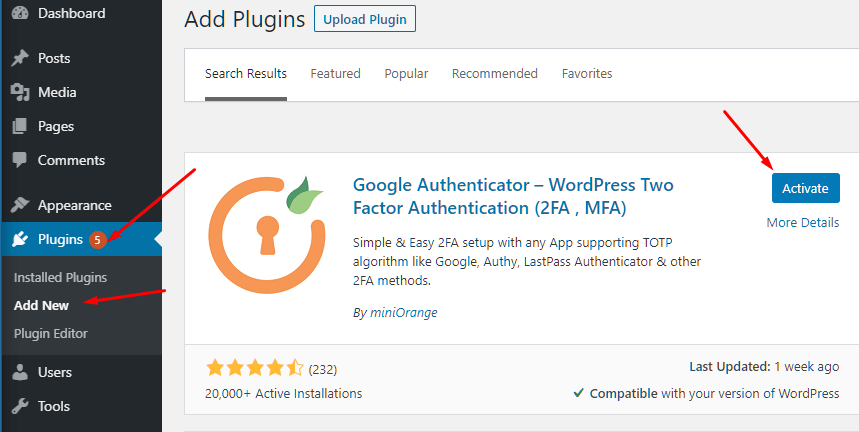
Now, click on Activate.
Set Up Google Authenticator Plugin
Once activating the plugin, you will now be able to access the plugin features. To do so, check the website dashboard on the side. There, you will find miniOrange 2-Factor label. Click on it.
The first time you open the app, you will be asked if you want 2-Factor plus Website Security or Just 2-Factor Authentication.

As we are only interested in 2-Factor authentication, we will select it and click on “continue.”
For the free version, you will only get the option to use the Google Authenticator option.
Click on Configure to start your plugin configuration process.

Now, you will be redirected to a new page where you need to set up your authenticator. Out of the box, you will get the option to use Google Authenticator, Authy Authenticator, or LastPass Authenticator.
Before you get started, you need to install the authenticator of your choice. For the purpose of the tutorial, we are going to use Google Authenticator.
Next, you need to choose the account name. Let’s name it, “SettingUpTwoFactor”.
Now, open the Google Authenticator and scan the QR code that is shown on your setup page.
You can also choose “Enter a setup key” and then enter it to your Google Auth app as well.
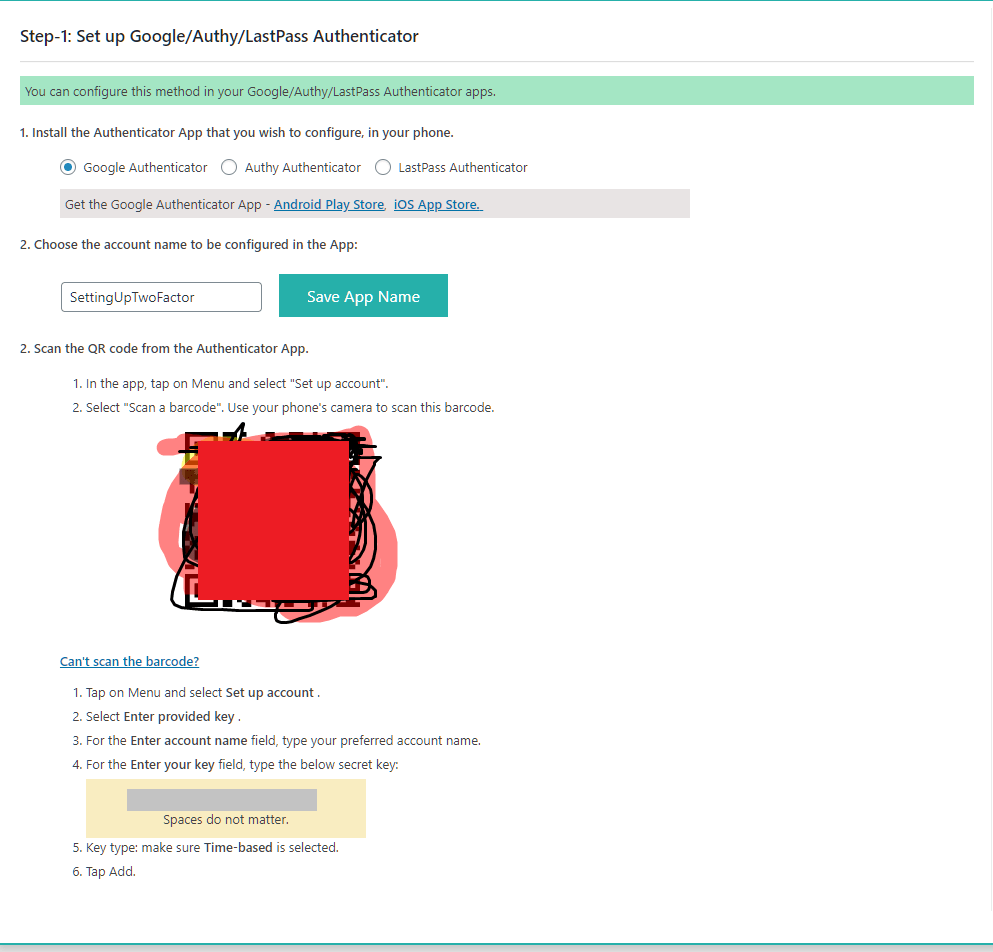
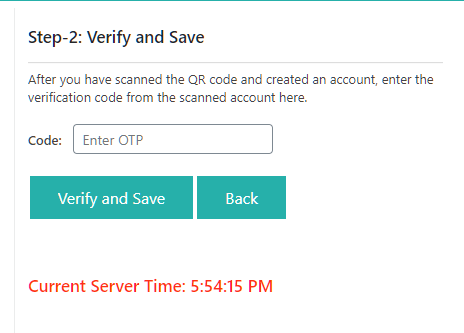
Once you have added it to your app, you will see that it will showcase it on your mobile. To complete the setup, you need to enter the OTP from the app to your website. Then click on Verify and Save button.
Test Two-Factor Authentication
Once you click on “Verify and Save”, you will now be redirected to a new prompt where it will ask you to test it out.
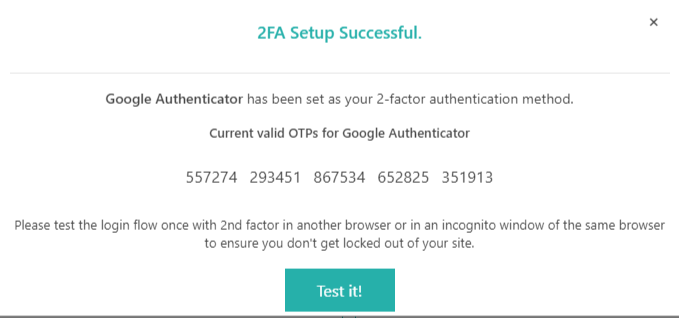
Click on Test it! button. And you will be redirected to a new page where it will ask you to enter the OTP again.
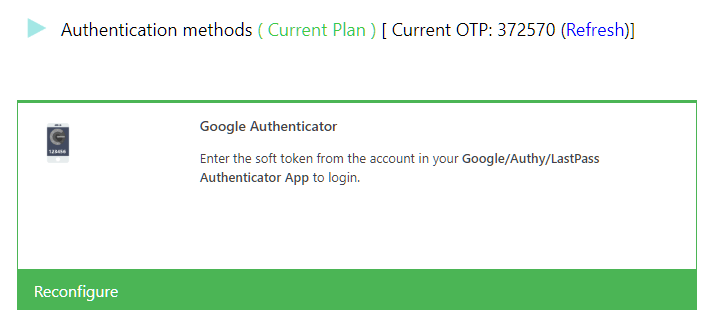
If everything works out, you will see it redirect back to the plugin page where it will showcase as Current Plan in green with the current OTP value.
But, what about if you want to set up with OTP over SMS. To do so, you need to buy a premium plan for it.
However, if you are not able to, then you can choose to use other plugins such as Two-Factor. You can also try out the Orion SMS OTP Verification.
The process for enabling 2FA over text messages using the above two plugins should be similar to how you enabled 2FA using the Google authenticator app. So, all you need to do is install the plugin and then follow its wizard to enable it.
Conclusion
This leads us to the end of our add two-factor authentication tutorial. So, what do you think about adding 2FA to your site? Comment below and let us know. Also, if you get stuck, share your problem in the comment section as well.
You may also want to see our in-depth step by step guide on how to add Instagram Feed to WordPress.
0 Comments