Contact form is one of the most important parts of your WordPress website. After all, it acts as a gateway for your site’s visitors to connect with you. In this article, we will go through a tutorial on how to create a contact form in WordPress.
To make it easy for you, we are going to use the WPForms Lite plugin. It is a drag & drop form builder, which makes it beginner-friendly.
But, before we do it, let’s learn why you need a contact form?
Why You Need a Contact Form?
Before we go and create a contact form, let’s try to learn why you need it on your site.
After all, you may think that your site already has an email address for others to connect to you, right? But, why contact form?
Well, contact forms make it easy for the visitors to communicate with you. They can simply type in the required field and click submit. In comparision, users need to copy email and to compose it before they shoot it out.
Also, beginners are not so confident when it comes to integrate a contact form on their website as they think that they need to have coding knowledge before they can create a contact form.
By using a contact form, you can have three benefits:
- Save the time of the visitor: It can save time for the user as they do not have to copy-paste email or then send the email through their personal email.
- Spam protection: It protects you for spam as your email address remains safe and is not open to everyone out there. Also, modern forms have spam protection, which filters spam emails from reach your inbox.
- Consistent information: With forms, you are bound to get consistent information. It should be noted that users will use their own way of expression if you do not give them forms.
How to Create a Contact Form in WordPress
Let’s discuss the steps required to create a contact form in WordPress.
Step 1: Choose the Right Contact Form Plugin for Your WordPress Site
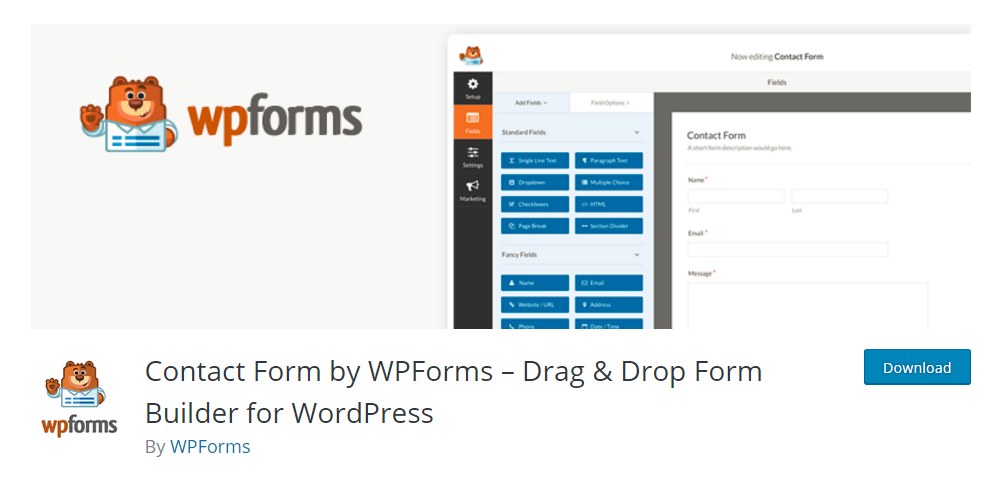
In the quest to create a contact form, you need to choose a plugin for your site. There are many contact form plugins out there. You can choose Contact Form 7 or WPForms. Both are good.
But, for the tutorial purpose, we are going to use WPForms — free edition. You can also try out the PRO version if you think that it meets your requirements better.
Step 2: Downloading and Installing WPForms Lite plugin
Now that you have decided on your plugin, you need to download and install the plugin.
Go to your site’s WordPress admn dashboard, and then select Plugins > Add New.
From there, type in the search, “Contact Form by WPForms.”
The screenshot gives you a good idea of what to do!
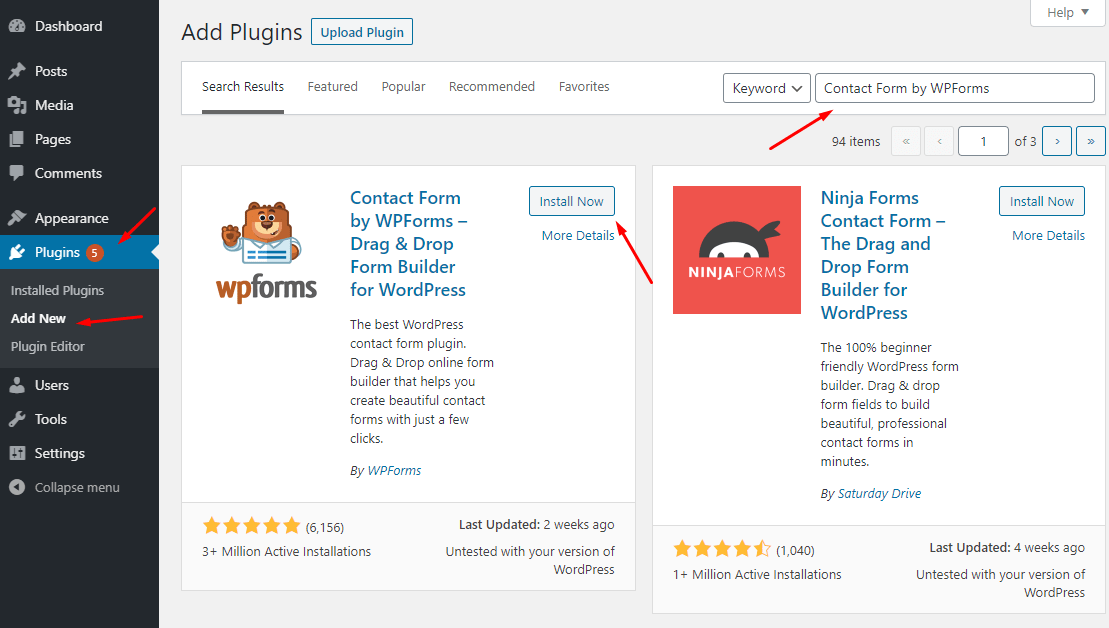
After installing, you need to activate it.
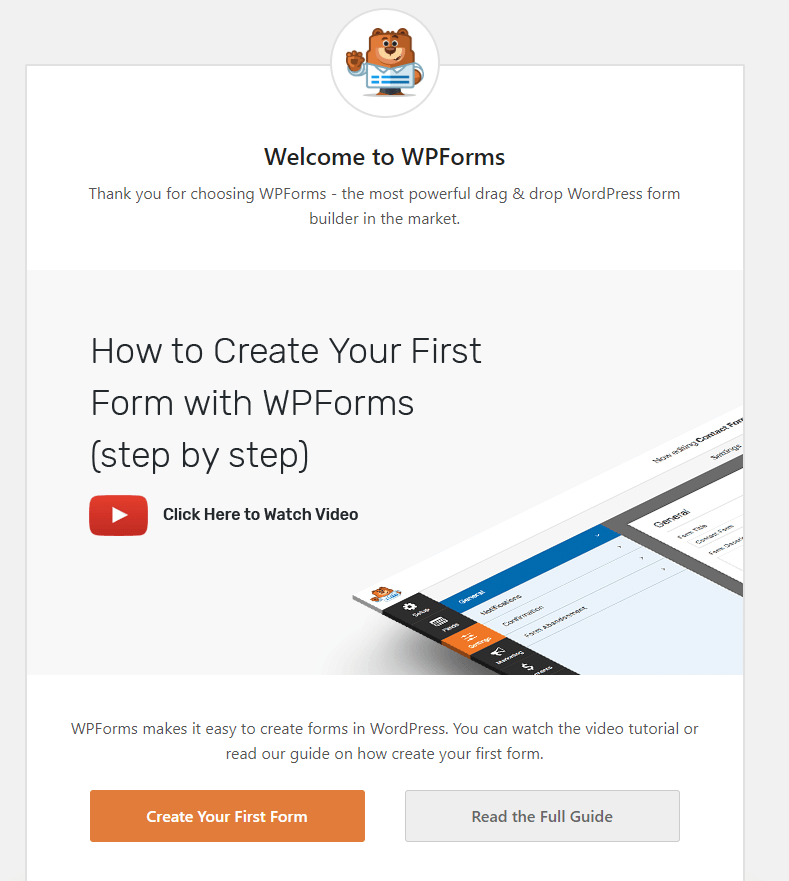
Instantly, it will give you a welcome screen as below.
Step 3: Creating a Contact Form
Next, click on “Create Your First Form.”
For any reason, if you miss the welcome screen or the welcome screen is not shown, then you need to click on WPForms on the sidebar and then click on “Add New.”
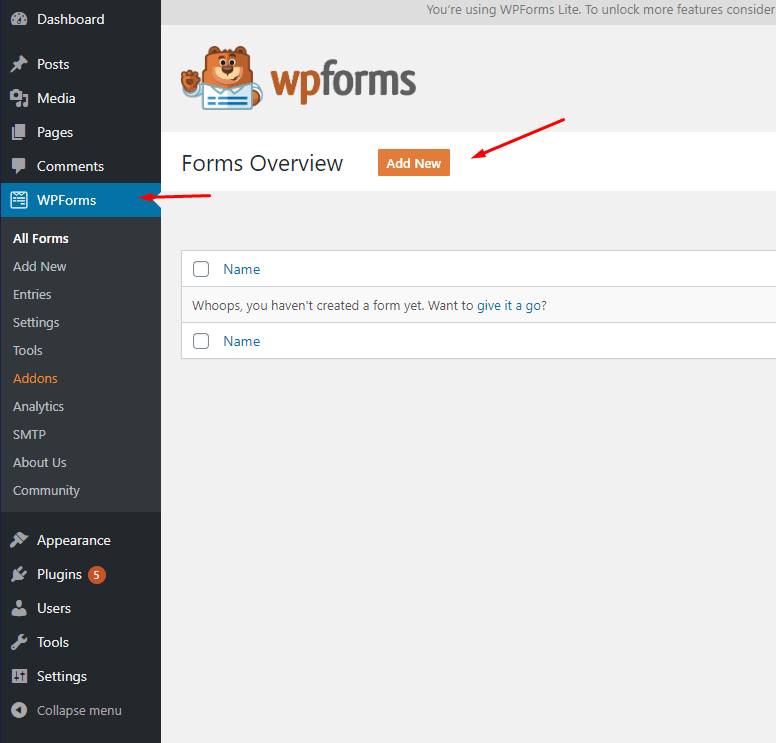
You will see a WPForms drag-and-drop builder.
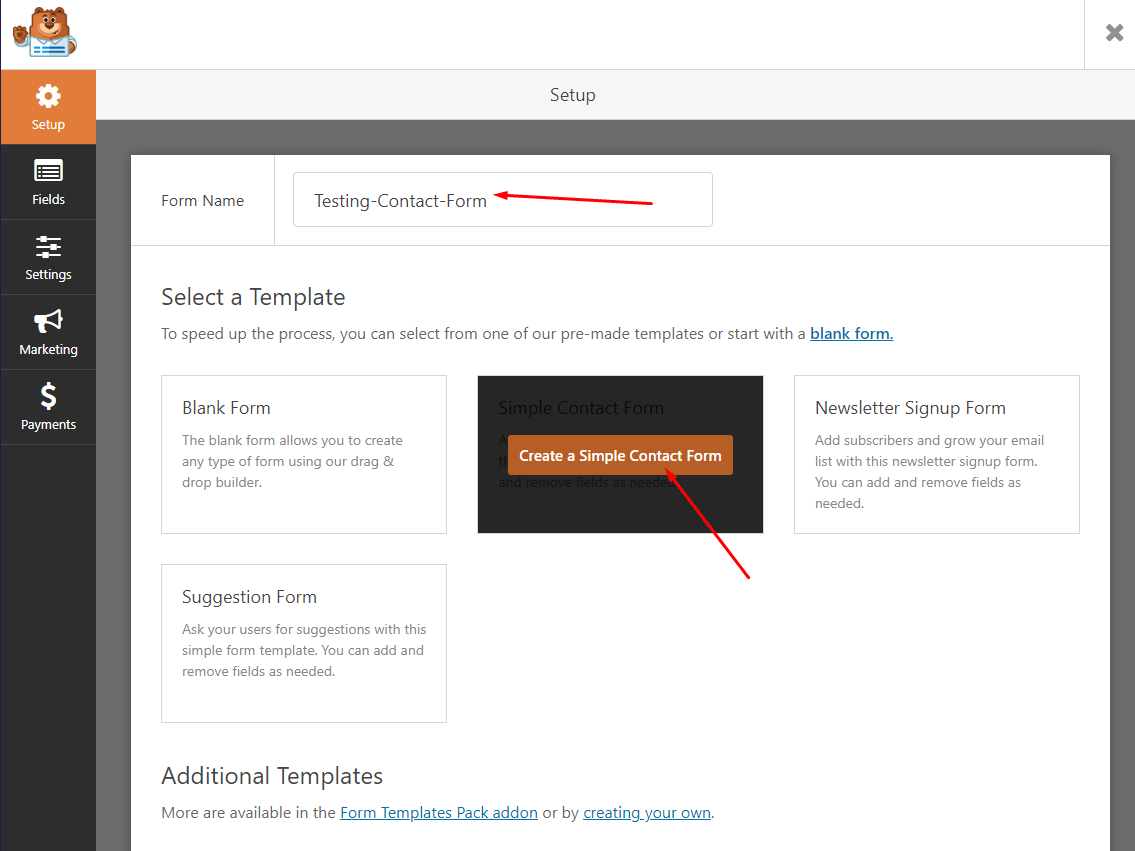
Now, you need to give your contact form a name and then choose the template for your form.
We are going to give our contact form the name “Testing-Contact-Form,” and choose the Simple Contact Form.
Next, you will see a new window, where on the left, you will be shown the fields and on the right the form itself. You can drag-and-drop the fields from left to right.
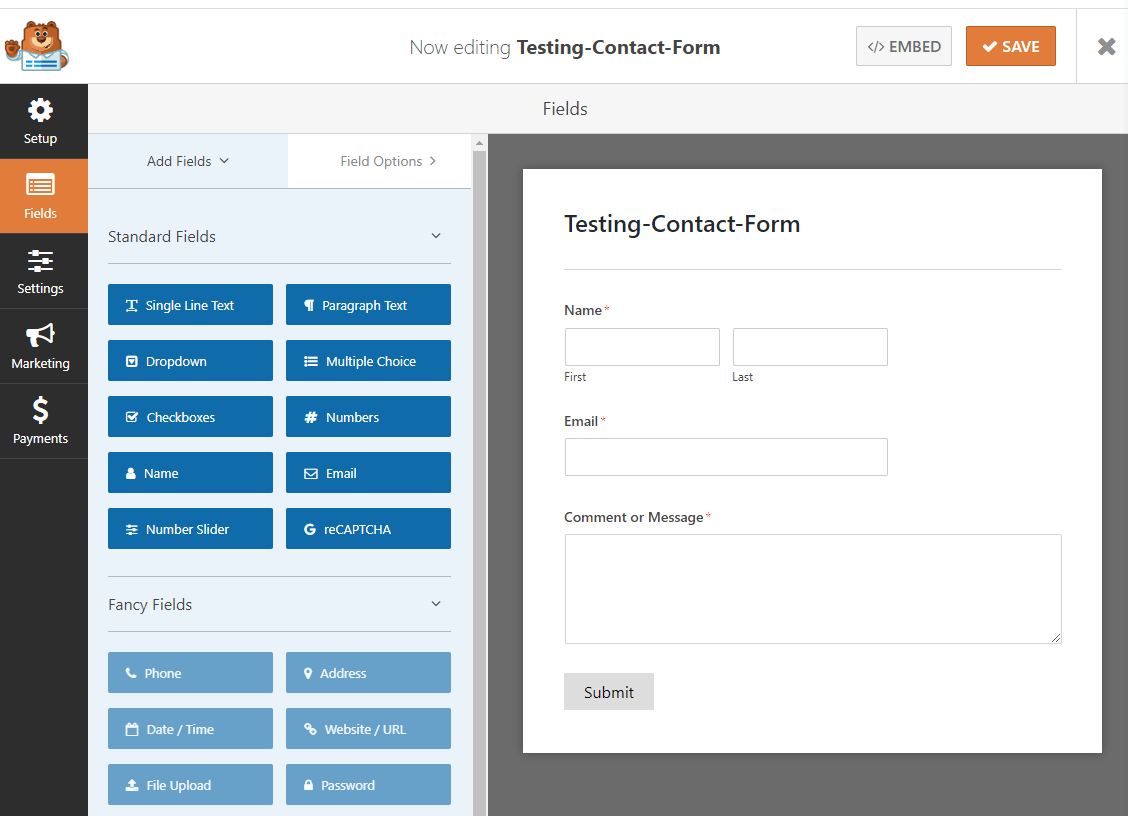
Step 4: Configuring the Form
Next, you need to configure the form. To do so, you need to click on the “settings” and then select Notifications and Confirmations.
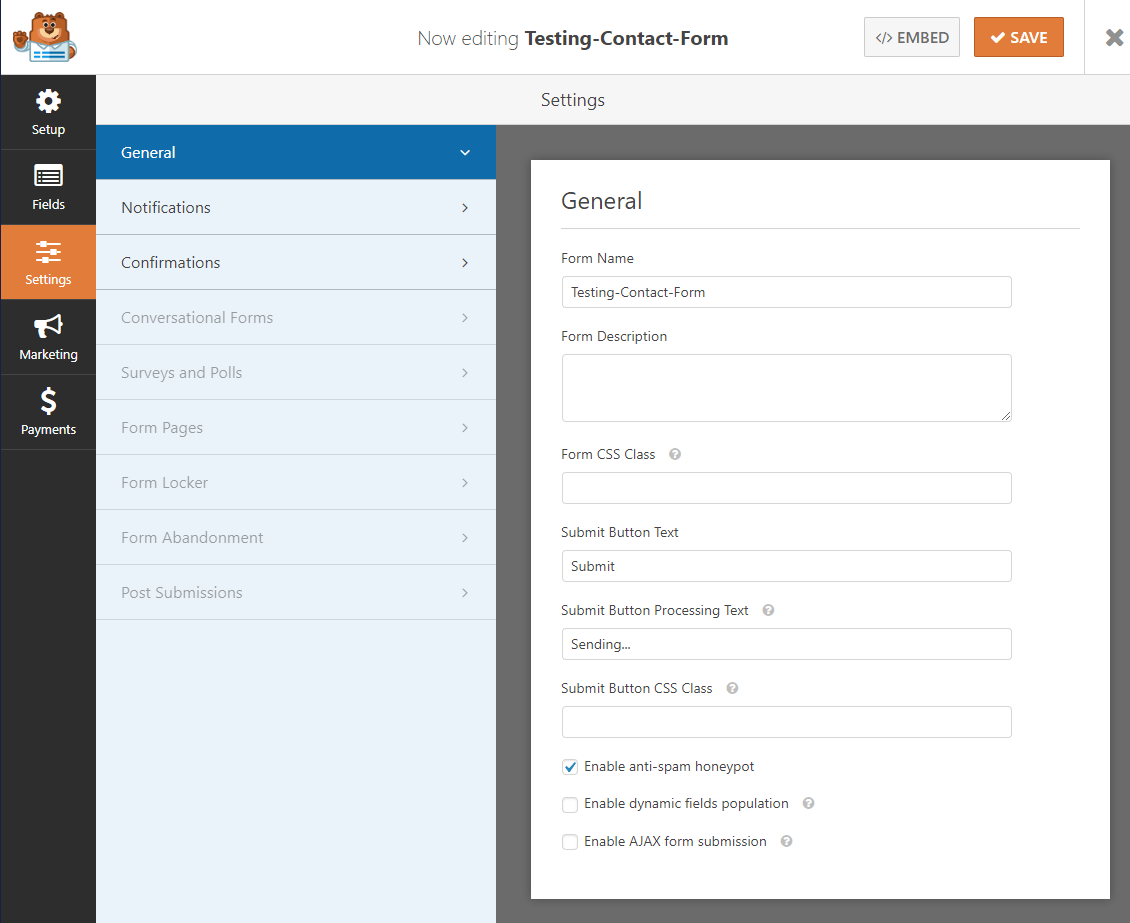
In the notifications, you will be able to set From Name, Email Subject, Default Notification, and so on!
In confirmations, you will be able to confirm the message reply that you want to send to the visitors who filled the form.
As you can see there are other greyed options. Those options are not available in the Lite version. If you think you need them, then you need to buy the PRO version of the plugin.
Also, if you are confused and don’t know what to do with notifications and confirmations options, then simply ignore them as they are already set to default values for beginners.
Before you leave the page, don’t forget to click on “Save” on the top of the form.
Step 5: Adding the Form to the Page
The last step is to add the contact form that you created and add it to the page.
Now, you need to go to Pages in the sidebar. From there, you need to create a page named, “Contact Us.” You can also edit an existing page or create a page with a different name.
To include it in the page, you need to click Widgets.
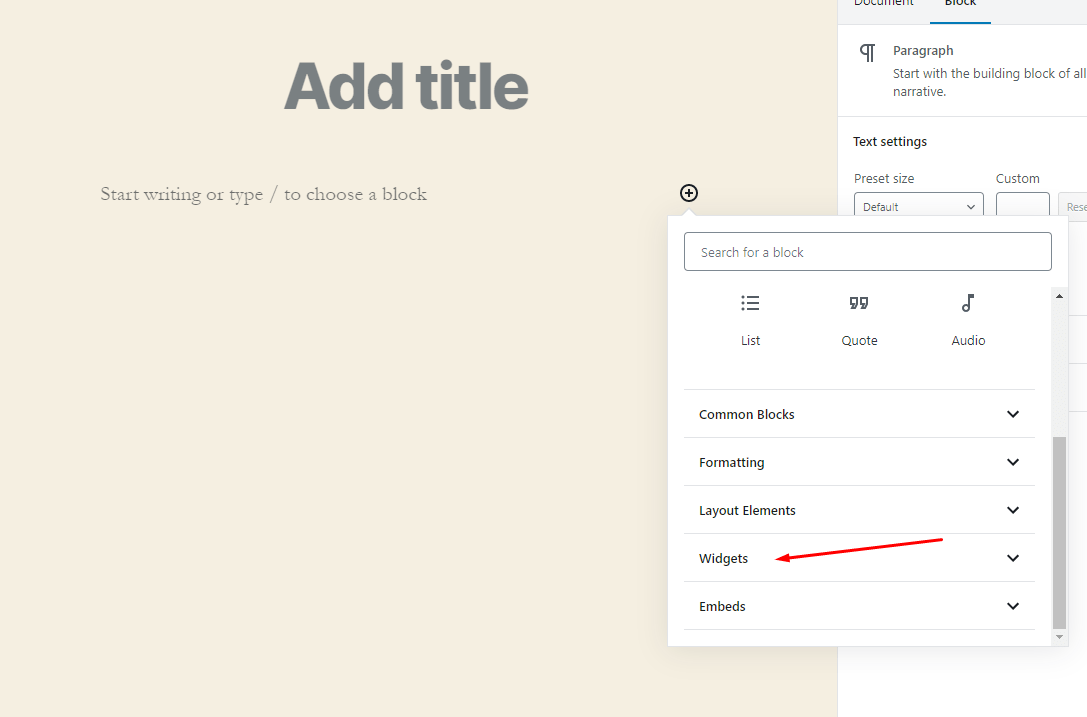
And then click on WPForms.
Once you do, you will integrate it on your page and then select the form name from the drop-down menu.
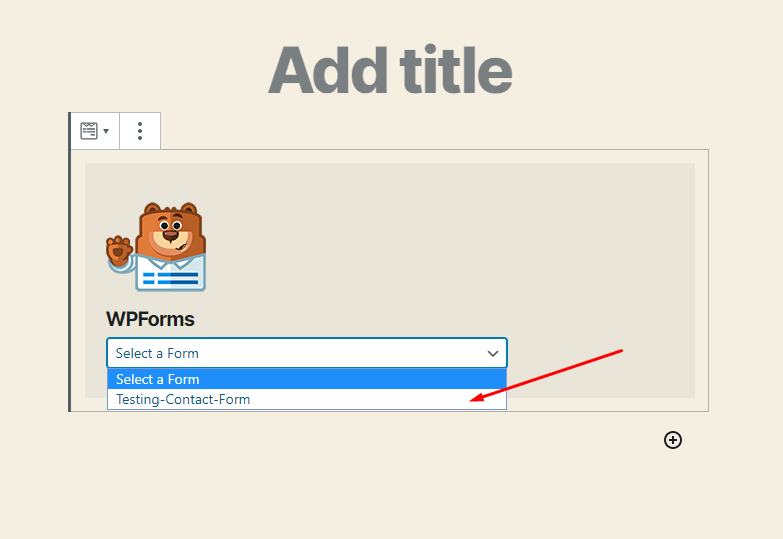
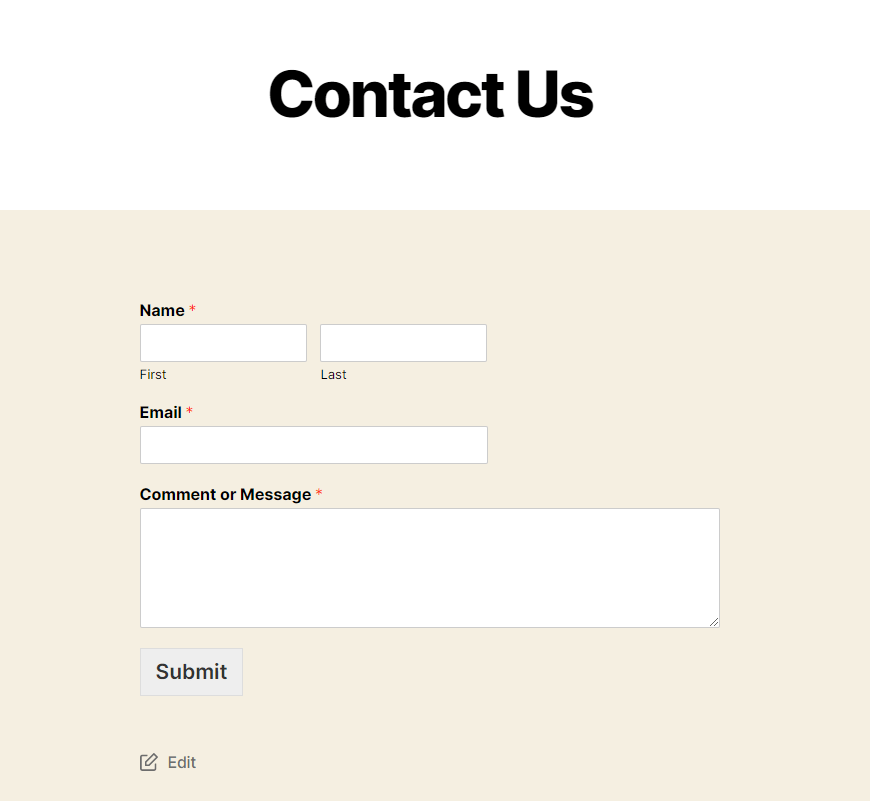
You will now see the form as it is on the page. Save and publish the page to make it go live!
The page will look as below.
Conclusion
This leads us to the end of our tutorial. We hope now you are able to create a form and integrate it on your site without any difficulty. For more questions, use the comment box below to know more.
You may also want to see our step by step guide on how to display related posts in WordPress.
0 Comments