Are you trying to insert ads into post content in WordPress? If you do, then you have come to the right place. In this article, we will explore ads insertion into post content using the WordPress content management system.
As a marketer, one of the basic things that you need to do is ads management! Posts are the most commonplace to insert the ads and improve your chances of earning revenue.
There are plenty of ways you can add ads to post, but not every method is efficient and worth your time.
In this post, we will go through two ways in which you can insert ads into your WordPress site. Let’s get started.
How to Insert Ads into Post Content in WordPress
The two ways we are going to show you how to insert ads into post content is as below:
- Manually inserting an ad
- Using a dedicated ad plugin such as Ad Inserter
Let’s explore the manual method first.
Manually inserting Ads into the Post Content
If you are okay with code then you can manually insert ads into your WordPress post. To do so, you need to use the editor that is baked in the WordPress dashboard.
Before you use it, you need to make sure that your WordPress editor has the capability to edit the theme files. If it doesn’t have them, then you will not be able to edit the file. In that case, you need to go to the site’s background and then edit the files from there.
Anyway, you can access the editor from the WordPress dashboard by going to Appearance and then Theme Editor, as shown in the image below.
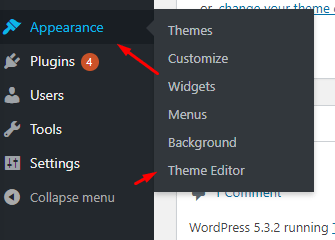
Once you click on it, the editor will give you a warning. I will ask you to create a child theme, which we also recommend doing so. Check the message below to know more.

Now click on “I understand” to continue.
There you will see two sections on the page. The first section is the selected file content and you will find the whole list of theme files on the right-hand side.

Now, click on functions.php file. Now, add the code according to the code snippet as shown below:
<?php

// The code lets you insert ads after the 2nd paragraphs

add_filter( 'the_content', 'prefix_post_insert_ads' );

function prefix_post_insert_ads( $content ) {

    $ad_code = '<div>Insert the Code for the ad here</div>';

    if ( is_single() && ! is_admin() ) {
        return prefix_after_insert_paragraph( $ad_code, 2, $content );
    }

    return $content;
}

// The parent function that ensures that the ad is added to the post.

function prefix_after_insert_paragraph( $insertion, $paragraph_id, $content ) {
    $closing_p = '</p>';
    $paragraphs = explode( $closing_p, $content );
    foreach ($paragraphs as $index => $paragraph) {

        if ( trim( $paragraph ) ) {
            $paragraphs[$index] .= $closing_p;
        }

        if ( $paragraph_id == $index + 1 ) {
            $paragraphs[$index] .= $insertion;
        }
    }

    return implode( '', $paragraphs );
}
The above code is straightforward to understand. There are two functions in the above code:
- prefix_post_insert_ads: Here, the code is used to specify where the ads will be inserted. You can find the $ad_code variable where you need to copy-paste the code and make it viable. Also, there are the next two lines; you can see paragraph_id return a value of 2, which means that the ad will be inserted after the 2nd paragraph.
- Prefix_after_insert_paragraph: This is where the ad insertion process takes place. As you can see, it takes in three paragraphs, $insertion, $paragrph_id, and $content.
You can change the value of paragraph_id to change the location of the add that is inserted.
Inserting Ads Using Ad Inserter Plugin
The next method is to use a plugin to insert ads within the post content. In this method, you can use any advertising plugin you want to insert the ads.
However, we recommend using Ad Inserter. It is an amazing plugin that also enables you to insert ads more effectively. Let’s get started below.

To install the plugin, you need to go to the Plugins > Add New. From there, type, “Ad Inserter” in the search bar and then install the plugin as shown in the image below.
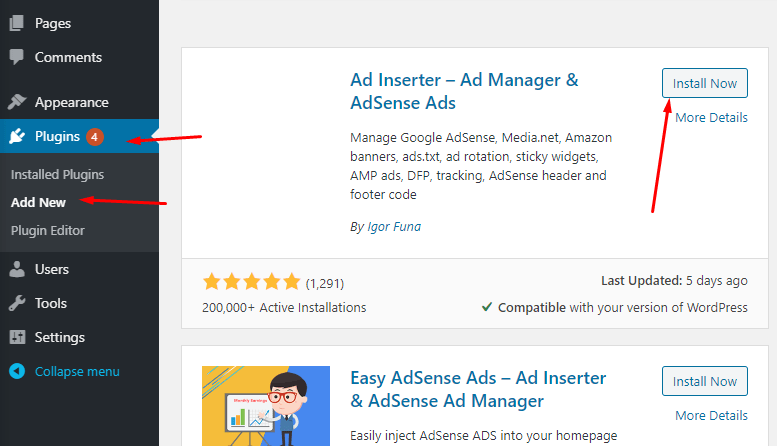
Once installed, you need to go to Settings and then “Ad Inserter”.
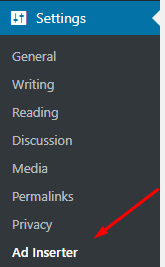
Once you are there, you will find the window as below.
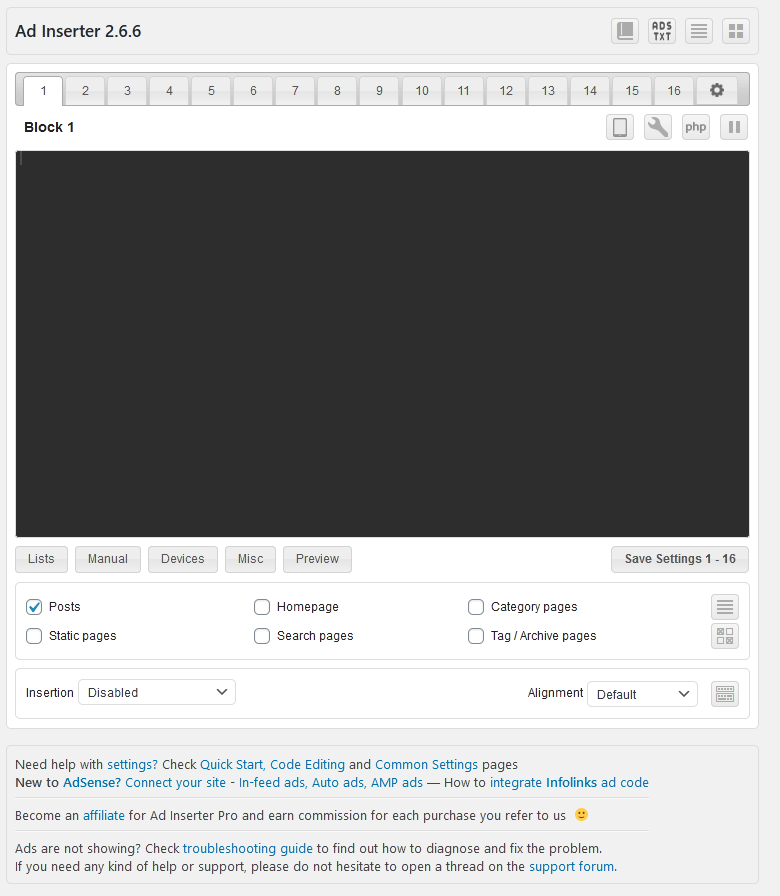
Here you will see ad blocks at the top named as 1,2,3 and so on. They are ad number that you can use to insert you add. Select 1 and then paste the ad code in block 1.
Next, you can also use other blocks to populate all your ads.
Below, you will see two options: Insertion and Alignment.

Here you can choose the option for the ad-block. For insertion, it offers a lot of options.
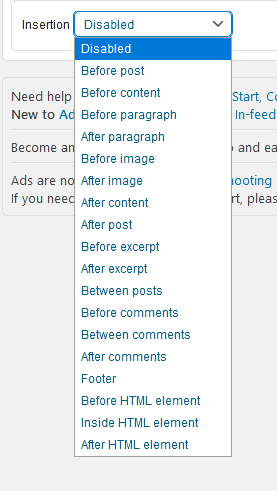
You can insert it before post, before content, before paragraph, after image, and so on!
Once you choose the position, you will get the option to enter the paragraph number around which you want to take the desired action. For instance, you want to insert the ad paragraph after 1st para.
There are many options to manage. You can also choose the alignment, including the following:
- Left
- Center
- Right
- Float left
- Float right
- Custom CSS
- No wrapping
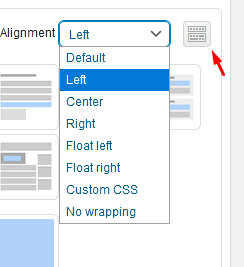
In the image above, you will also see a symbol, as shown with the red marker. These will open up a visual guide on the options that you use. It is super-friendly, and we suggest you use it if you feel confused. The options will be shown as below.
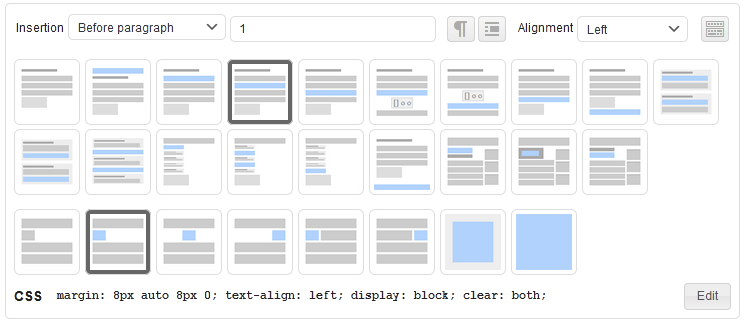
If all the settings are right, then you can go forward and save them.
Conclusion
Inserting ads on the site can be a frustrating challenge if not done right. We went through two options, including manual and plugin. Out of both the options, the best way is to use the plugin as it enables you not only to insert the ads but also to manage them in the long term.
So, what do you think about ads management? Are you going to use the manual way or plugin way? Comment below and let us know.
You may also want to see our step by step guide on how to create and edit an .htaccess file in WordPress.
0 Comments