Did you ever try to change your WordPress username? But, if you don’t know how to change it, this article is for you. In this article, I will show you how to change WordPress username.
How to change WordPress username manually
The easiest way to change WordPress username is create a new username with administrator rights and delete the old one.
First thing you need to do is login your WordPress dashboard and navigate to Users > Add new.
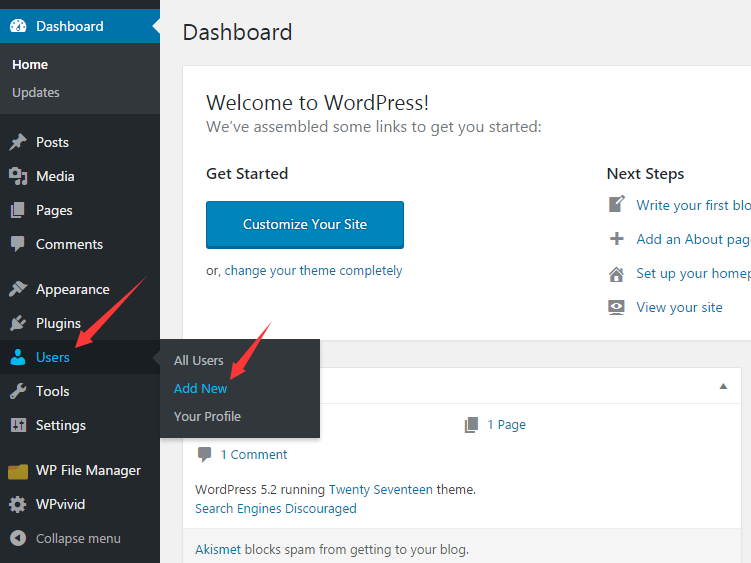
Once clicking on Add New option, you are taken to Add New User page and can create a new user here.
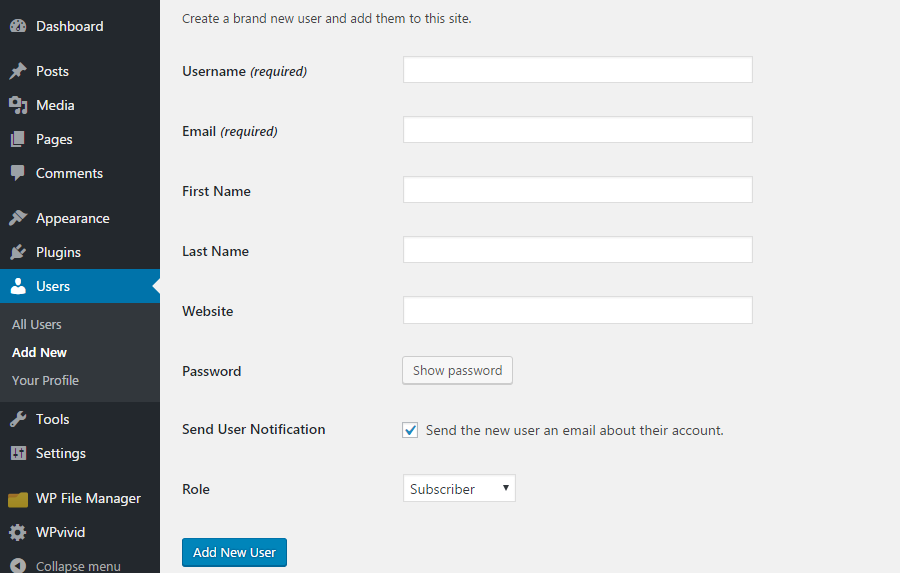
Enter your desired username and fill in the rest of information. There are three things you need to be careful.
First, the email address must be different than the email address of the current username. But don’t worry, you can change back it to the original one after this process is complete.
Second, choose a strong password for your username.
Third, display the Role drop-down menu and choose Administrator role for your new user.
Once you filled out all required information, click on Add New User button.
Next, you need to log out your site and log in again with the new account. Then, visit Users > All Users and click Delete underneath of the old admin username.

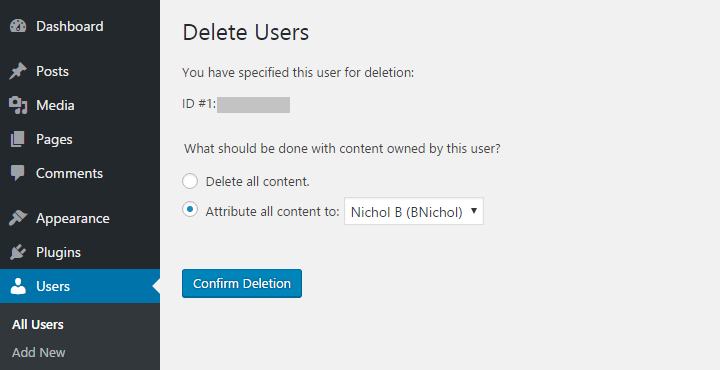
Before deleting the old account completely, WordPress will ask you what to do with all content created with the old account. Select Attribute all content to option and choose the new username in the drop-down menu.
This will transfer the ownership of all content to the new account. Then, click Confirm Deletion button.
This is all process for how to change WordPress username manually. Let’s take a look at how to change WordPress username with a plugin.
How to change WordPress username with a plugin
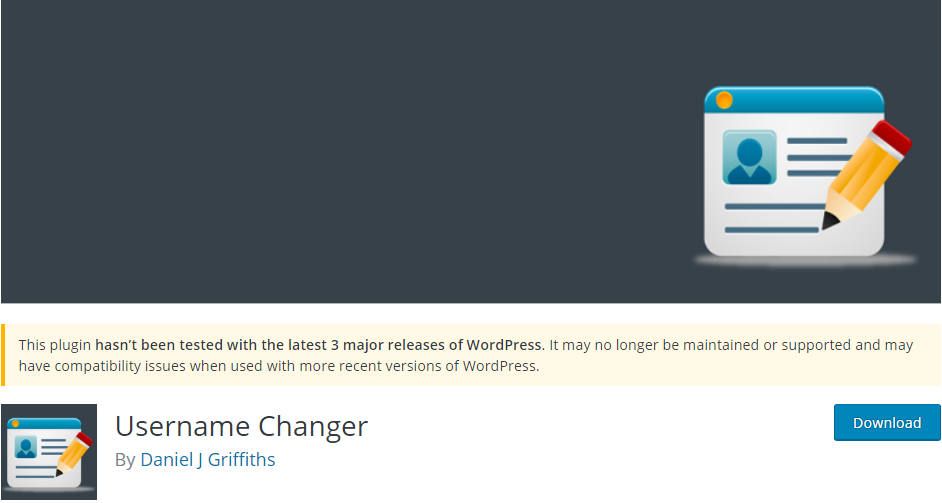
Apart from changing WordPress username manually, the another simple way is install Username Changer plugin to change.
First things you need to do is install Username Changer plugin. For more details, please see our step by step guide on how to install WordPress plugin.
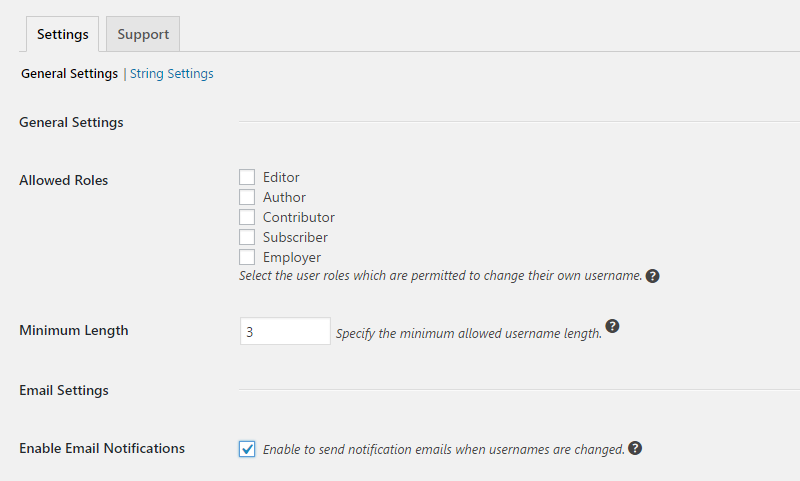
Next, visit Settings > Username Changer and configure the settings.
Here you can decide which that which roles allowes to be changed. Specify the minimum allowed username length. Enable email notification to send users automation emails when their infromation has been changed. Then click on Save Changes button.
After that, navigate to Users > All Users and click on the user you want to change its username.
Next, scroll down the page to Username option and click Change Username.
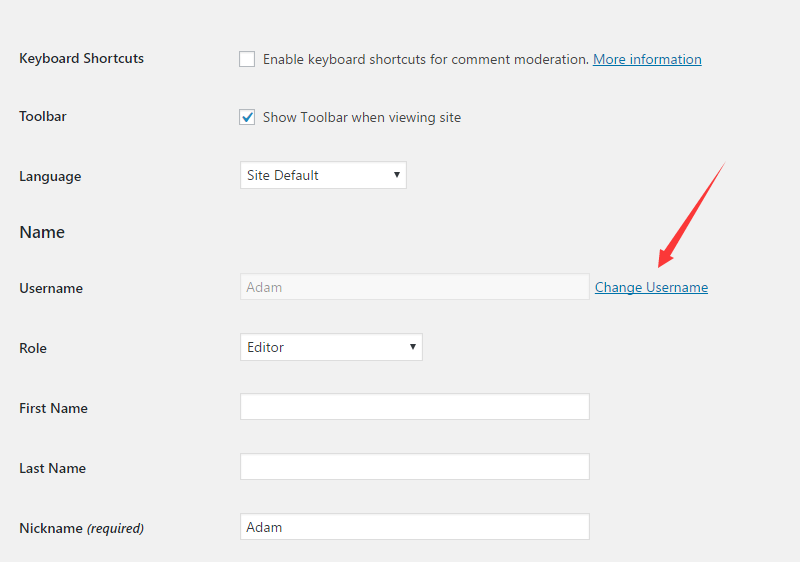
Enter the desired username and click Save Username button. Then scroll down the page to the bottom and click Update User button to save changes.

That’s it. You have successfully changed WordPress username with Username changer plugin.
There is one more thing, you can uninstall Username Changer plugin after you changed your username if you don’t want to install a plugin for every little thing. Another reason is that the plugin author didn’t maintain Username Changer plugin for a long time.
I hope you enjoyed this tutorial for how to change WordPress username. You may also be interested in our step by step guide on how to change WordPress admin password.
0 Comments