As you start to add more and more high-quality posts and articles to your WordPress blog or website, it is going to get a bit difficult to navigate through all the content. This makes it super important for you to add a search bar to WordPress.
It will make finding posts and articles a lot easier, and you will have increased user engagement and interaction on your website. As such, we have put together an in-depth step by step guide on how to add a search bar to WordPress website.
How to Add a Search Bar to WordPress Site
By default, WordPress gives you access to a Search widget. You can use it to add a search bar to the sidebar or footer. Alternatively, you can also use a WordPress plugin to add an advanced search bar to your WordPress website.
In this article, we will be covering both methods on how to add a search bar to WordPress websites. So without further ado, let’s get started.
Add a Search Bar to WordPress Sidebar
Here is a step by step guide on how to add the search bar widget to your WordPress sidebar.
- Log-in to your WordPress backend dashboard.
- Go to Appearance > Widgets from the left-hand sidebar.
- Scroll down the list of “Available Widgets” till you find the Search widget.
- Drag and drop it to the Sidebar.
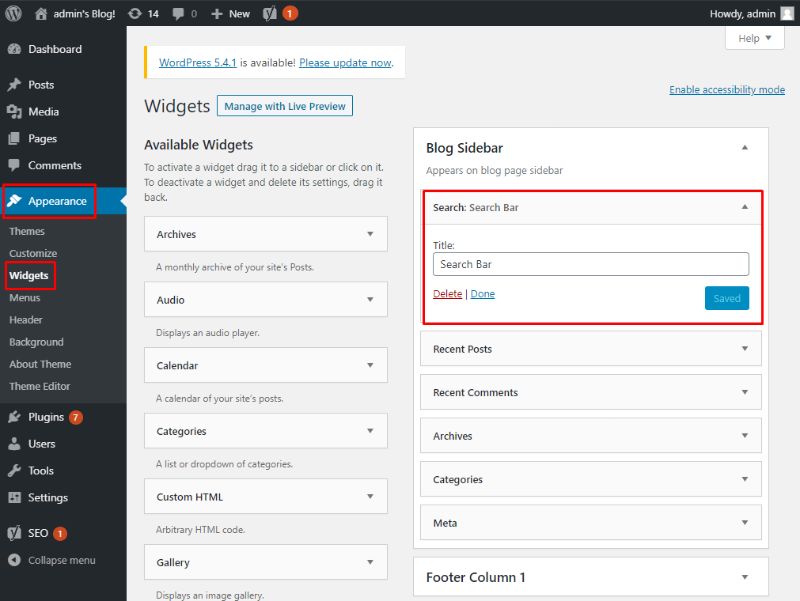
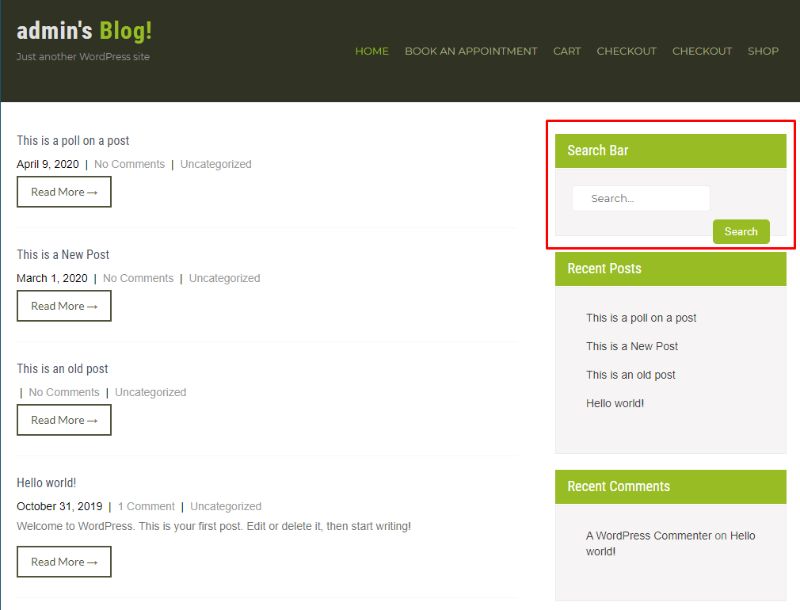
You now have a search bar on your website sidebar.
Disclaimer: Depending on the theme you have installed, you might or might not have the Blog Sidebar option. Similarly, the number of footer columns will also be different.
Limitations of Using the Default Search Bar Widget
One of the clear disadvantages of the search bar widget is the lack of options. You don’t get any control over how the search bar functions, what results it will show your users, and so on.
However, the biggest problem is when your website layout doesn’t have a sidebar. In that case, where would you add your search widget? Having the search bar on your website footer is really unintuitive, and your users won’t be able to find it.
As such, it is currently the standard to have the search bar on your website menu. And this is where Ivory Search WordPress plugin comes into the picture.
What is Ivory Search WordPress Plugin?

Ivory Search is a feature-packed WordPress search plugin that helps you add an advanced search form to your website.
For starters, it can help you create potentially unlimited search forms which you can add almost anywhere on your website, including your site header, footer, sidebar, posts, pages, and even custom post types.
Each form can also be configured giving you control over the look and feel of the search form, access to Ajax-power live search (search content loads up without reloading the entire webpage), and much more.
How to Add a Search Bar to WordPress Menu Using Ivory Search
Now that we have a basic idea of what you can do with the Ivory Search WordPress plugin, let’s go over this quick step by step guide on how to use the plugin to add a search bar to WordPress menu bar.
Step 1: Installing the Plugin
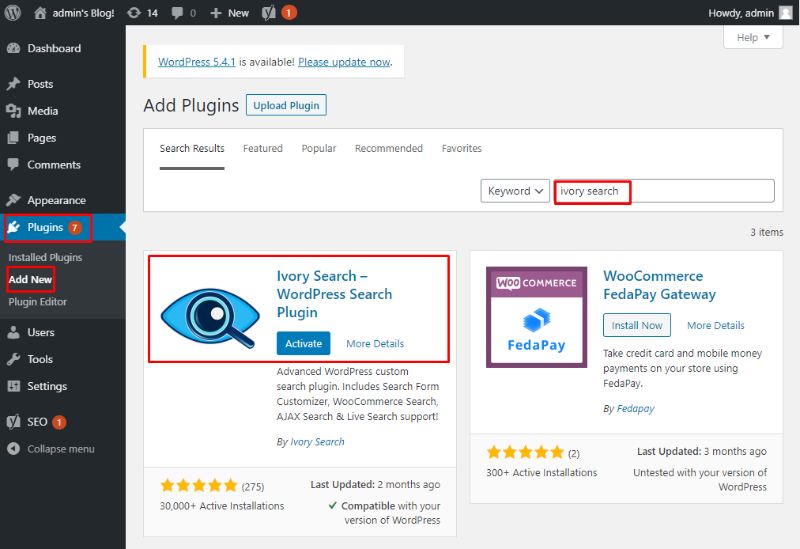
To install the plugin, log in to your WordPress backend dashboard, and then from the left-hand sidebar, navigate to Plugins > Add New, and type in Ivory Search in the search field.
Now, click on Install Now followed by Activate for the plugin as shown in the image:
Step 2: Configuring the Plugin
With the plugin installed, you will get a new option called “Ivory Search” in the left-hand sidebar of your WordPress dashboard.
Click on it, and it will take you to the following page:
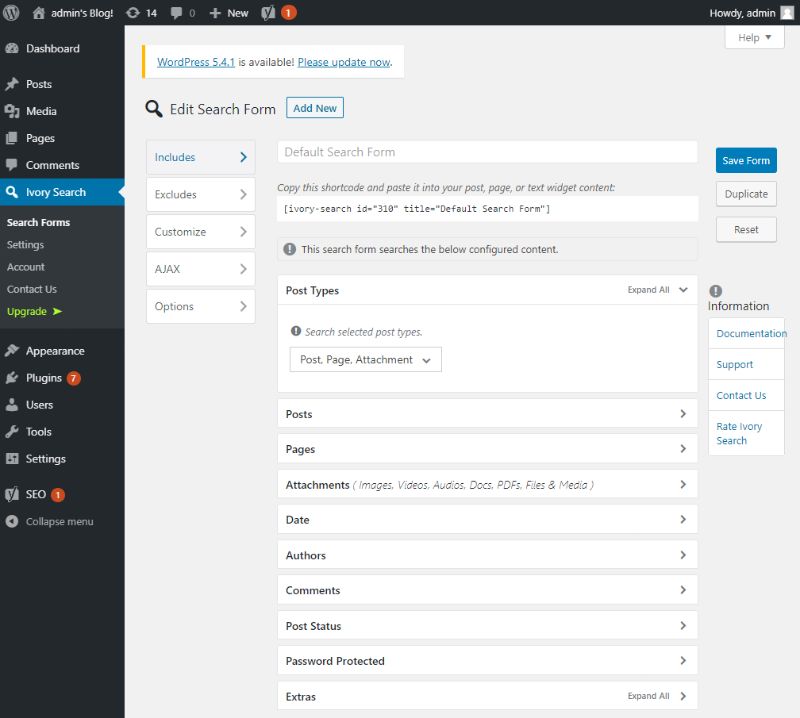
As you can see, it is loaded with tons of settings and options, which gives you granular control over how the plugin operates. Let’s have a look at everything the plugin has to offer, so you can have a basic idea of what you can (and can’t do) with the plugin.
Note: We are using the free version of the plugin for this tutorial. A paid version of the plugin is also available, and upgrading to it will unlock all the advanced functionalities.
You get dedicated Include and Exclude sections, where you can select what type of content (includes posts, pages, attachments, and so on) are shown and not shown in the search results.
The Customize section gives you a few basic options to help you tweak the form and text colour to better match your site aesthetics.
Under the Ajax section, you can get to enable/disable ajax search. Apart from this, you get some basic controls that let you fine-tune the ajax search mechanism to your needs.
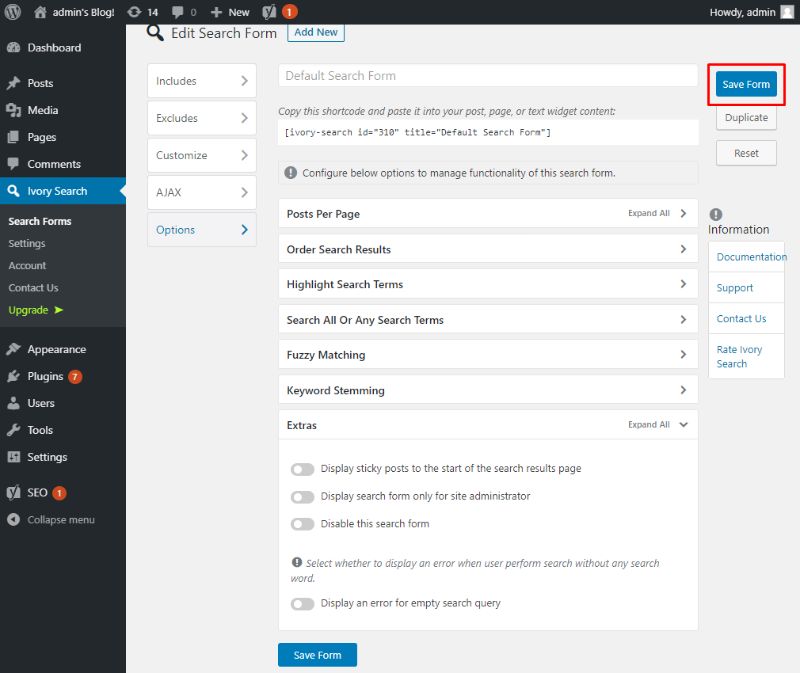
And finally, we head on to the Options section. Here you get access to all the basic settings and options including:
- Posts Per Page – How many posts will be shown per search results page.
- Order Search Results – How to order search results.
- Highlight Search Terms – Whether to highlight the search terms in each search result.
- Fuzzy Matching – Whether to show content that is a partial match to the search term or only content that is a complete match.
- Keyword Stemming – It will search for the base word of the typed keyword. For example, if the user types in “doing,” the plugin will also include the keyword “do” in its search.
Once you have fully configured your search form, hit the Save Form button. Remember – the form is saved as “Default Search Form.”
Note: You can click on Add New to create a new search form with a different set of search settings and save it with a different name. This will give you two different search forms, which you can use in different areas of your website.
Step 3: Add Search Form
To add the search form to your website header, go to the Ivory Search > Settings > Menu Search.
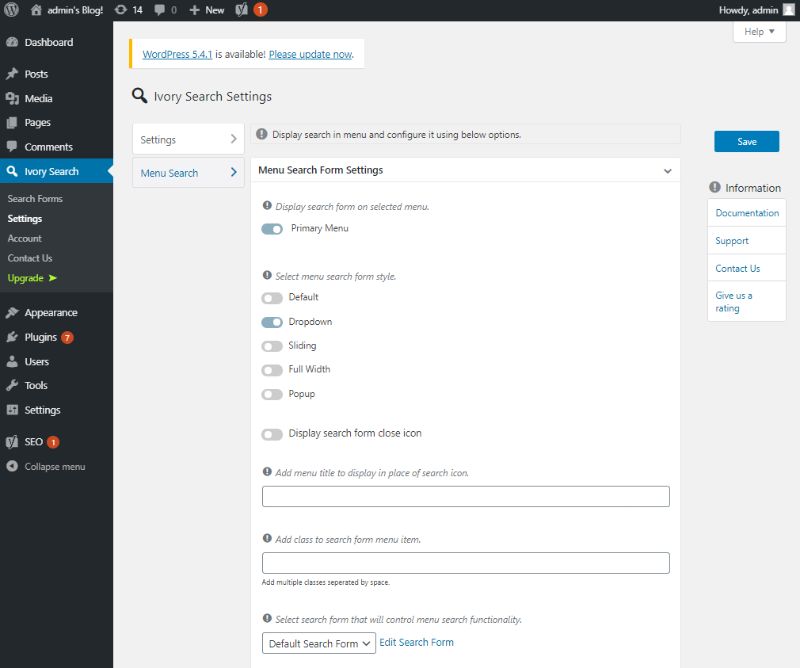
Now, select the Menu where you want to activate the Search Form. On our website, we have only one Menu – the Primary Menu, and we are enabling the search form on it. Depending on the theme you have installed, it might be different.
Next, select a menu search form style. You get access to:
- Default
- Dropdown
- Sliding
- Full-width
- Popup
We have picked Dropdown for this tutorial, but you can pick anything that you want.
Next, scroll down and select the search form that will control the menu search functionality. Here we have selected the Default Search Form, which we created earlier.
Once done, click on Save.
Step 4: Look at the New Search Bar on Your WordPress Menu
Once you have followed all the above steps, head on over to your website’s frontend, and you should see the new search bar integrated to your menu.
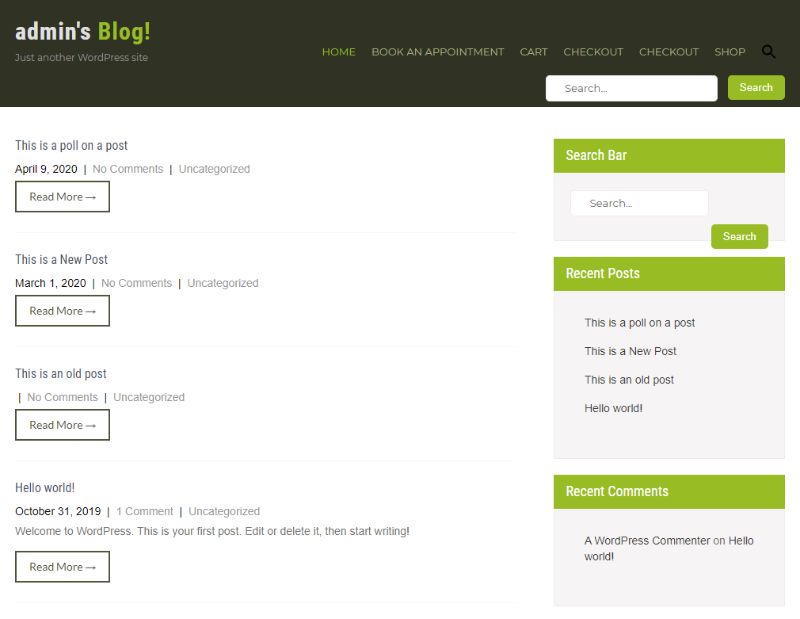
Note: After following all the steps, in case you don’t see the search bar, purge your cache and try again. It should solve the problem.
Wrapping Up
We hope this guide was useful and that it helped you to add a search bar to WordPress menu. However, if you have any doubts or have some questions, feel free to write it down in the comments, and we will surely get back to you.
You may also want to see our in-depth step by step guide on how to create a pricing table in WordPress.
0 Comments