MySQL is an open-source database management software, it is used to create database, store and retrieve data when necessary. In this article, we show you how to create MySQL database and user and how to grant the appropriate privileges to users.
Connect to server with VPSrobots
Go to VPSrobots official site to download and install VPSrobots which is a desktop control panel for Linux web hosting on Windows platform.
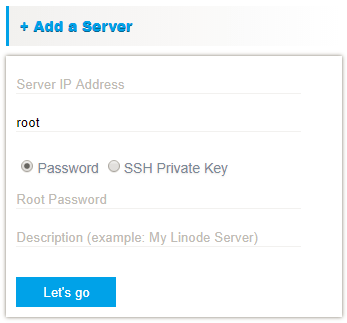
After logging in VPSrobots, enter your IP address and password to add server into My servers. Meanwhile, you need to name an alias for your server and click Let’s go button.
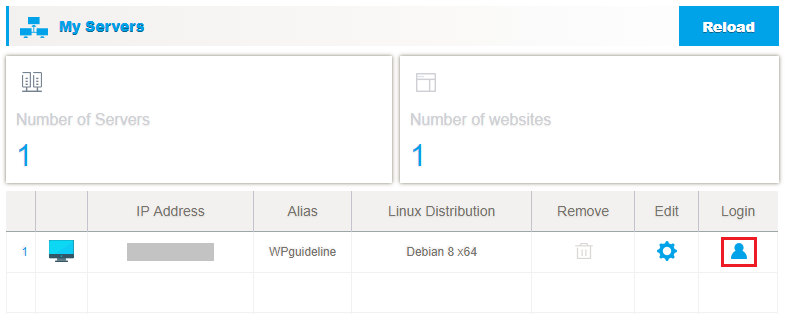
Once done, you will find the server listed in My servers section. Then click login icon next to your server to continue.
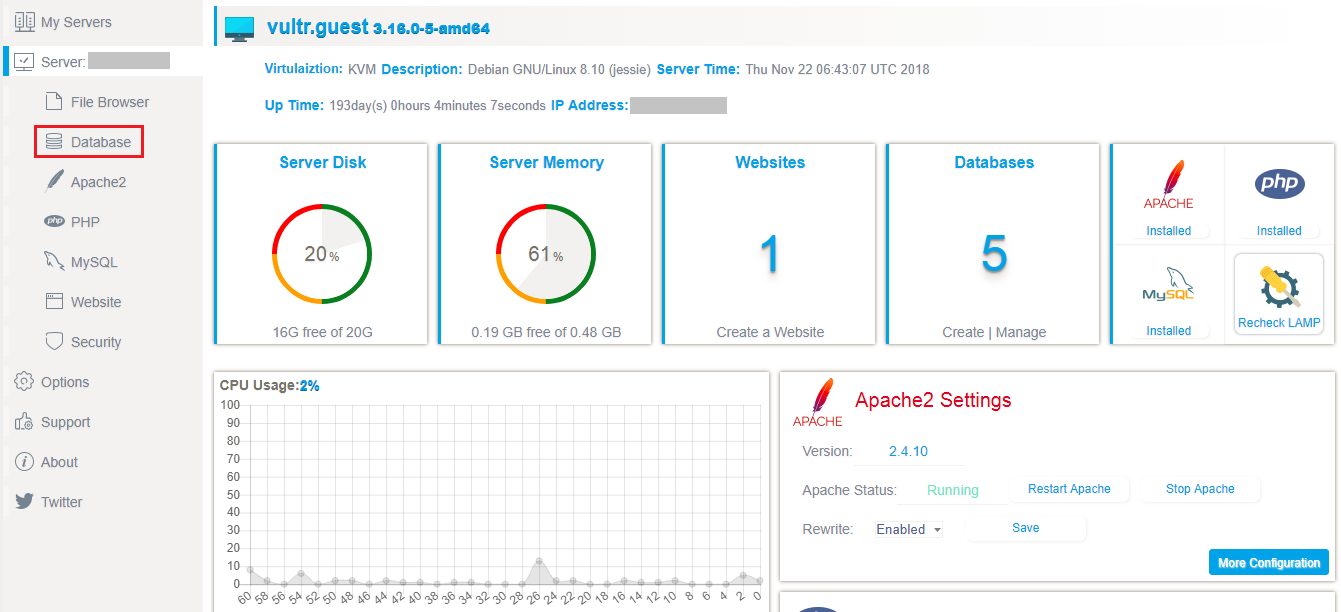
After connection to server, you are taken to the current server page on which all details of current are displayed. They include uptime, the usage of disk, memory, and CPU, and more details. Then click Database option on the left side navigation to continue.
Create MySQL database
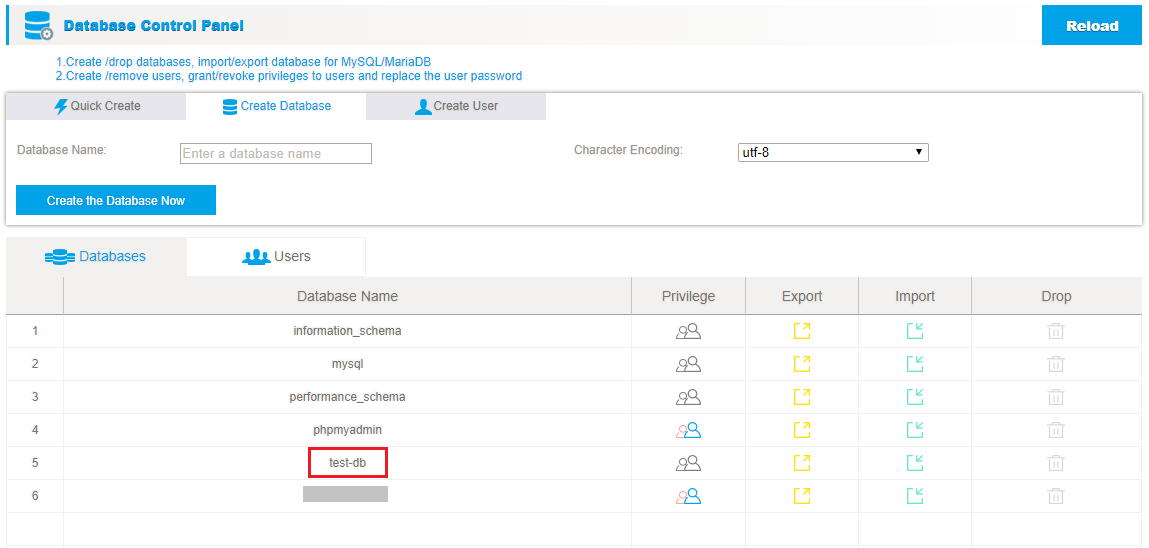
After clicking Database option, you switch to Database control panel. Click Create Database tab to continue.

Enter database name in the required field and click Create the Database Now button.
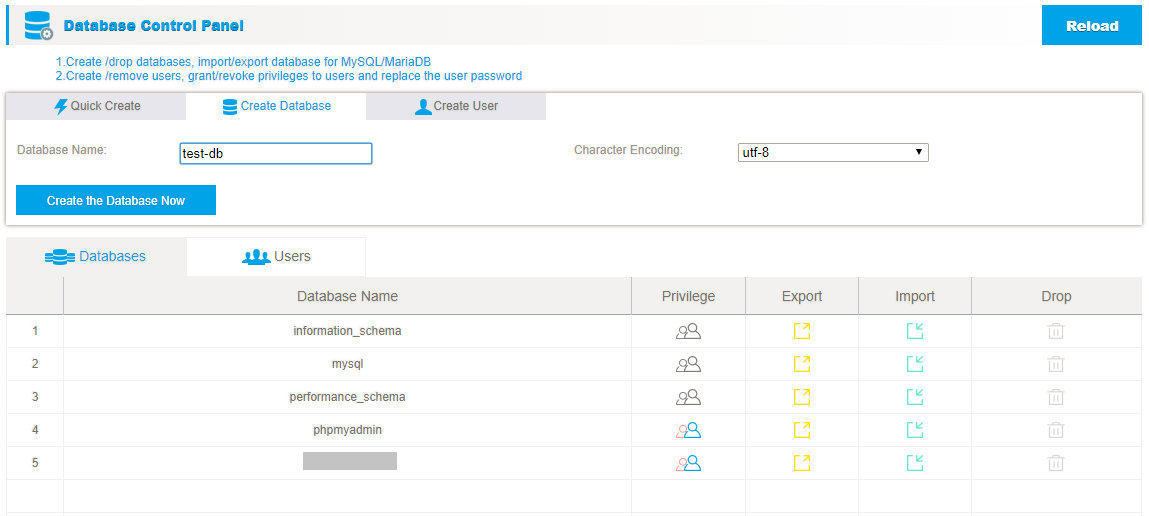
After clicking the button, you will see the new database listed instantly in database list. You can also export, import and drop the database by clicking the icons on the right side.
Create MySQL user for database
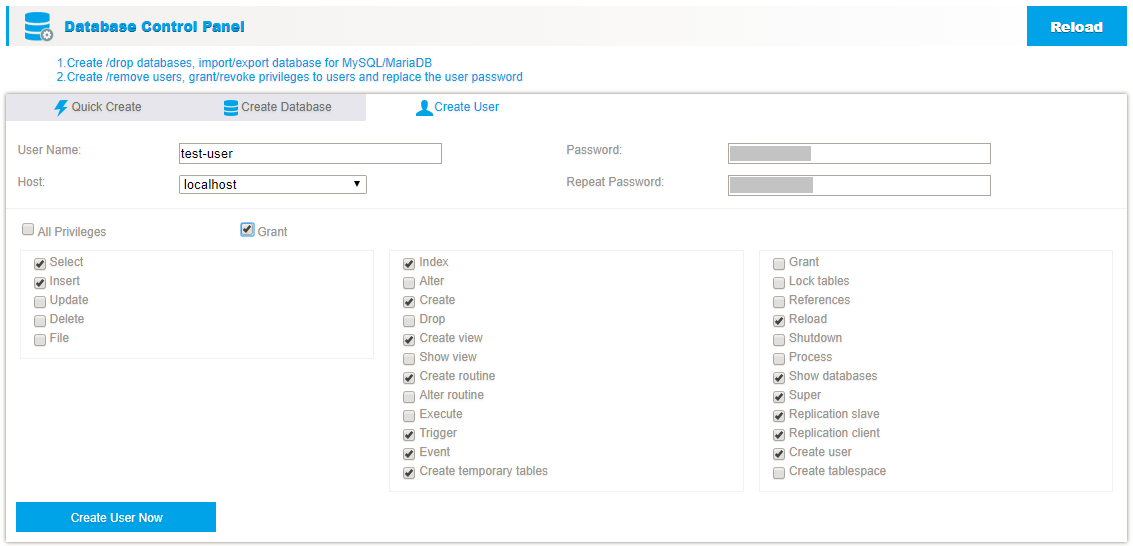
Click Create User tab on Database control panel and switch to create user page. Then fill out username and password fields and click drop-down list to choose host option. While granting the privileges to users, check Grant option and the preferable detail privilege options or Grant all privileges by checking All Privileges option. Finally, click Create User Now button.
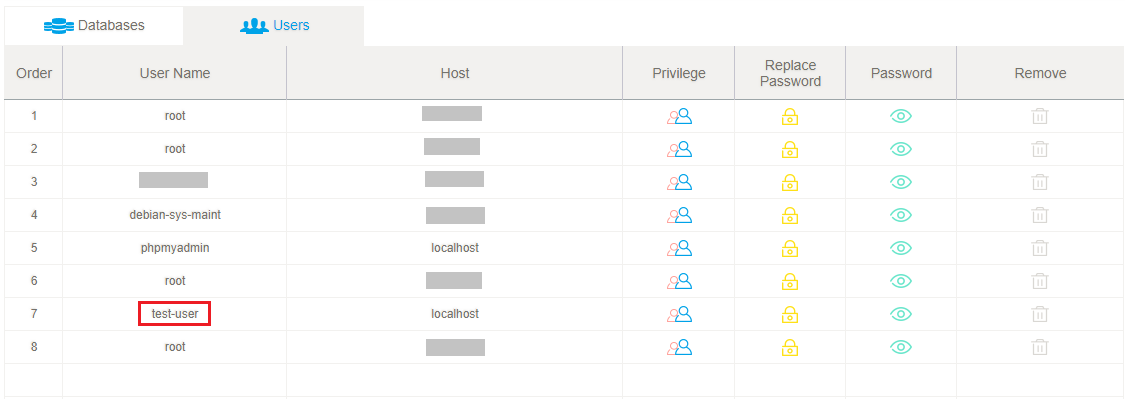
Once clicking the button, you will find the new user added in user list. Plus, you can alter privileges, replace password, show password and drop user by clicking icons on the right side.
I hope this guide helps you learn how to create MySQL database and user. You may also want to see our guide on how to install and auto-renew Let’s Encrypt SSL.
0 Comments