If you wish to run a successful website, it is important to know how your audience interact with your website. The easiest way to know your audience behaviour is add Google Analytics to your site. It helps you analyze your traffic and you would know how they got here, what they have been looking at, how long they stayed on your site, what is your most popular content and more. In this article, I will show you how to add Google Analytics to WordPress site.
Create a Google Analytics account
First thing you need to do is create a Google Analytics account. Please follow the setps below to sign up Google Analytics.
Step 1: Log in Google Analytics with your Google account. Once login, you will see this page below. Then, click on Sign up button.

Step 2: On the next screen, you will be asked to provide the details of Google Analytics account.
- Account Name
- Website Name
- Website URL
- Industry Category
- Reporting time zone
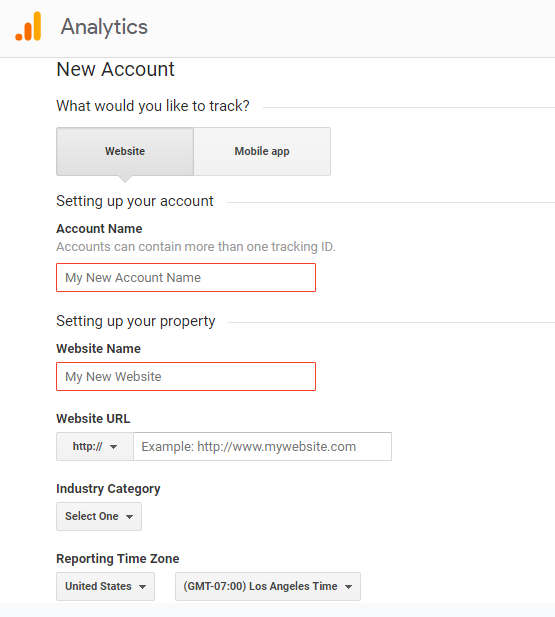
Step 3: Once you have entered the required information, click on Get Tracking ID button. Then you will be presented with Google Analytics Terms of Service Aggreement and Additional Terms Applicable to Data Shared with Google, click on I Accept button to continue.
Step 4: On the next screen, you should see your Tracking ID.
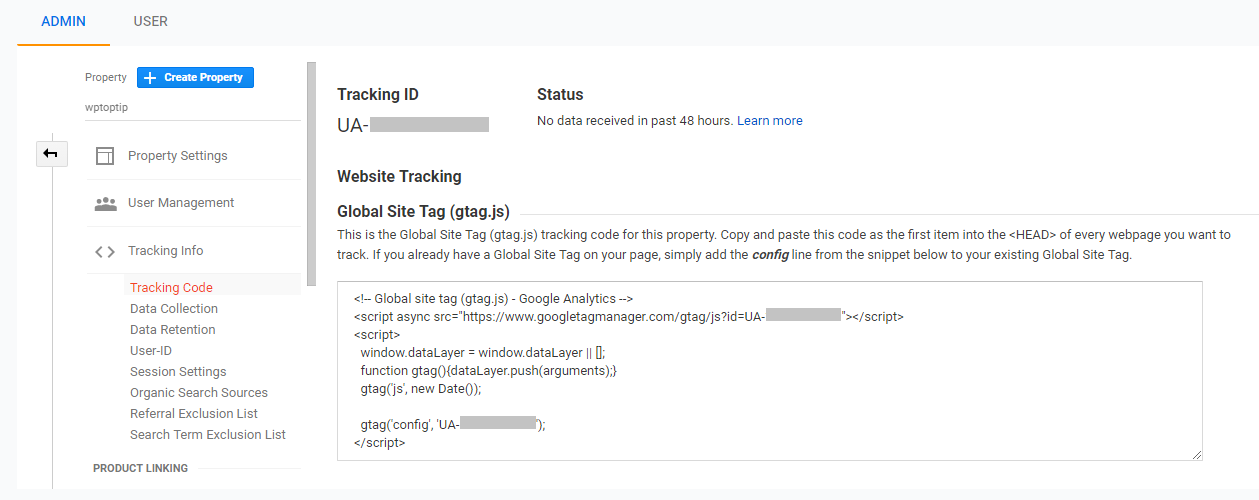
Now, you have obtained Tracking ID. Let’s take a look at how to add Google Analytics to your WordPress site.
Add Google Analytics to WordPress site with MonsterInsights

MonsterInsights is one of the most popular Google Analytics plugins with over two million active installations. In addition, it offers free and premium version, and you can choose one depending on your needs and budget.
At first, you need to do is install and activate MonsterInsights plugin. Fro more details, please see our guide on how to install WordPress plugin.
Upon activation, navigate to Insights > Settings and click on Connect MonsterInsights buttons.

Next, sigin in with Google account.
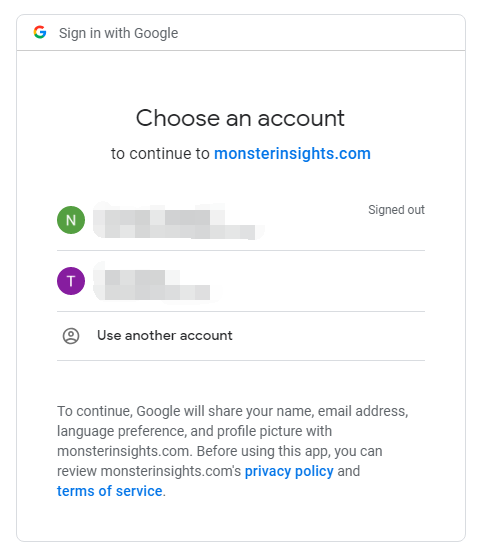
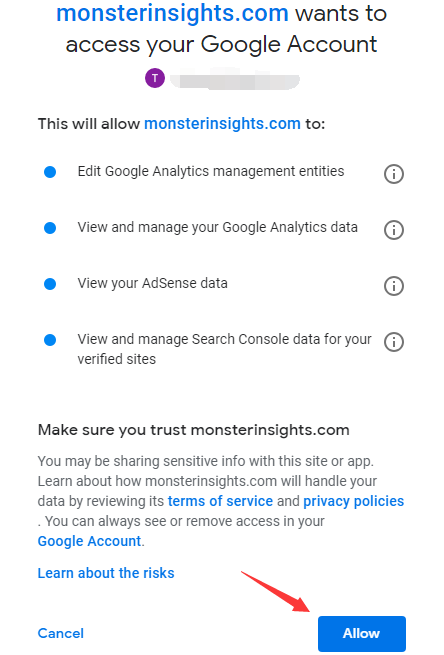
Then, allow MonsterInsights to access Google Analytics by clicking on Allow button.
The last step is pick a profile you want to track. Select your website and click on Complete Connection button.
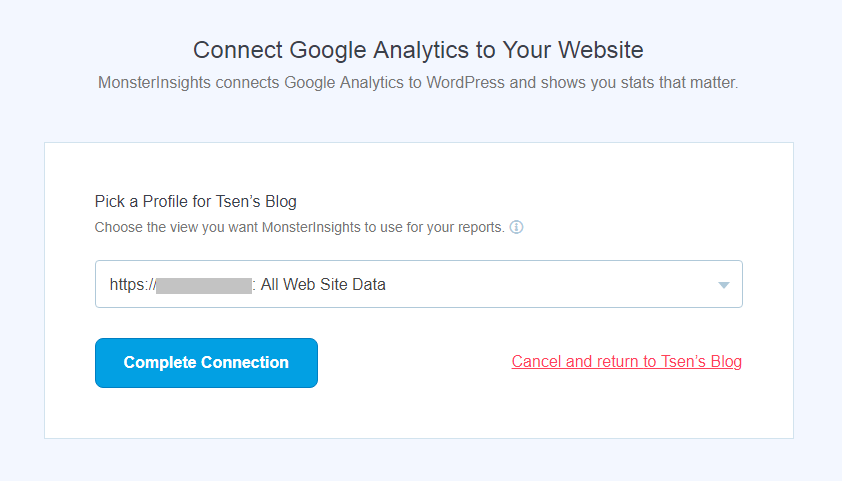
That’s it. You have successfully set up Google Analytics in WordPress. If you want to see an overview of your analytics data, please check out Report page of MonsterInsights.
Add Google Analytics to WordPress site with GADWP plugin
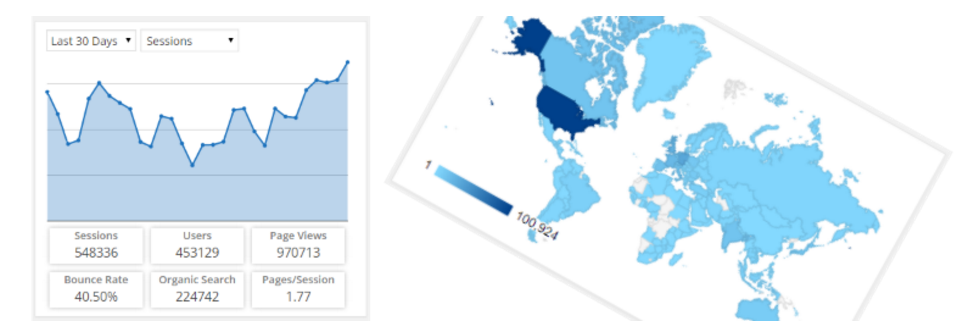
Google Analytics Dashboard for WP by ExactMetrics is formerly known as GADWP. It is completely free Google Analytics plugin for WordPress site. Let’s set up Google Analytics Dashboard for WP plugin and start tracking your traffic immediately.
First thing you need to do is install and activate Google Analytics Dashboard for WP plugin. For more details, Please see our step by step guide on how to install WordPress plugin.
Upon activation, simply head over Google Analytics > General Settings. Then click on Authorize Plugin button.
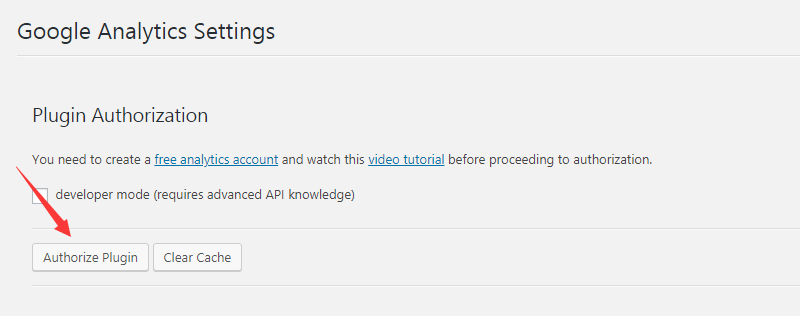
Clicking on Authorize Plugin button will take you to next page. Then you need to click on Get Access Code link to continue.
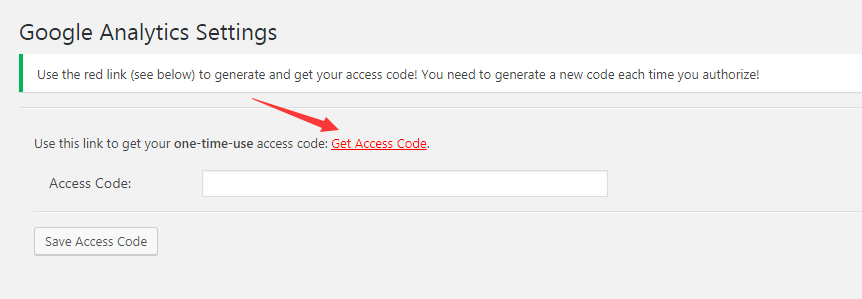
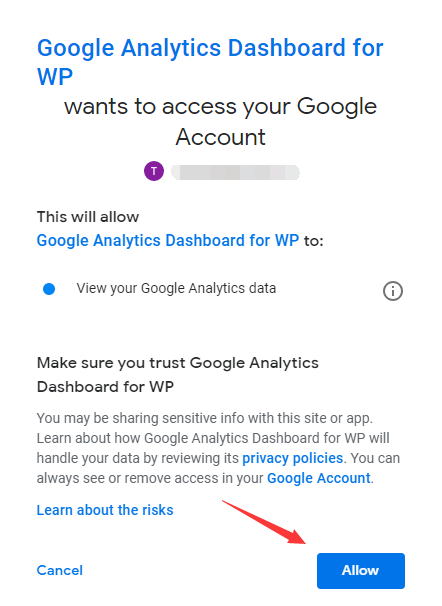
Once clicking on the link, you are asked to sign in Google account and allow the plugin to view Google Analytics data by clicking on Allow button.
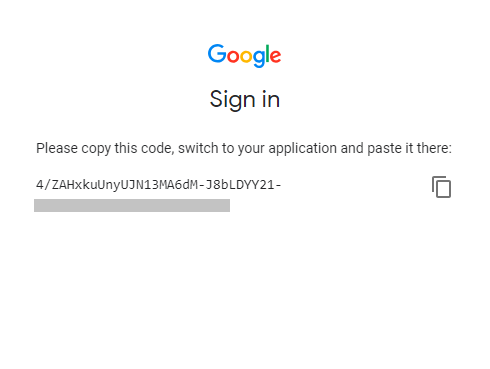
After that, you will see Access Code and copy and copy it.
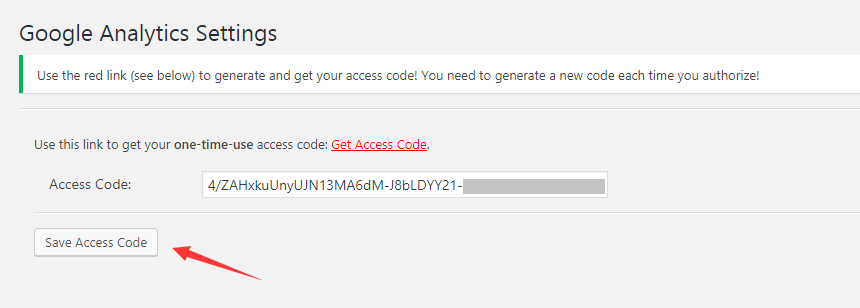
Then you need to go back to Google Analytics settings page, paste the access code and click on Save Access Code button.
That’s it. Now, Google Analytics tracking is active and you could view Google Analytics data of your WordPress site.
I hope this guide helped you learn how to add Google Analytics to WordPress site. You may also want to see our setp by step guide on how to add WordPress site to Google search console.
0 Comments