Do you create regular bakups for your site? Regular backups are the last insurance of your site and defend against any sort of security threads. In this article, I will show you how to easily backup a WordPress site.
How to easily backup a WordPress site
WPvivid backup plugin is an all in one WordPress backup plugin. It is the only solution which provides backup, restore, and migration features for free in WordPress plugin repository. In this tutorial, I will use WPvivid backup plugin to create a backup for my WordPress site.
Configure the settings of WPvivid backup plugin
First thing you need to do is install and activate WPvivid backup plugin. For more details, please see our guide on how to install WordPress plugin.
Upon activation, click on WPvivid in left navigation menu bar or the op bar and click Backup/Restore sub-option.
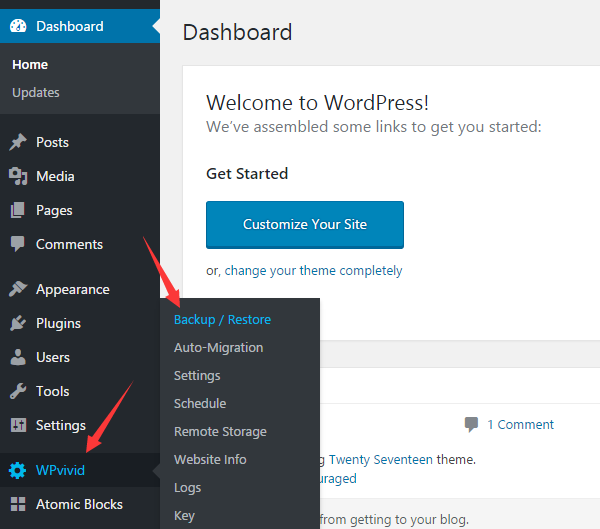
Next, we need to configure the settings for WPvivid backup plugin. So, click on Settings tab to fill out the required infromation depending on your needs:
- The value for compressing files
- The value for excluding the large size of files
- PHP script execution timeout
- The number of backup retention
- The custom backup folder name available
- Removing out of date backups
- The type for archiving backups
- Email report
- Clean junk
- Export and Import settings
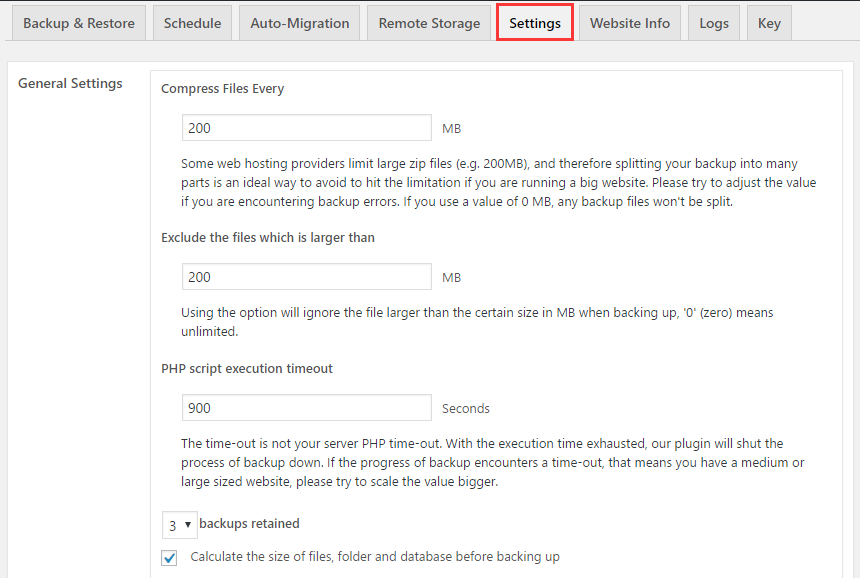
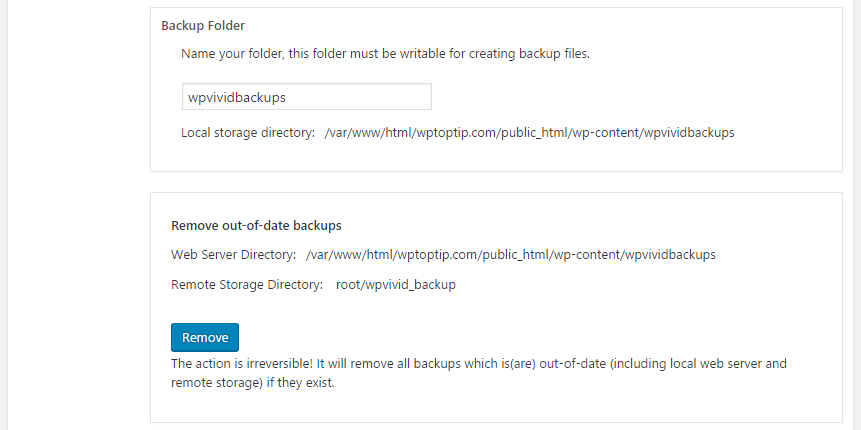
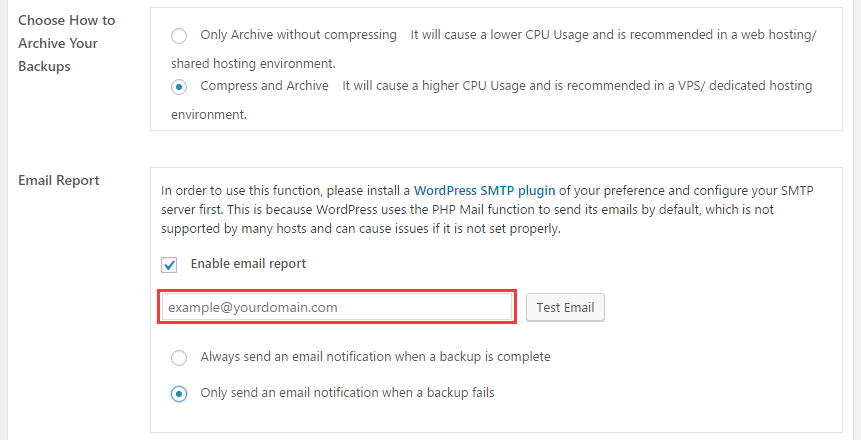
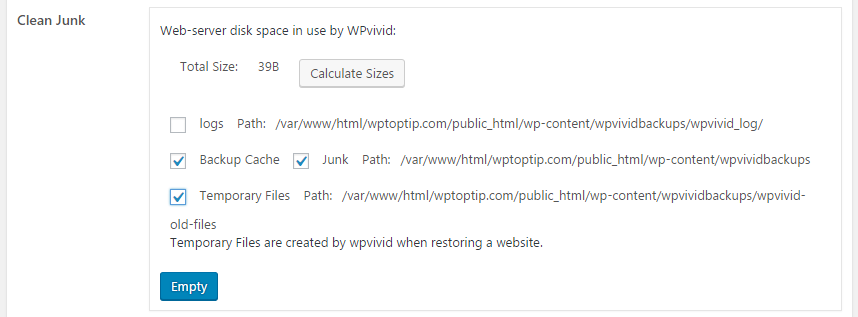

Once done, click Save Changes button.
In order to upload backups to cloud storage, you have to set up a remote storage first.
Click Remote storage tab and choose one of the supported remote storage providers.
Currently, WPvivid backup plugin supports for backing up to the leading cloud storage providers including Google Drive, Dropbox, Microsoft OneDrive, Amazon S3, DigitalOcean Spaces, FTP and SFTP server.
Then fill out the required information. In this guide, I choose Microsoft OneDrive as my remote storage. So name your cloud storage and click Authenticate with Microsoft OneDrive button.
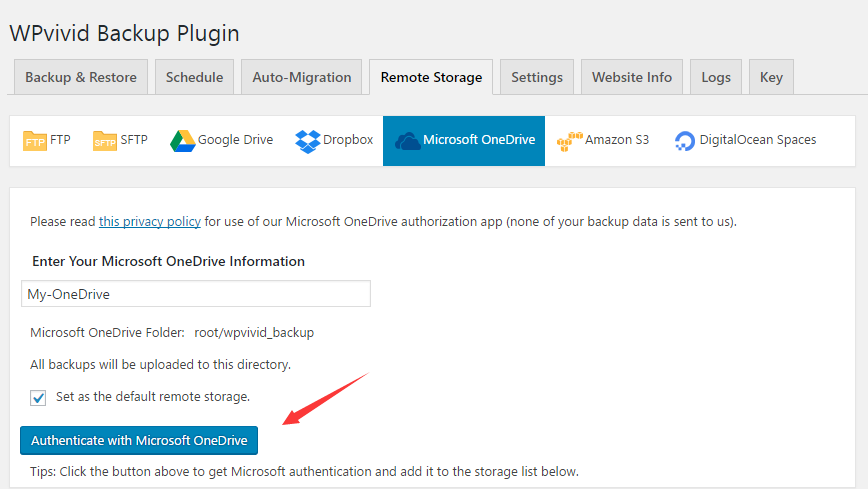
Next, you need to allow Wpvivid backup plugin to access your Microsoft OneDrive. Then you will see your OneDrive account in Storage list.

That’s it. You have configured all general settings and remote storage. Next, let’s take a look at how to backup a WordPress site with WPvivid backup plugin.
Create a manual backup with WPvivid backup plugin
After configuring the settings, you need to go back to Backup/Restore tab page.
- Using WPvivid backup plugin, you can create a full backup and partial backup for only database or all files.
- You can store your backups to localhost and remote storage.
- The name of local storage directory is available to rename. You can change it by clicking on rename directory link.
- There is a option available for preventing backup deletion automatically.
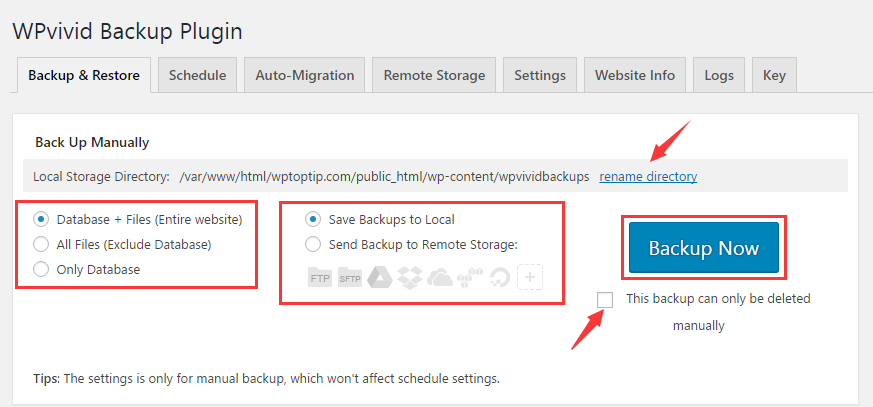
Once you set up remote storage, you will find out OneDrive icon highlightes on Backup/Restore tab page.
If you want to create a full backup, please mark the option of Database+Files (Entire website). Select Send Backup to Remote Storage and click on Backup Now button.
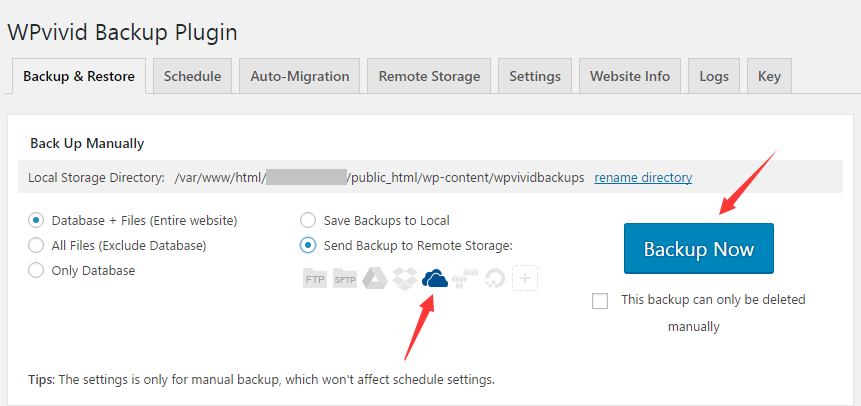
Once clicking on Backup Now button, WPvivid backup plugin will start backing up. Depending on the size of your site, the progess will take some time.
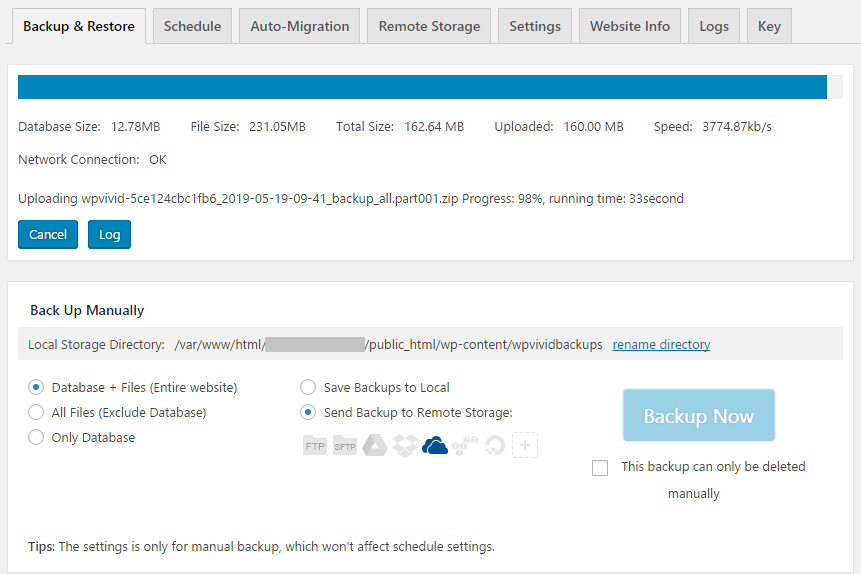
Once done, a notification shows in top bar and tells you the backup task have been completed. Meanwhile, you will see the backup shows in backups list.
You can download the backup from the cloud storage to your computer by clicking Download text.
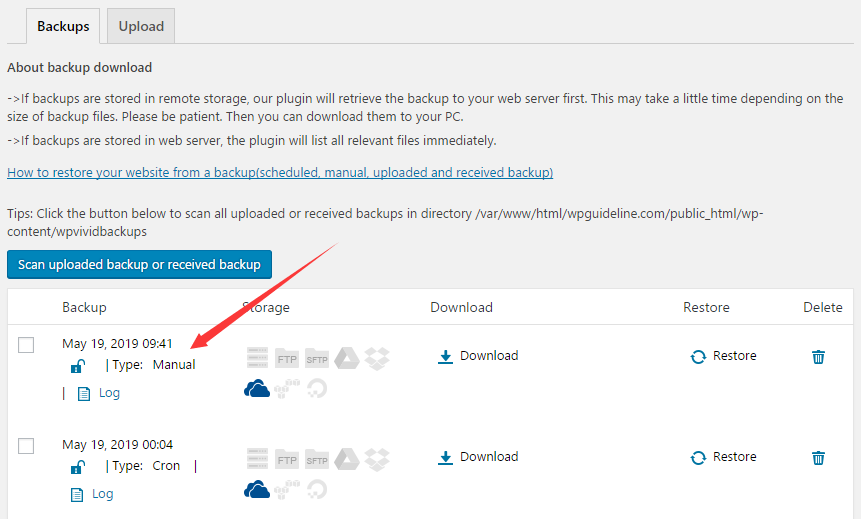
That’s it, you have created a manual backup with WPvivid back plugin. Easy right?
How to schedule automated backups with WPvivid backup plugin
Go to Schedule tab page and enable backup schedule. Mark the options for backup frequency, content, and storage as your needs. Then click Save Changes button.
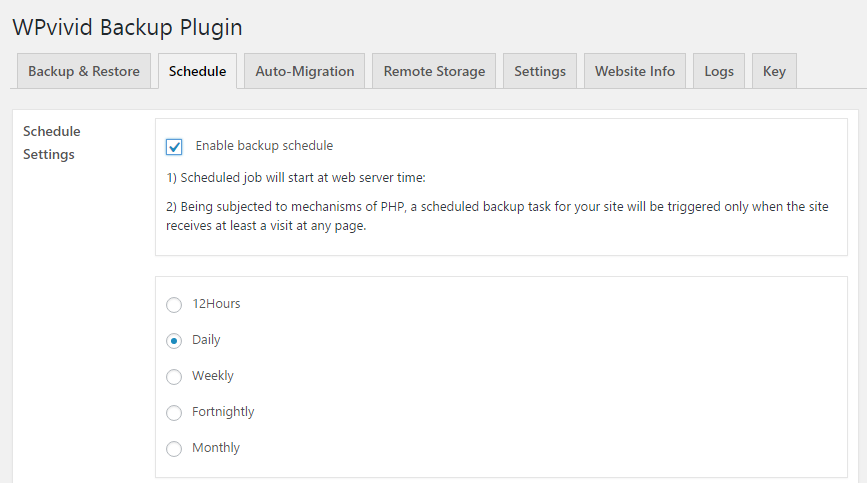
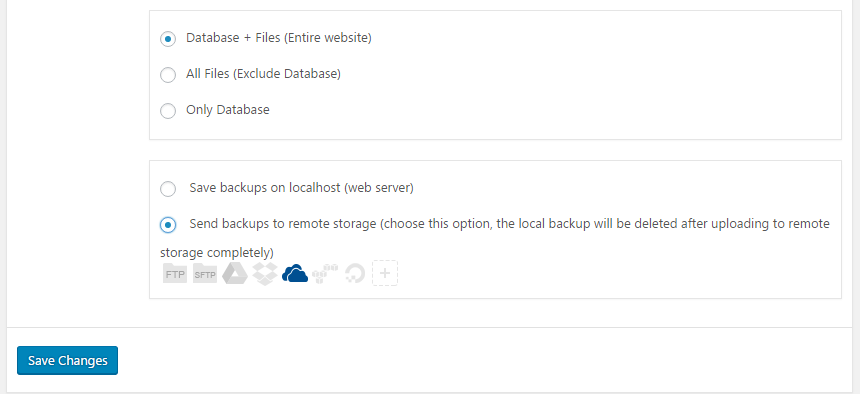
If you configure the settings correctly, it will backup your WordPress site on schedule.
I hope this tutorial helped you learn how to backup your WordPress site. You may want to see our step by step guide on how to restore a WordPress site from backups.
0 Comments