Do you want to learn how to add an Instagram feed to WordPress site? If you do, then you are not alone. Instagram is a popular social network that enables people to share their ideas, creativity, and personal life via photos.
Also, as many people decide to blog or have an internet address linked to them, it is common for people to look for ways to add the Instagram feed to their site so that their followers can easily follow the updates from the site. It will result in more Instagram followers and also help your site readers to keep up with you without the need to follow Instagram.
Need for Adding Instagram Feed To WordPress Site
If done right, you will be able to improve both Instagram and site audience. Also, if you are running a business, then it will help boost your brand’s image, improving brand exposure.
Images have a huge impact on viewers and the Instagram feed can surely help you keep up with the demand using searchable hashtags. In the end, you will have better customer engagement and higher loyalty.
How to Add Instagram Feed to WordPress Site
Now that we have understood the need to add an Instagram feed, let’s learn how you can actually do so!
To achieve the results, we are going to a popular plugin known as Smash Ballon Social Photo Feed.
With over 1+ million active installations, it is quite popular among the community. It also supports the latest WordPress version and comes with tons of features.
To get a better understanding of what it has to offer, let’s quickly look at its features below:
- It is easy-to-use and simple to set up.
- Multiple Instagram accounts are supported both in separate feeds or in the same feed.
- Supports responsive design.
- Allows users to completely customize the feed along with height, width, columns, number of photos, background color, and so on!
- Supports full-size photos along with medium and thumbnail options.
- Includes follow on the Instagram button.
- Supports JavaScript and CSS customization.
- Shortcode options available.
- Infinitely load more option available.
- Support random or chronologically showcase of photos.
By using the plugin, you will get multiple benefits including increased social engagement, improved site’s looks, save time, and customize content the way you want.
It also comes with a Pro version which gives you more control over the add-on’s functionality and helps you get the most out of the Instagram platform.
Installing the Plugin
To get started, you need to go to the site’s dashboard and then go Plugins > Add New.
From there, search for “Small Balloon Social Photo Feed”.
You now need to download and install the plugin.
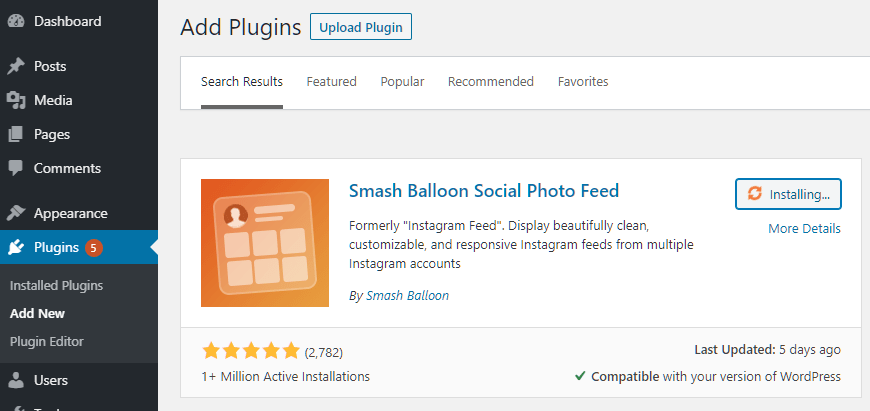
Once done, activate it to move forward.
Setting Up the Plugin
After you have activated it, you will be redirected to the Plugins page.
Now, you need to click on the “Instagram Feed” on the side menu.
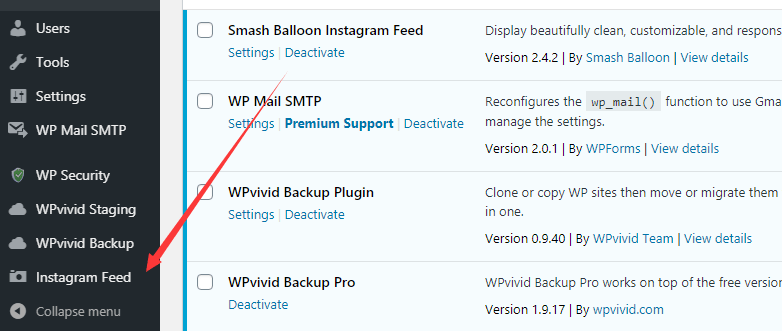
From there, click on “Settings.” This will land you to the configuration page of the plugin.
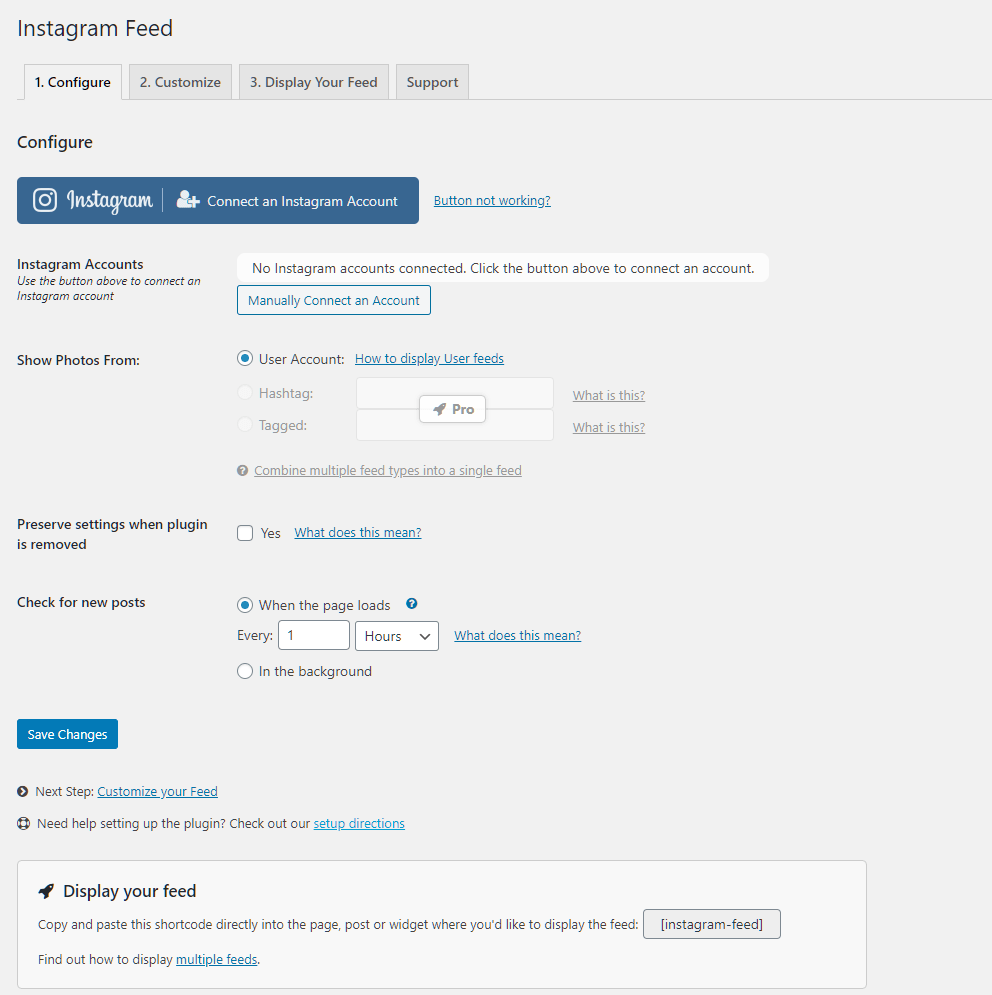
Here, you can see plethora of options.
The first step you need to do is connect your Instagram Account(s) to the plugin. Simply click on “Connect an Instagram Account” to get started.
Once done, it will ask if you want to connect a personal or business Instagram profile. Select the one that fits your requirement and then click “Connect”.
You can also select, “I am not sure” and the plugin will take care of it.
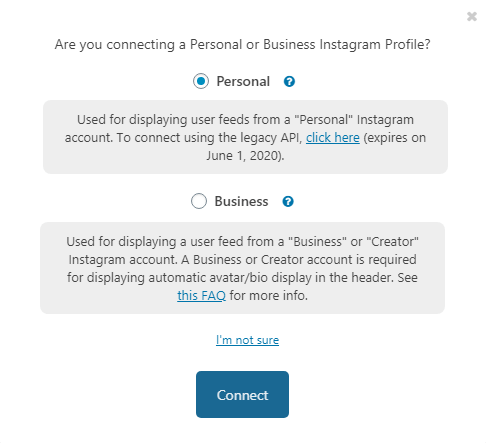
For demonstration purposes, let’s use it “Personal” option. Once you click on it, it redirectes you to the Authorization window where you need to “Authorize.”
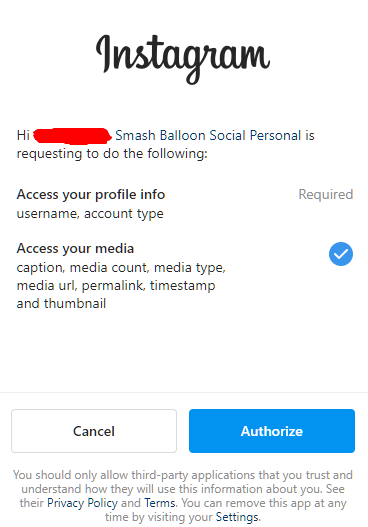
Once you authorize, it redirectes you back to the plugin settings where you will be asked again about connecting the account.

Now, the account will show in the Instagram accounts.
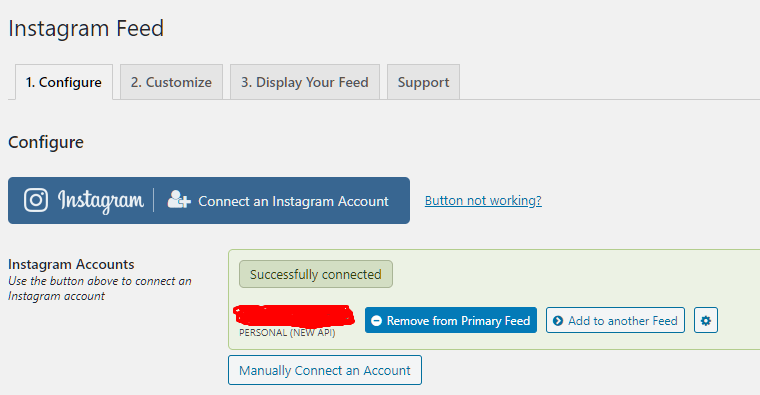
This way you can decide to add another account. Once you add more than one account, then you can select any one of them as primary feed.
This way you can create multiple feeds and add multiple accounts to a particular feed.
Another important setting that you need to make sure that you set it up is the frequency of checking for new posts. By default, it is set to a 1-hour check. You can change the frequency to minutes or days as well.
Also, the update can be done via two methods including when the page loads or in the background.
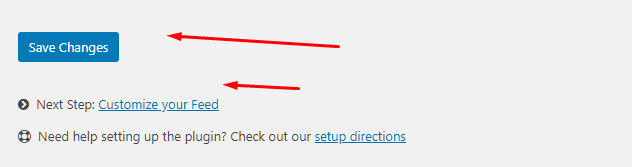
With everything set up, you now need to save changes.
Now, click on “Customize Your Feed”.
Next, we look at the options for customizing.
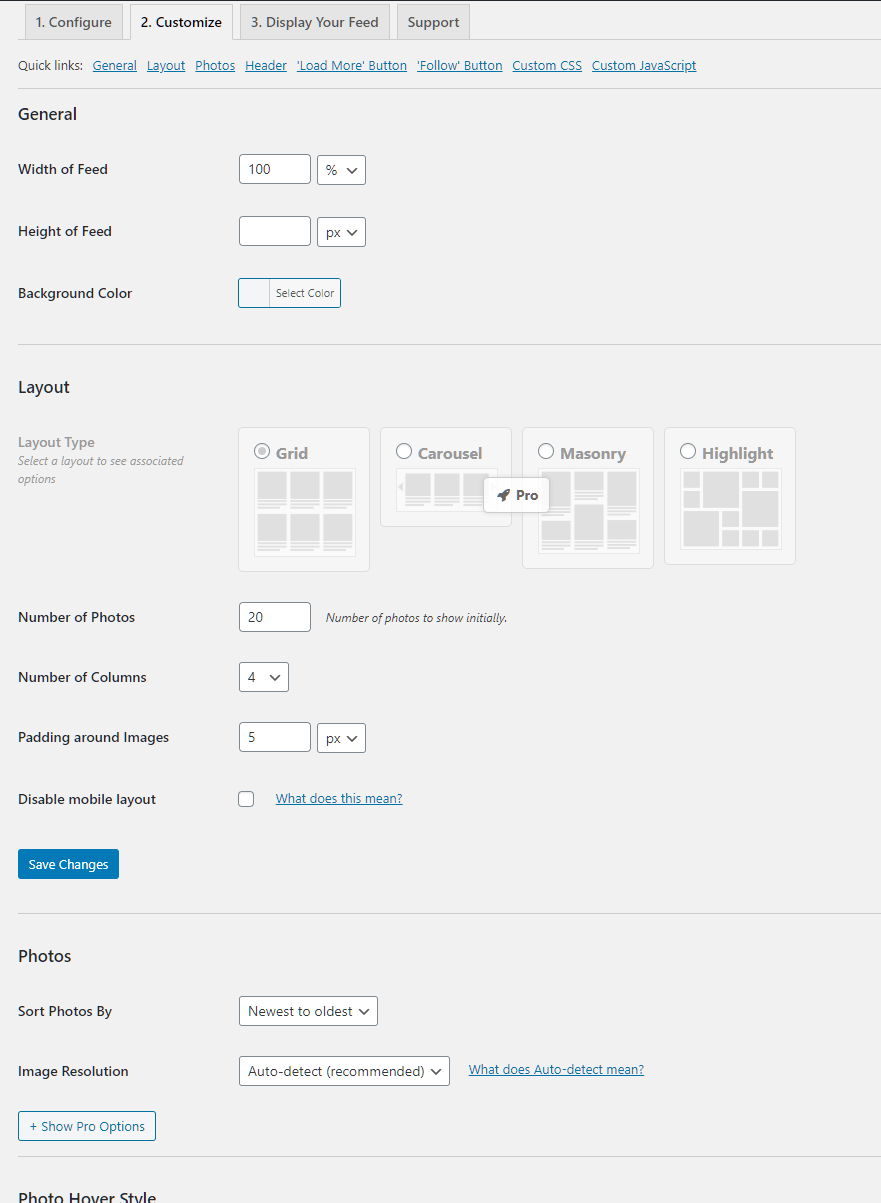
Here, you will be able to customize your feed as you like including height width, layout, and so on. However, not all features are unlocked from upfront. For this, you need to get the Pro version.
The sections that are available in the customize feed section:
- General → Change the general feel and look of the feed
- Layout → Select the layout, number of photos, number of columns, and so on!
- Photos → Customize based on how you sort them and image resolution
- Photo Hover Style → Enable or Disable Photo Hover Style
- Carousel → Enable and customize the carousel
- Header → Customize header size, bio text, a custom avatar
And more!
Displaying Your Feed
If you have completed customizing your feed, then the last step is to showcase the feed.
As the plugin supports shortcode, you can display the feed using the simple [instagram-feed] shortcode. You can include it in posts, widgets, pages, and so on!
They are also customizable as you can add columns, width, height, access token, etc.
Conclusion
This leads us to the end of our how to add Instagram feed to WordPress. So, what do you think about the plugin that we used to do so? Are you going to use it to enable Instagram feed to your site? Comment below and let us know.
You may also want to see our in-depth step by step guide on how to display recent posts in WordPress.
0 Comments