If you are looking to add affiliate links in WordPress, then you have come to the right place.
Affiliate marketing is one of the best ways to monetize your website. That’s why you need to learn how to manage affiliate on your site and that’s where we come in.
In this article, we will give through the full tutorial on how to add affiliate links in WordPress using ThirstyAffiliates. Of couse, you can use other plugins, but if you are a newbie, we suggest to use the plugin.
Let’s get started.
What is ThirstyAffiliates?

ThirstyAffiliates is one of the most popular affiliate plugins out there. It enables you to add affiliate links to your site without the need to write any code for it.
The plugin also lets you do proper affiliate link management. This means that you can store, manage, and organize them from your site’s backend.
It works by replacing affiliate links to specific keywords. To do so, you need to create the branded affiliate URLs.
Let’s look at an example below.
https://www.yoursite.com/?product_id=1211313%aff_id=23e232
As you can see, there is a lot to remember if you want to use it again. That’s where the ThirstyAffiliates comes in. It transforms the URL and makes it look good. It will look similar to the below URL.
https://www.yoursite.com/refer/affiliate
You can also categorize the links according to categories and sub-categories. Furthermore, you can use the cloaked link with category slug.
Once you add the affiliate link to the plugin, you can add it to any post. It also supports custom post type which makes it work with any plugin out there.
So, when you create a post, you can insert the affiliate link and be done with it! The whole process is similar to that of inserting internet URLs. The insertion of the links is further made easy with the search option which you can use directly from the post editor.
Installing and Setting Up Affiliates Plugin: ThirstyAffiliates
Installing ThurstyAffiliates is easy. If you want to use the free version, then you need to download the free version from WordPress plugin repository. However, if you are looking for the paid version, then you need to go to ThirstyAffiliate’s official site and choose a subscription plan for you.
At the time of writing this post, there are three subscription plans to choose from — Standard, Premium, and Professional. Choose the one that fits you.
However, before you make a choice, you need to know that the professional subscription comes with Auto-Linker add-on that automates the linking process. Also, once you buy the subscription, you can then use it on an unlimited number of sites.
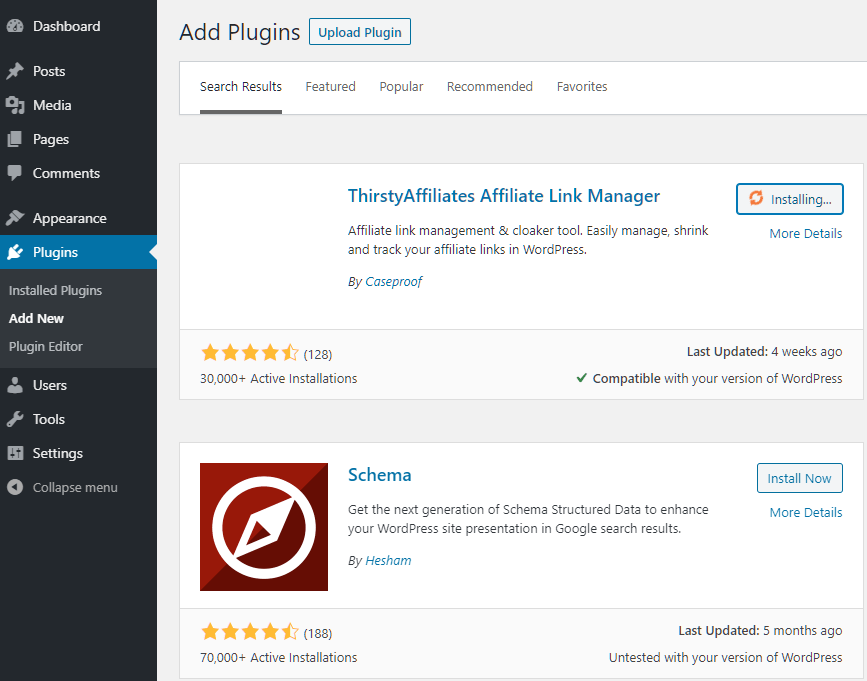
After you make the purchase, you need to install the plugin by going to Plugins > Add New.
After activating, you can then access the plugin settings by going to ThirstyAffiliates > Settings.
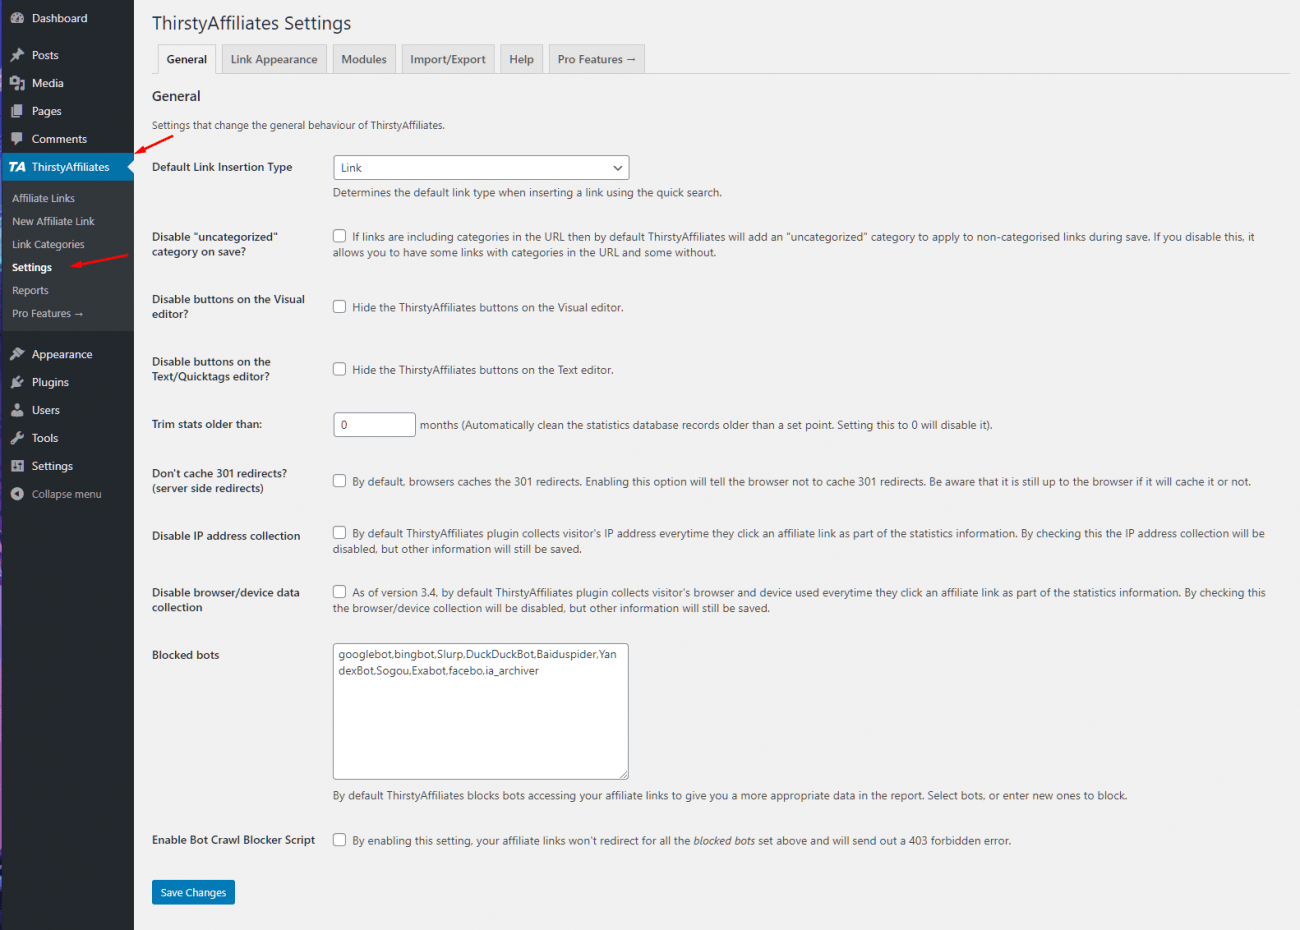
Fixing the Link Prefix
The first thing that you need to set is the Link Prefix. The prefix is very useful when it comes to cloaking the slug URL.
To get to the option, you need to click on the Link Appearance tab within the ThirstyAffiliates Settings.
You can choose between plenty of options here. For example, you can choose between recommends, link, go, review, refer, and so on.
It is very common for the sites to use ‘refer’ or recommends.
If you choose to refer, it will look like below.
https://www.yoursite.com/refer/category/link-name
You can also choose a custom link prefix.
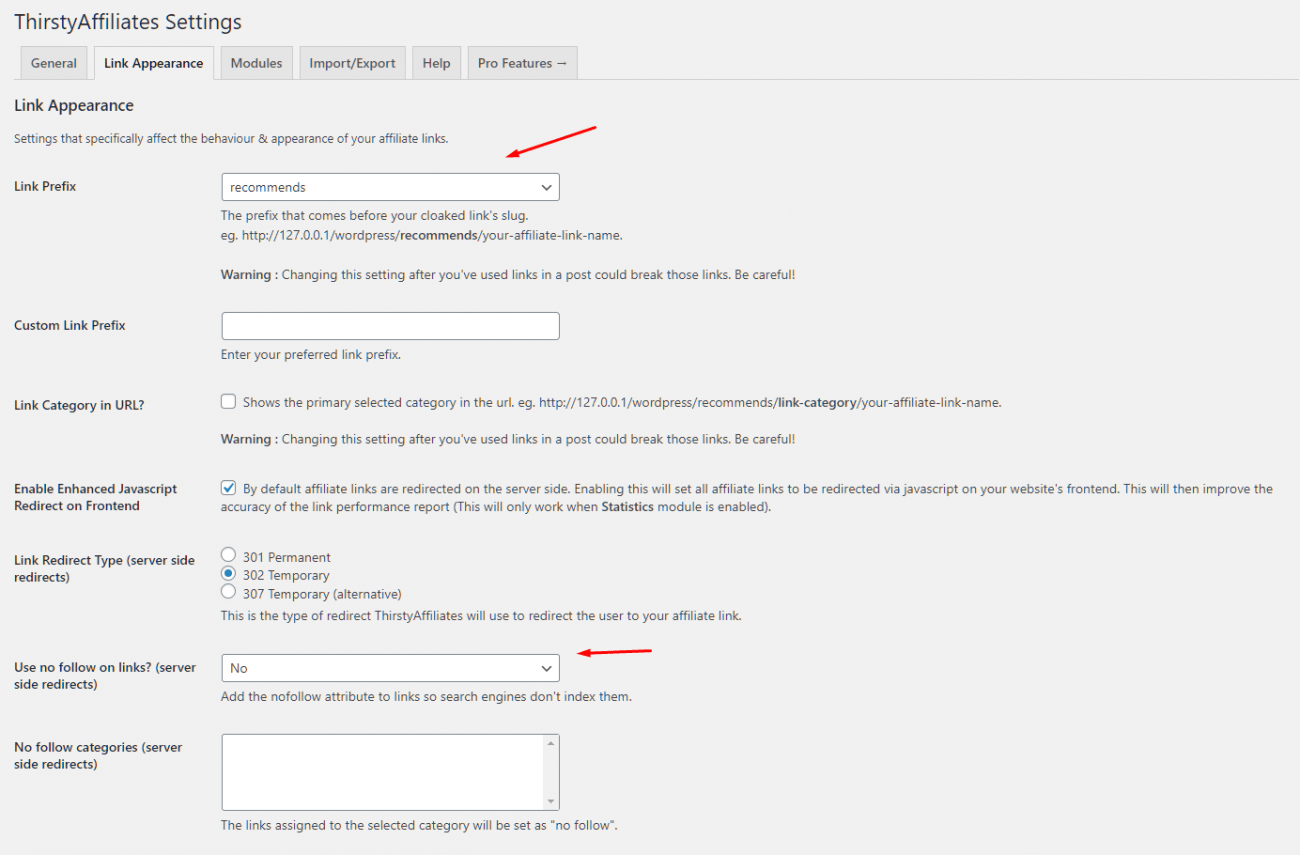
You can also set nofollow to the links. We recommend using it as well help you keep your site’s SEO healthy. Moreover, you can also choose the option to open the links on a new tab.
You may also want to check other options including the option to record users. If your site is a membership-based or users can create accounts, then you might want to enable the feature of tracking record logged in users.
Other settings include additional CSS classes, additional rel attribute tags, new window categories, and so on. Most of these options are not useful for a user, so you might want to skip these.
Once you have made all the changes, click on “save changes” to save your settings.
Adding Links to ThirstyAffiliates
Now, that you have setup ThirstyAffiliates, let’s see how you can use ThirtyAffiliates.
To add a new affiliate link, you need to click on “ThirstyAffiliates” and “New Affiliate Link” .
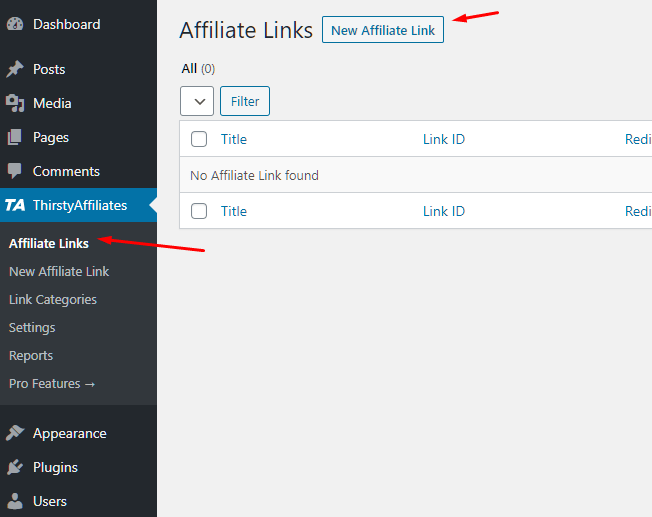
There you will find a new page open up. It will have option to add different details including images, link options, and so on!
The different fields include the following:
- Link Name
- Destination URL
- Attach Images
- Autolink Keywords
- Link Categories
Once done, click on Save Link and the link will be saved.
Adding Affiliate Links to Post
The last step is to add affiliate links to the post. To do so, you can open up a new or old post and then from there choose the section you want to include the link. Now, click on “More Rich Text Controls” and then “Affiliate Link” options.
Once you click on it, a small box will appear where you can add the affiliate link.
If you have a premium subscription, then the auto-linker will add the links automatically based on the frequency and options that you choose for it.
Conclusion
This leads us to the end of our tutorial, where we went through the process of adding affiliate links in WordPress using ThirstryAffiliates.
So, what do you think about the plugin and the process? Comment below and let us know.
You may also want to see our in-depth step by step guide on how to add a search bar to WordPress menu.
0 Comments